By: Team CS2103-F14-2 Since: Sept 2019 Licence: MIT
- 1. Introduction
- 2. Quick Start
- 3. Features
- 3.1. Viewing help :
help - 3.2. Register :
register - 3.3. Login :
login - 3.4. User Interface
- 3.5. Tasks
- 3.6. Reminders
- 3.7. Earnings
- 3.8. Notes
- 3.9. Student List
- 3.10. Learn wrong commands as custom commands
- 3.11. Clearing all entries :
clear - 3.12. Undoing previous command :
undo - 3.13. Redoing the previously undone command :
redo - 3.14. Exiting the program :
exit - 3.15. Saving the data
- 3.16. Logout :
logout - 3.17. Encrypting data files
[coming in v2.0]
- 3.1. Viewing help :
- 4. FAQ
- 5. Command Summary
1. Introduction
Are you a teaching assistant that is struggling to keep up with the additional responsibility of teaching a class?
Do you sometimes wish that there was an easier way to organize and filter through your students?
As a broke uni student, do you desperately need a tool to keep track of your earnings?
Look no further! TutorAid is the one stop solution to answer all of your TA woes!
TutorAid is for teaching assistants or tutors who prefer to use a desktop app for managing their classes and related tasks. TutorAid helps in organizing all the information you need in one place so that you can optimize your workflow. More importantly, TutorAid is optimized for those who prefer to work with a Command Line Interface (CLI) while still having the benefits of a Graphical User Interface (GUI).
This User Guide was written to help you understand and familiarize yourself with all the commands TutorAid has to help you get started.
If you can type fast, TutorAid can get your tasks done faster than traditional GUI apps. Interested? Jump to the Section 2, “Quick Start” to get started. Enjoy!
2. Quick Start
-
Ensure you have Java
11or above installed in your Computer. -
Download the latest
tutoraid.jarhere. -
Copy the file to the folder you want to use as the home folder for your TutorAid.
-
Double-click the file to start the app. The GUI should appear in a few seconds.

-
Login with your account or if you do not have one, register within Tutoraid.
-
After logging in, you will be directed to the Student Page.
-
The Reminders Window should pop up as well.
-
Type a command in the command box and press Enter to execute it.
e.g. typinghelpand pressing Enter will open the help window. -
Some example commands you can try:
-
help: Links you to the User Guide so you can view how to use all the available commands. -
add_taskc/CS2103T Lecture mark/Y tt/20/09/2019 16:00, 20/09/2019 18:00: adds a classId named CS2103T that is on 20th September 2019 4pm. -
claim_earnings2 claim/approved: marks that the claim for this earnings has been approved. -
exit: exits the app
-
-
Refer to Section 3, “Features” for details of each command.
3. Features
Command Format
-
Words in
UPPER_CASEare the parameters to be supplied by the user e.g. inadd n/NAME,NAMEis a parameter which can be used asadd n/John Doe. -
Items in square brackets are optional e.g
n/NAME [t/TAG]can be used asn/John Doe t/friendor asn/John Doe. -
Items with
… after them can be used multiple times e.g.tt/TASK_TIME…can be used astt/…,tt/… tt/…etc. -
Parameters can be in any order e.g. if the command specifies
n/NAME p/PHONE_NUMBER,p/PHONE_NUMBER n/NAMEis also acceptable.
3.1. Viewing help : help
Format: help
3.2. Register : register
Register an account with the application to start using it.
Format: register user/USERNAME pass/PASSWORD
Examples:
-
register user/Steve pass/Pa55w0rd!
3.3. Login : login
Login a registered account with the correct username and password.
Format: login user/USERNAME pass/PASSWORD
Examples:
-
login user/Steve pass/Pa55w0rd!
3.4. User Interface

3.4.2. Change tab : tab
Change tab to any of the available ones.
Format: change_tab tab/DESTINATION
Examples (All available destinations listed):
-
change_tab tab/earnings -
change_tab tab/calendar -
change_tab tab/student_profile -
change_tab tab/reminders -
change_tab tab/notepad -
change_tab tab/task

The user may alternatively choose to change tab by using the Items on the Menu Bar.
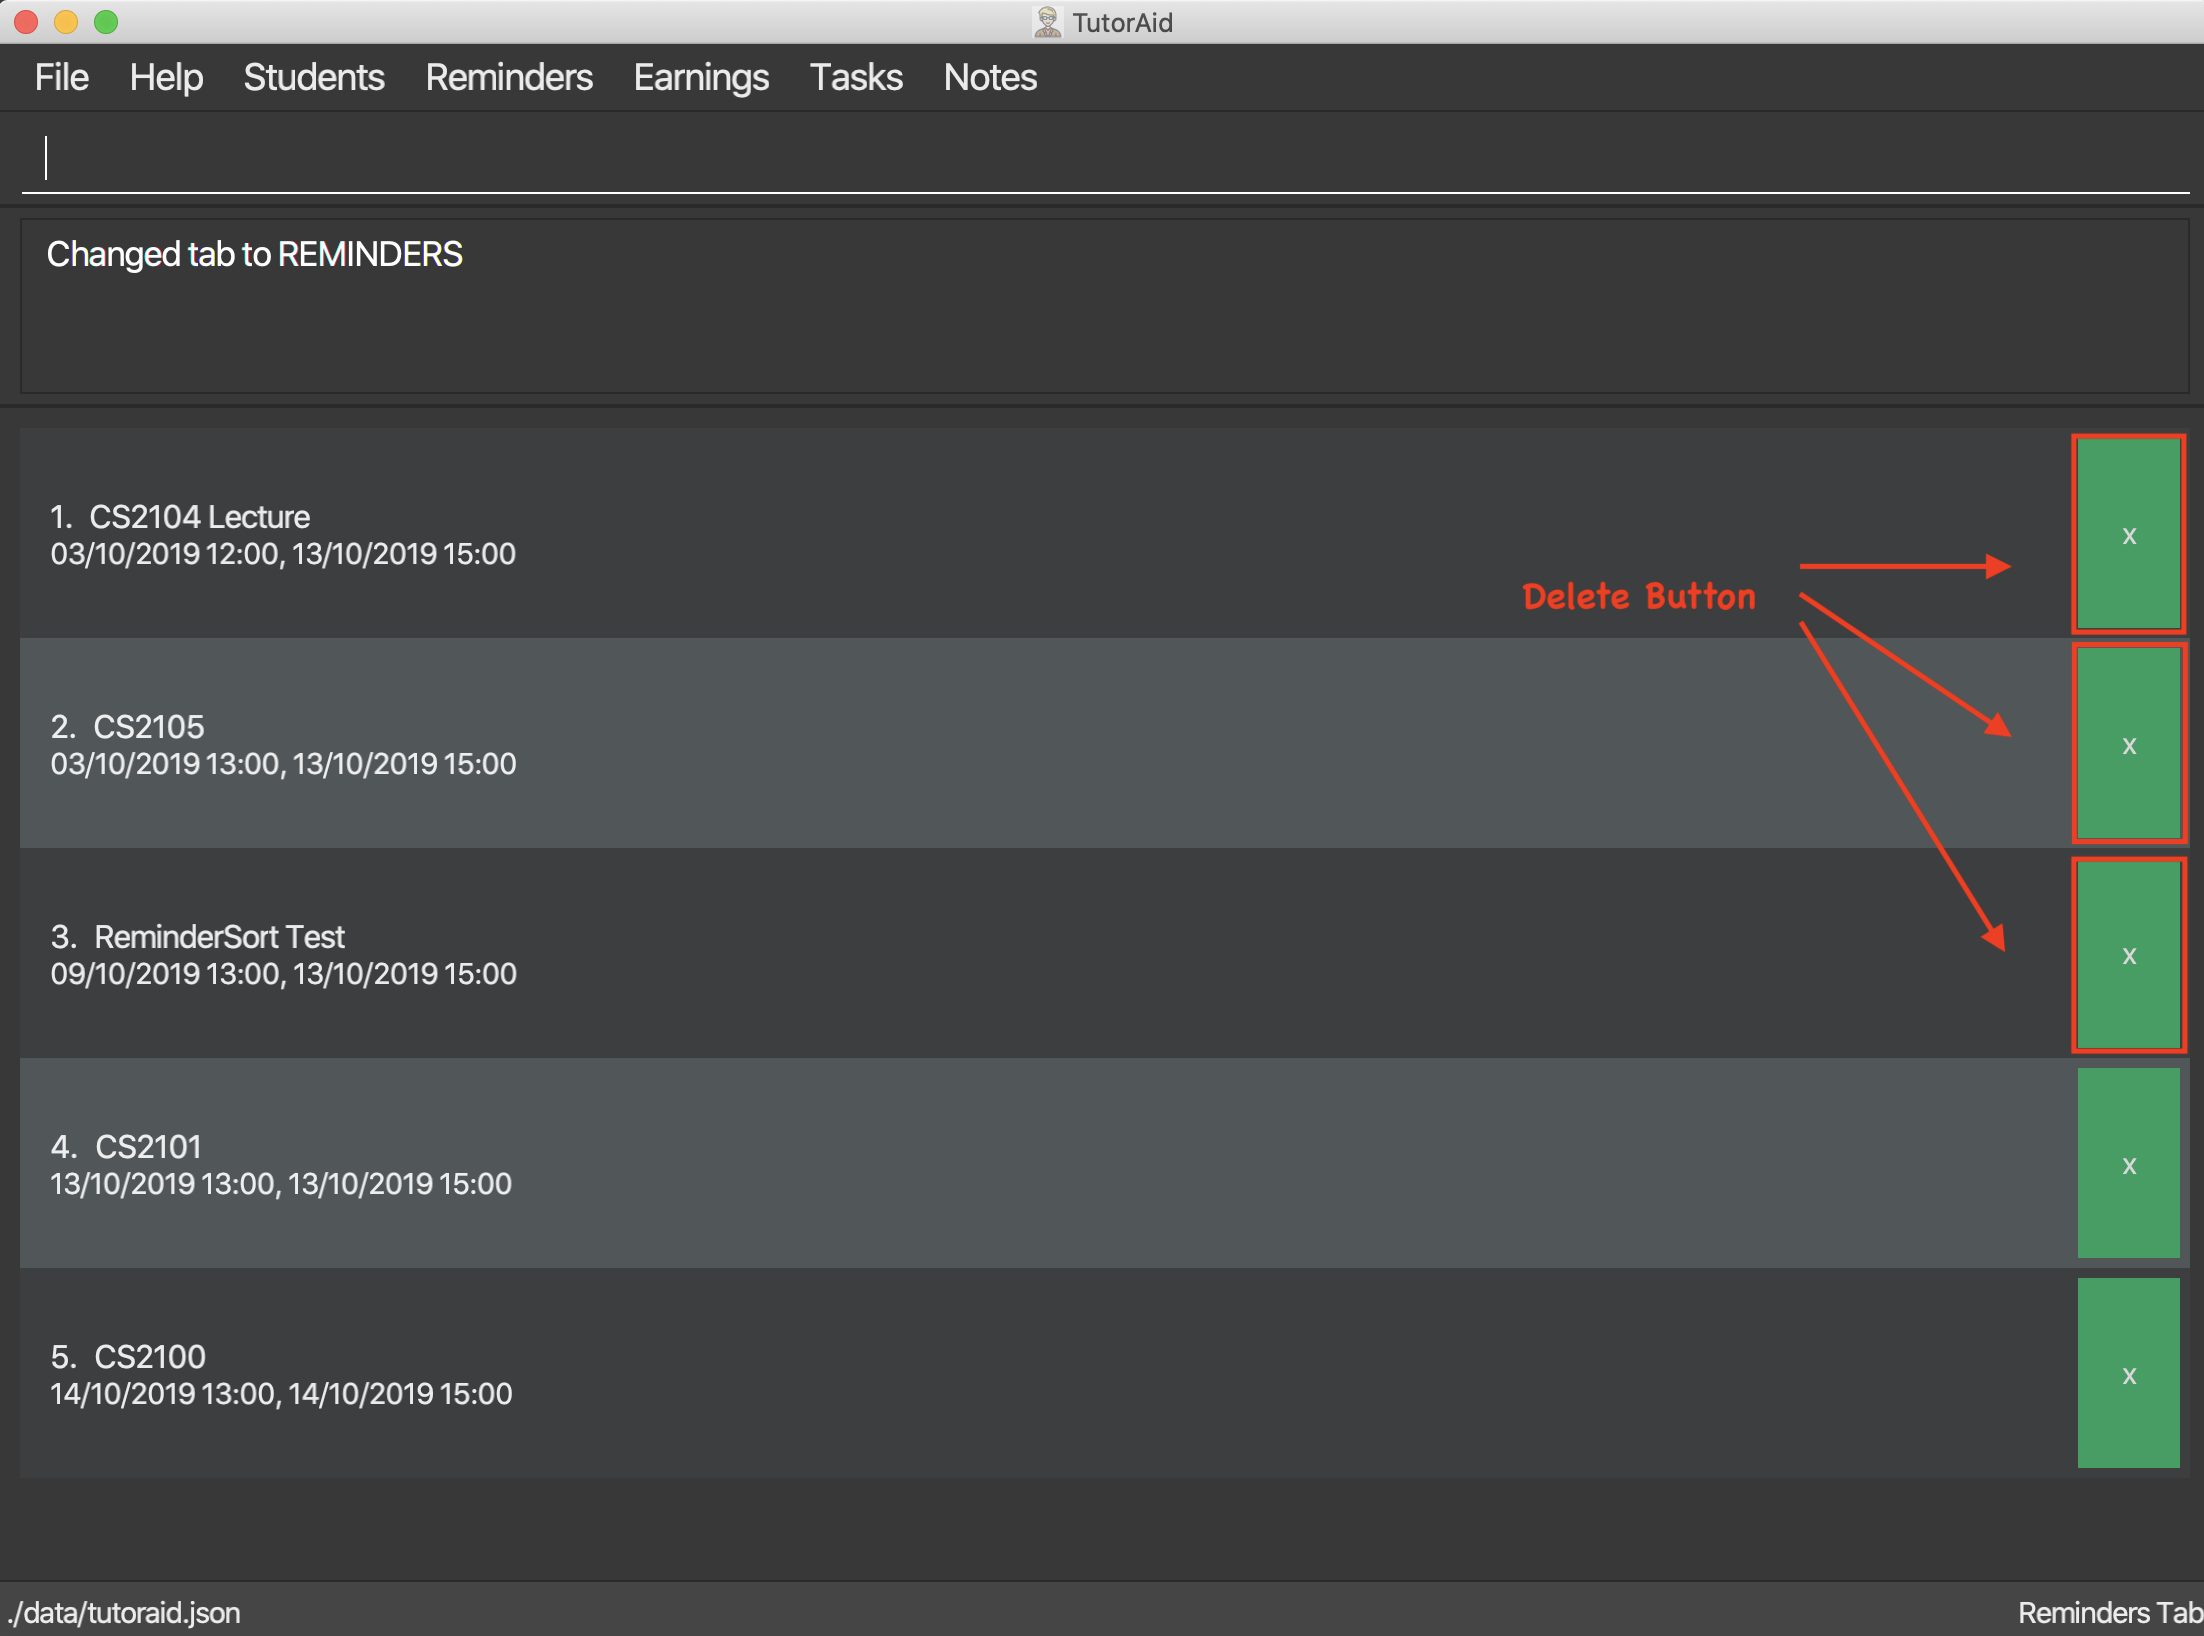
3.4.3. Delete Button
Delete Button for Reminders and Notes for quick and easy removal of Reminder or Note.
3.5. Tasks
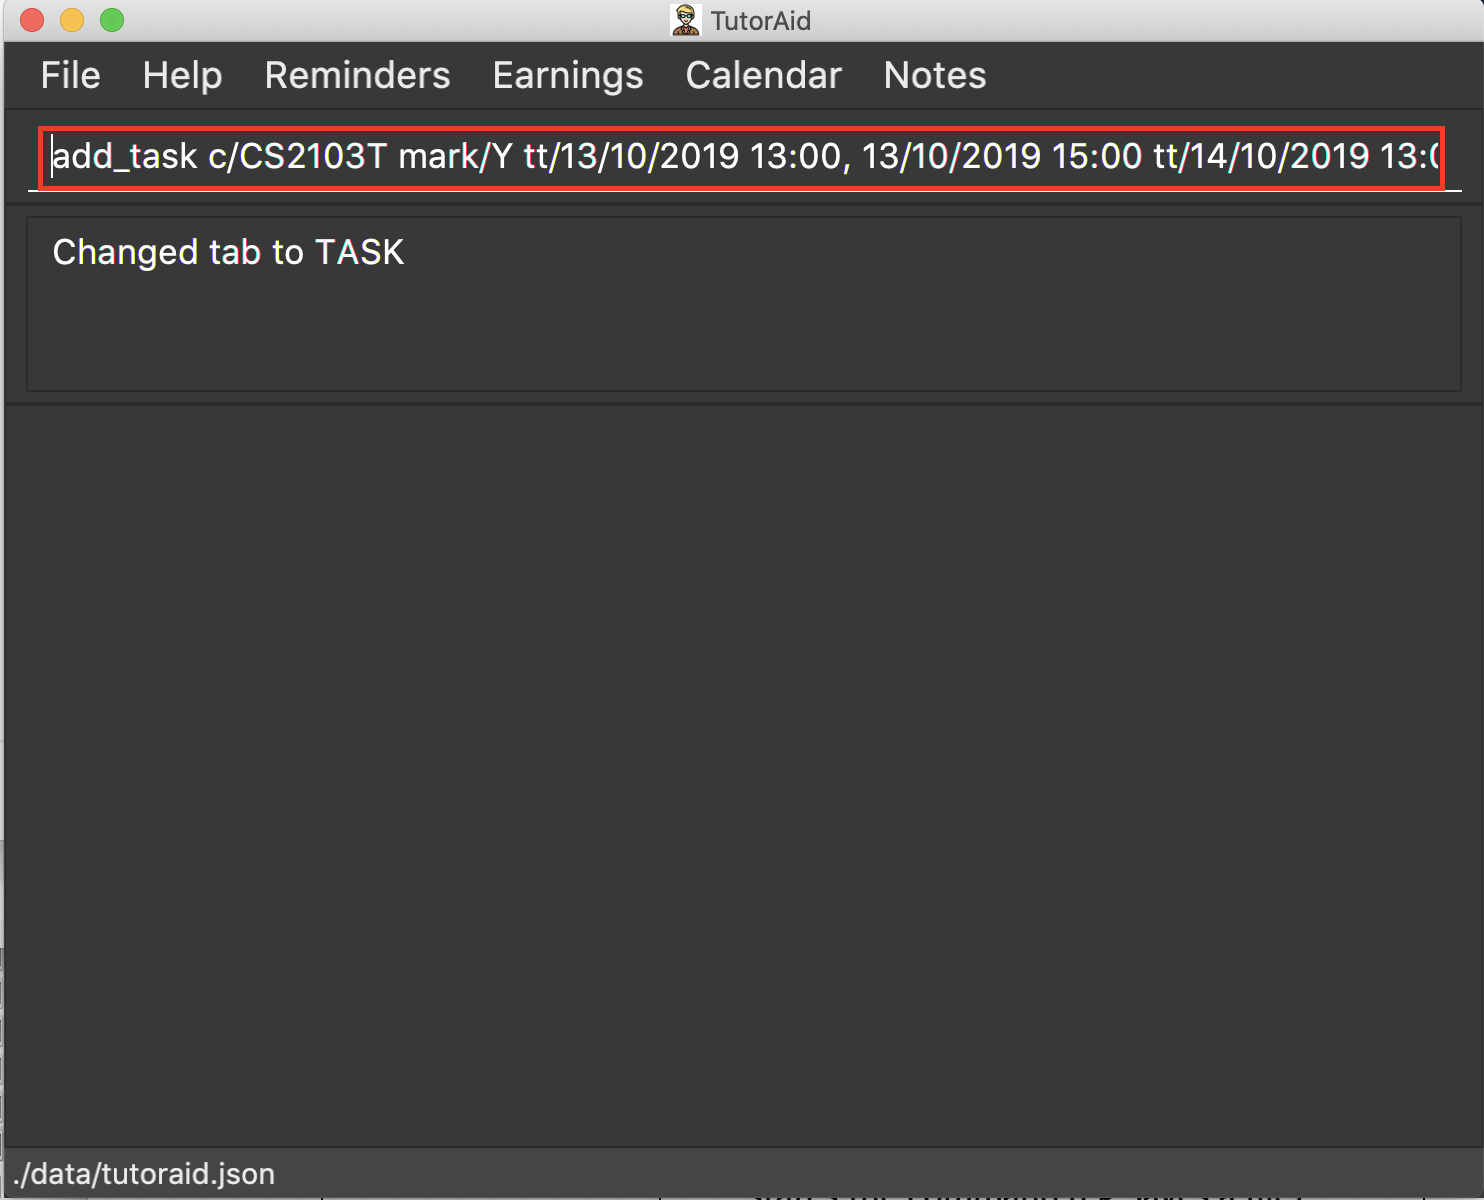
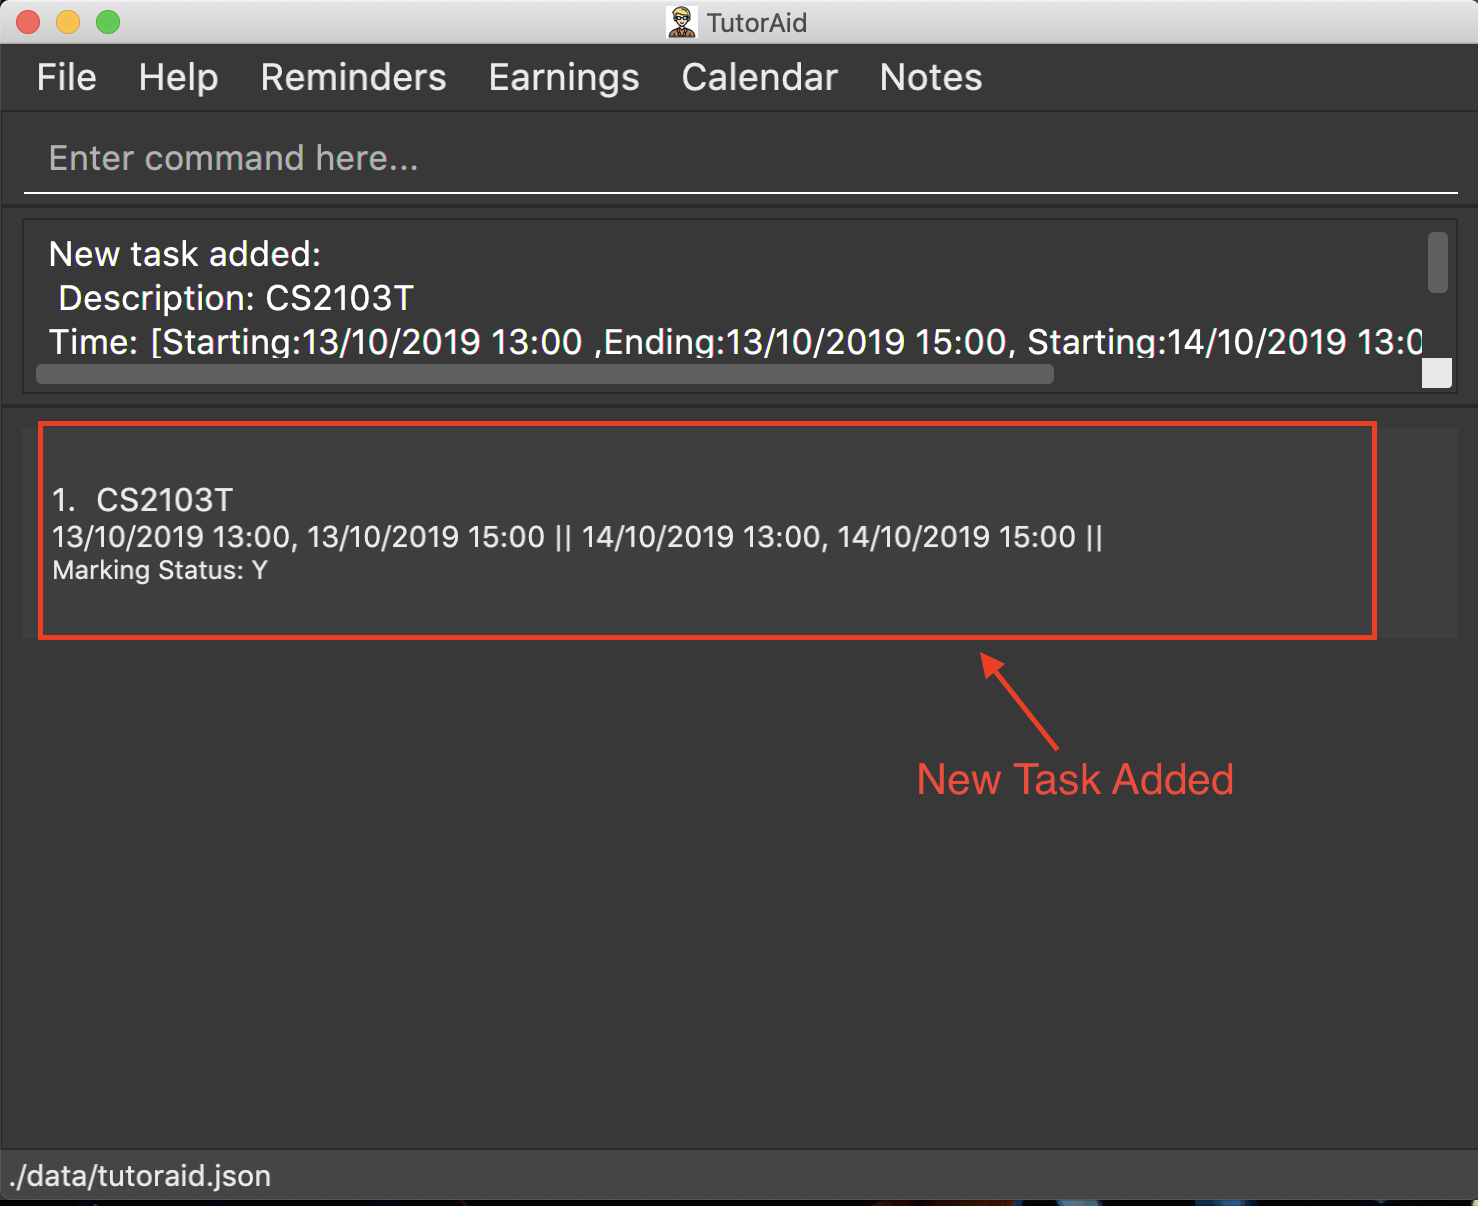
3.5.1. Adding task: add_task
Adds a task to one or more time slots.
Format: add_task c/MODULE mark/STATUS tt/TASK_TIME…
|
A task can have more than one time slots. STATUS should only be Y or N. TASK_TIME should be in the format "dd/MM/YYYY HH:mm, dd/MM/YYYY HH:mm".If there are multiple task times, they will be automatically sorted based on their starting time. Mark indicates whether a Reminder will be created for this task. The Reminder created will have the Task’s MODULE as its DESCRIPTION and the Task’s TASK_TIME as its DATE.
|
Examples:
-
add_task c/CS2103T mark/Y tt/13/09/2019 13:00, 20/09/2019 16:00 tt/21/09/2019 13:00, 21/09/2019 15:00 -
add_task c/MA1521 Tutorial mark/N tt/02/11/2020 14:00, 02/11/2020 15:00
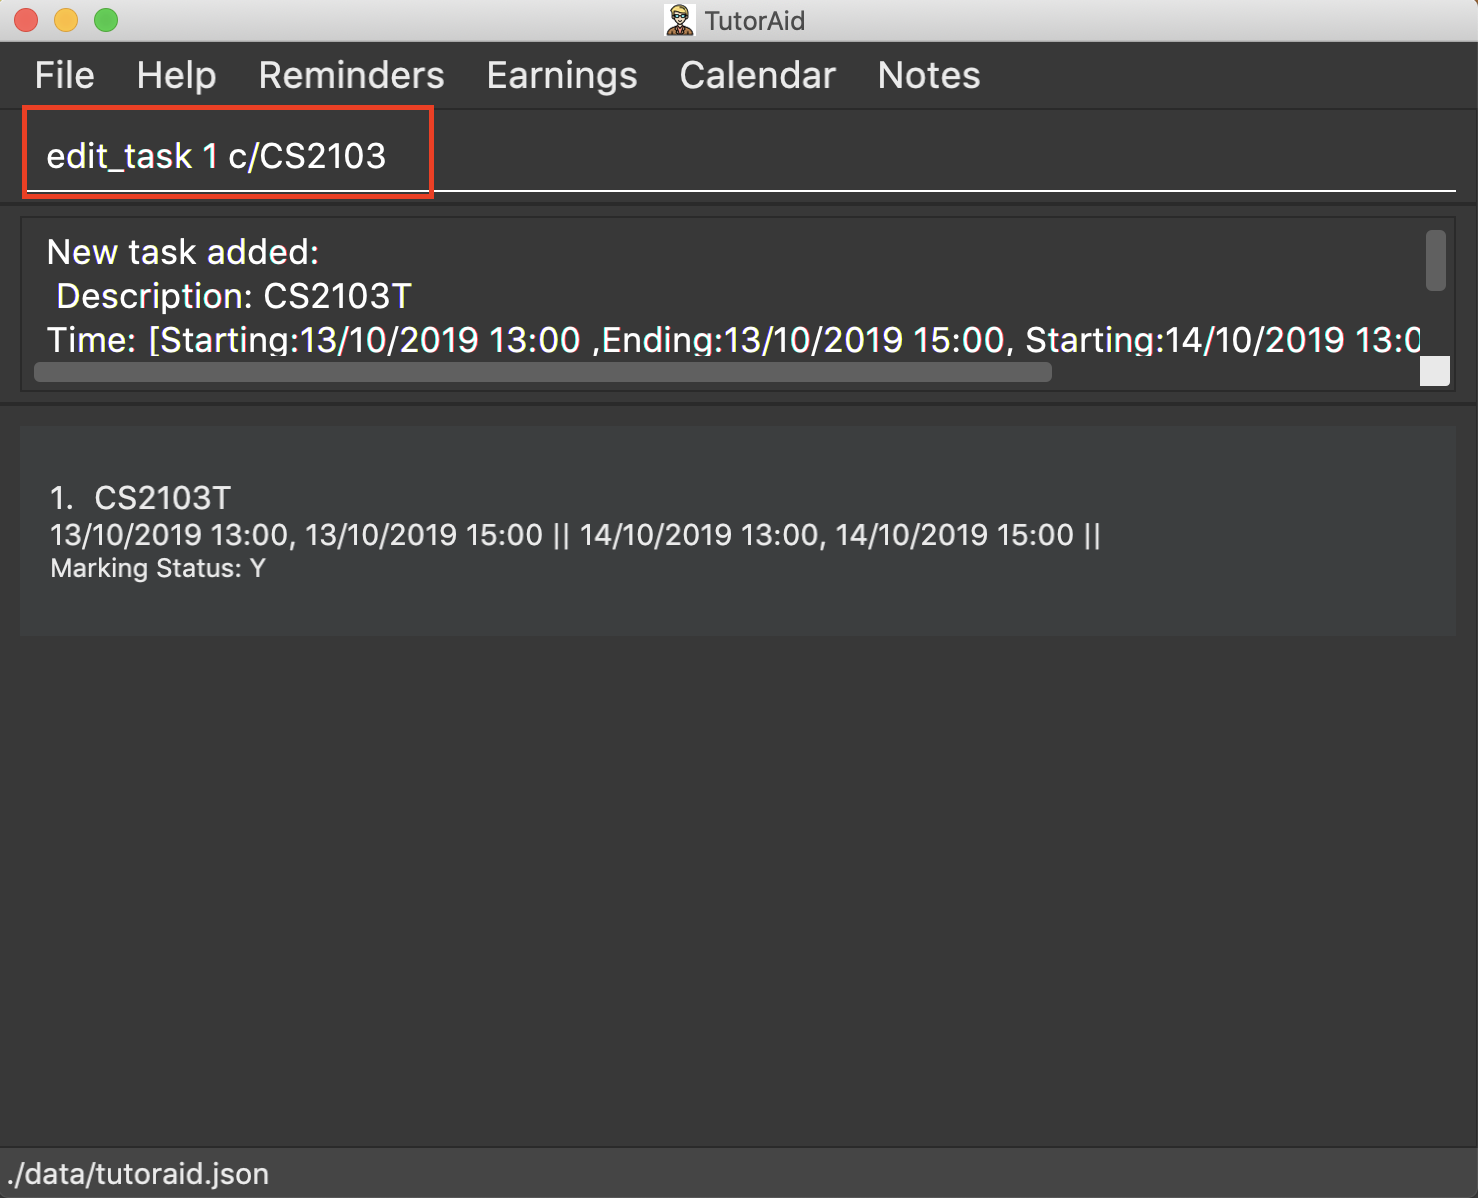
3.5.2. Editing task: edit_task
Update task information.
Format: edit_task INDEX [c/CLASSID] [mark/STATUS] [tt/TASK_TIME]
|
INDEX must be a positive integer. At least one element inside task should be edited. If key in a Task Time, it can be empty. |
Examples:
-
edit_task 1 c/CS2103

-
edit_task 1 tt/19/10/2019 12:00, 19/10/2019 14:00 mark/N
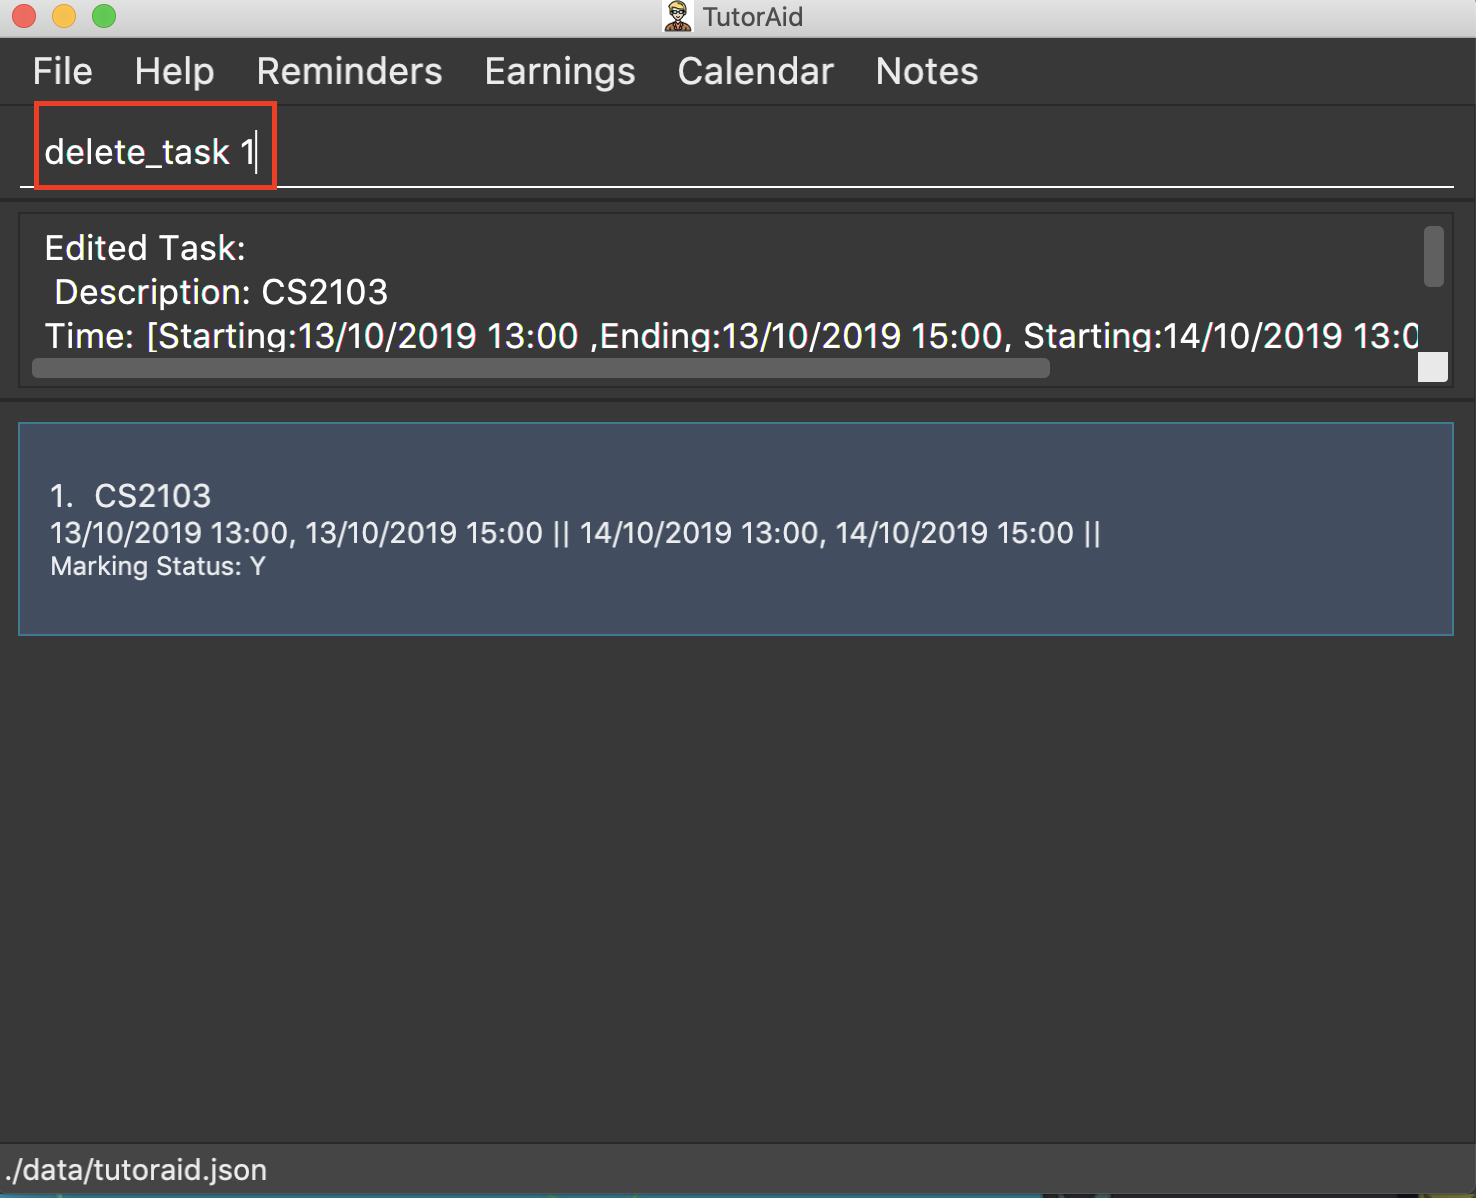
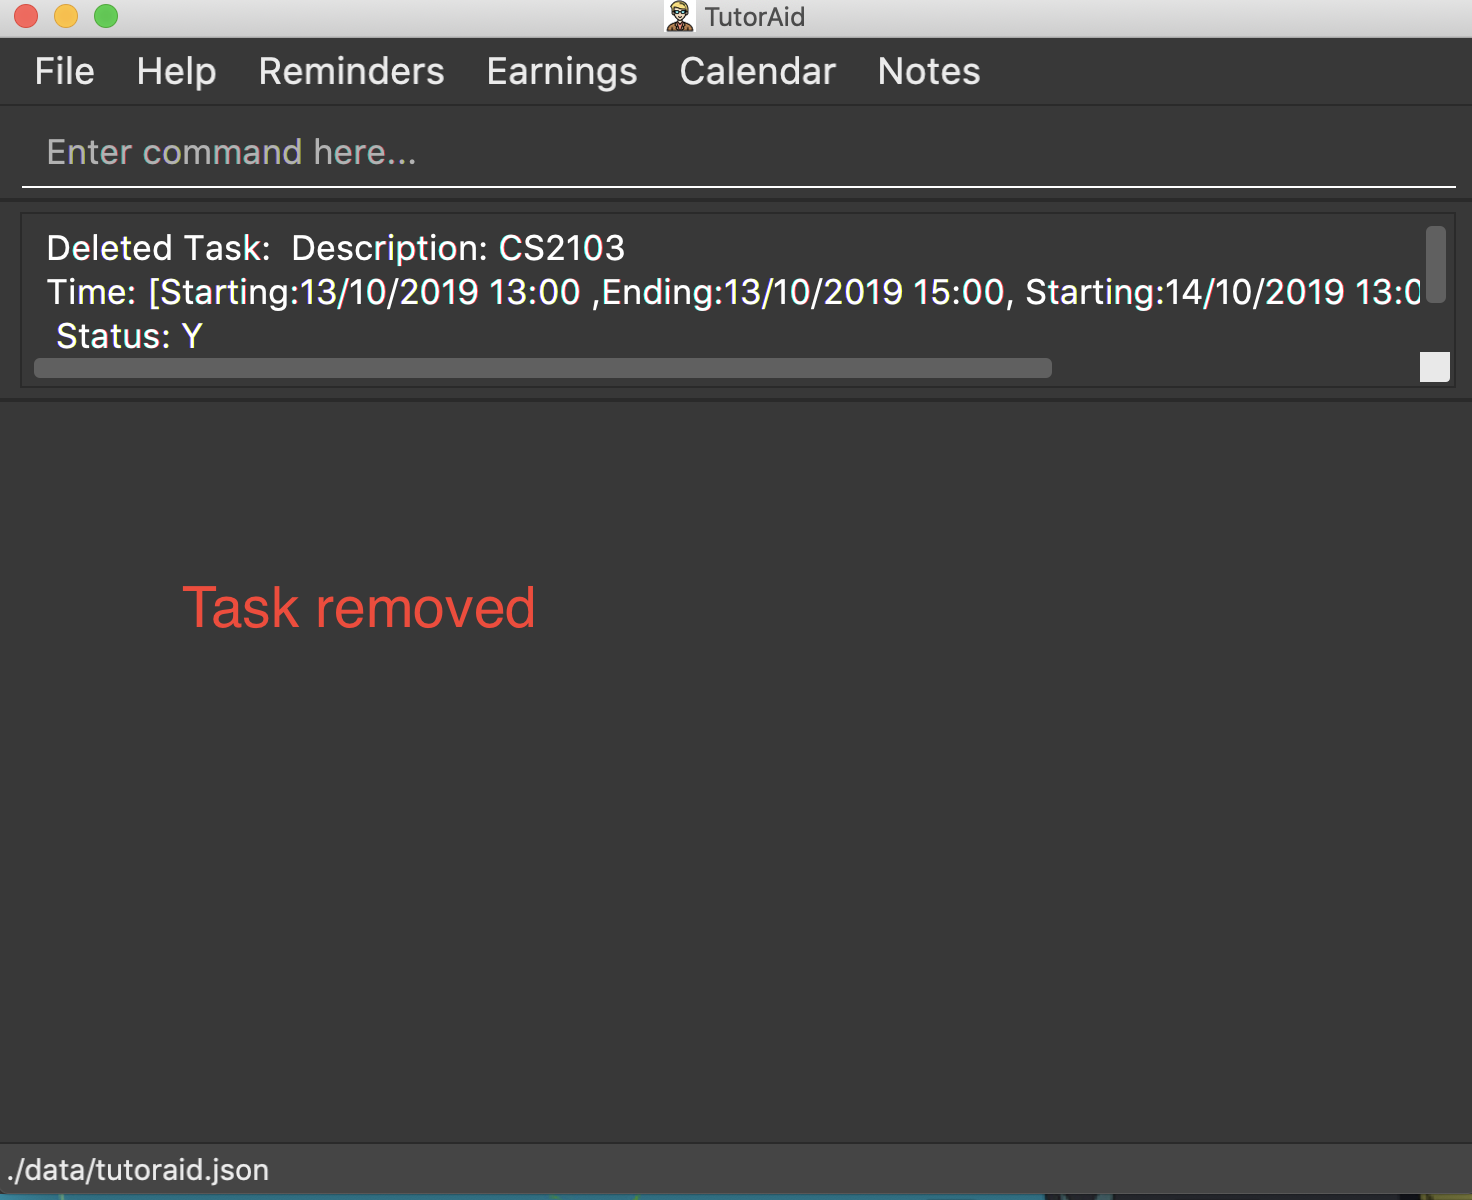
3.5.3. Deleting task: delete_task
Deletes selected task.
Format: delete_task INDEX
| INDEX must be a positive integer. |
Examples:
-
delete_task 1
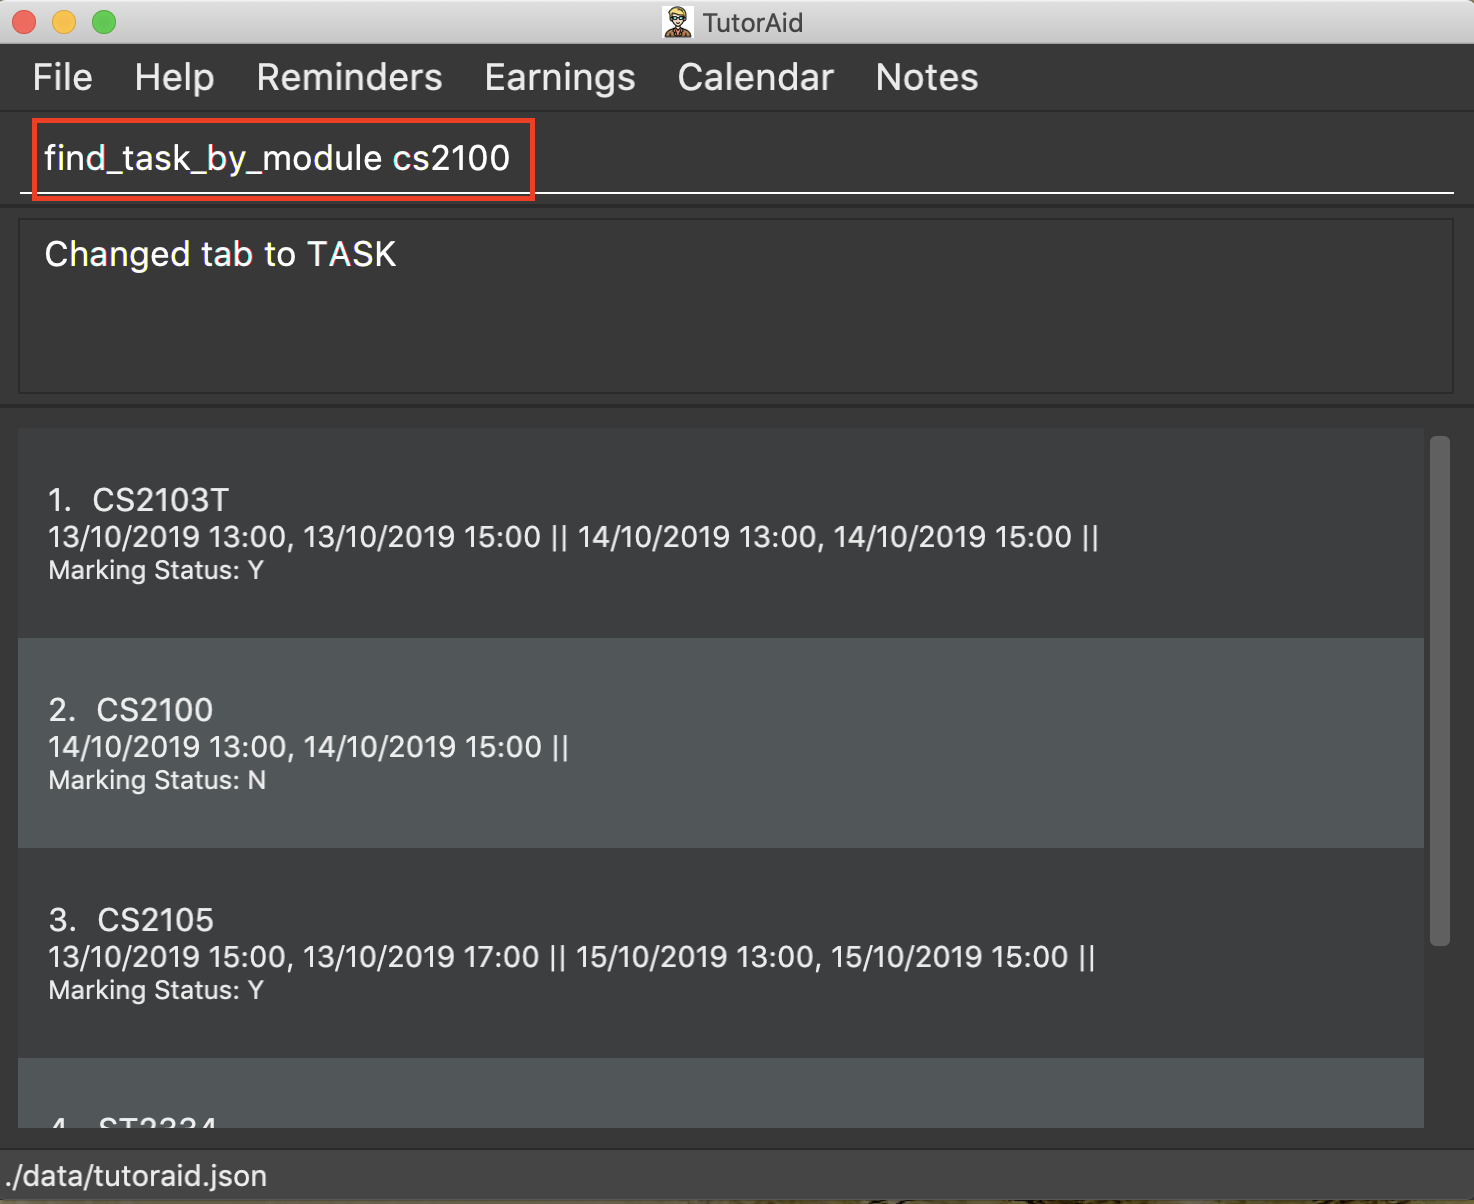
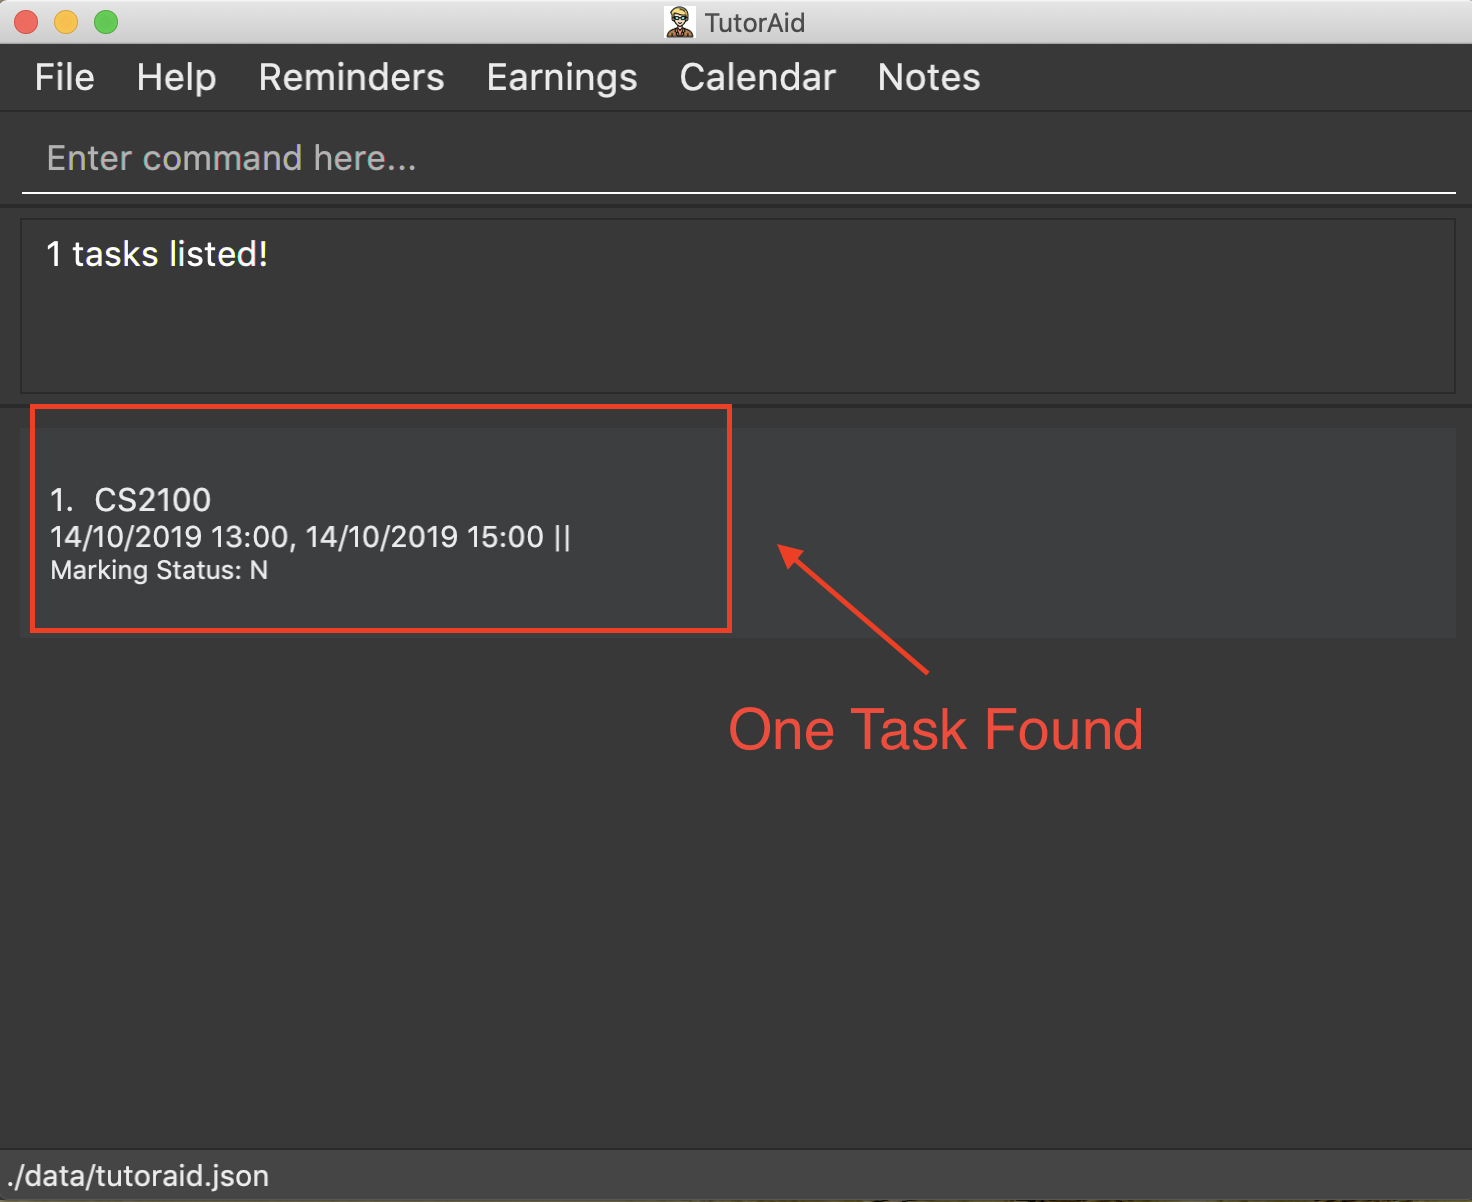
3.5.4. Finding tasks based on Module : find_task_by_module
Find specific tasks by Module and list them.
Format: find_task_by_module MODULE …
Examples:
-
find_task_by_module cs2100
-
find_task_by_module CS2103T cs2100
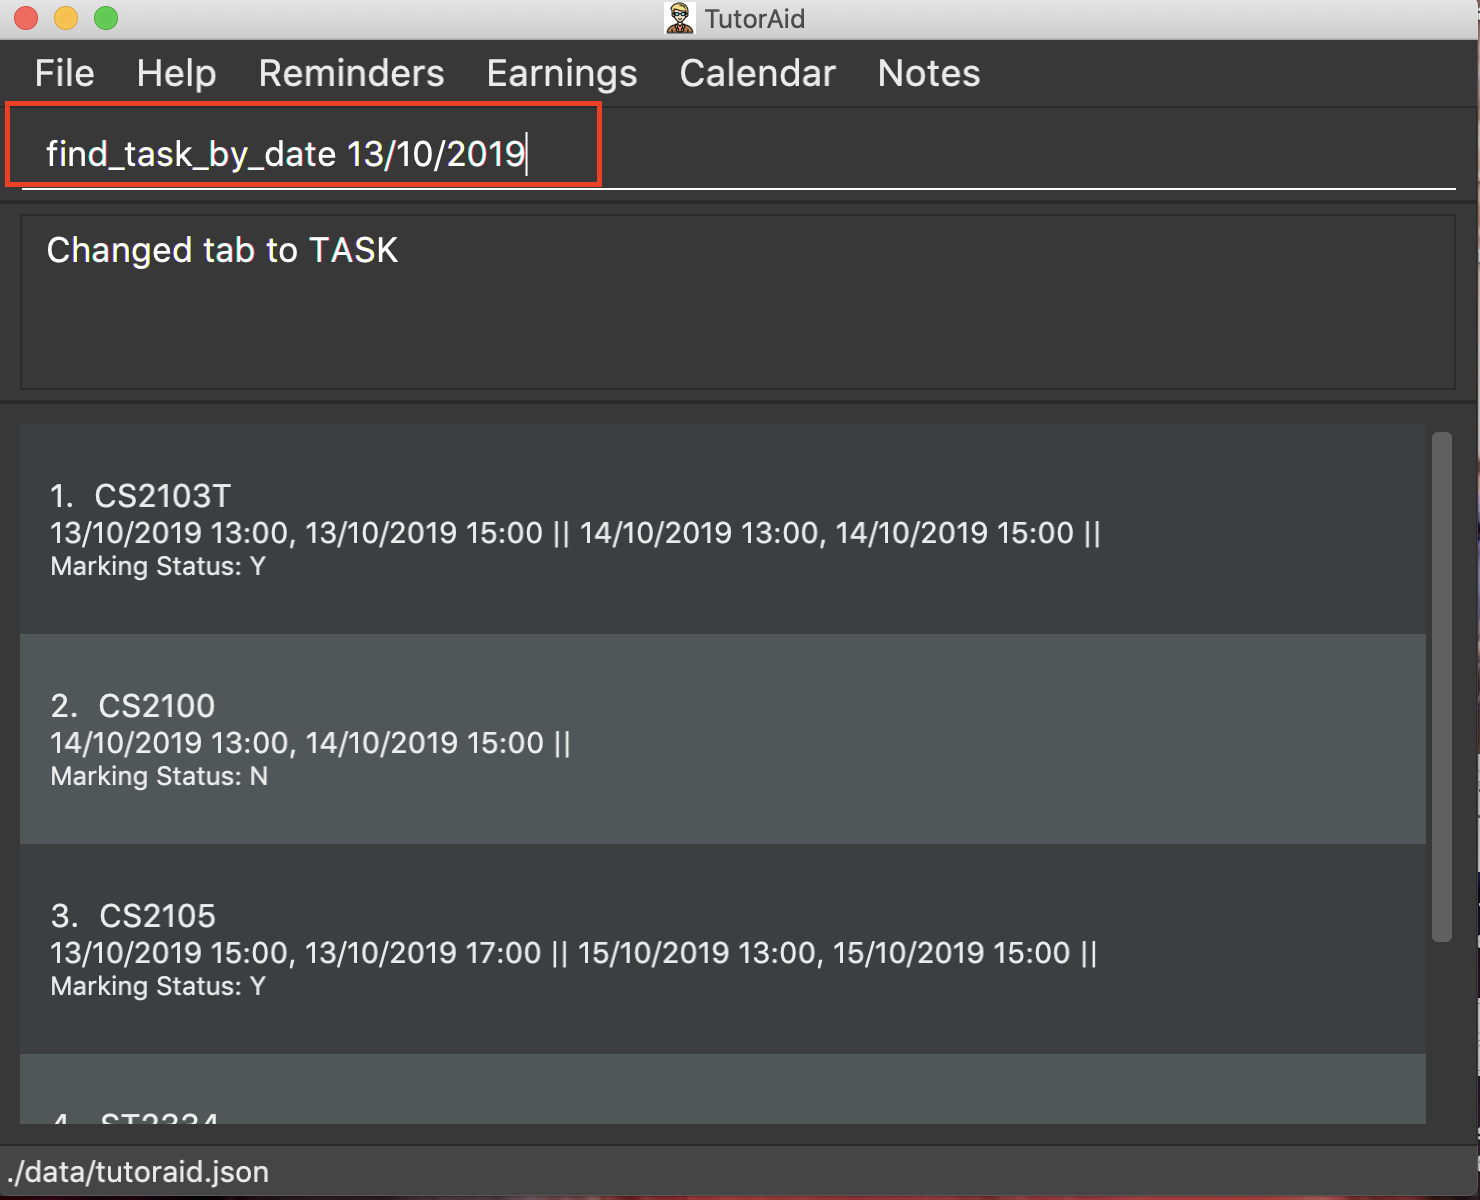
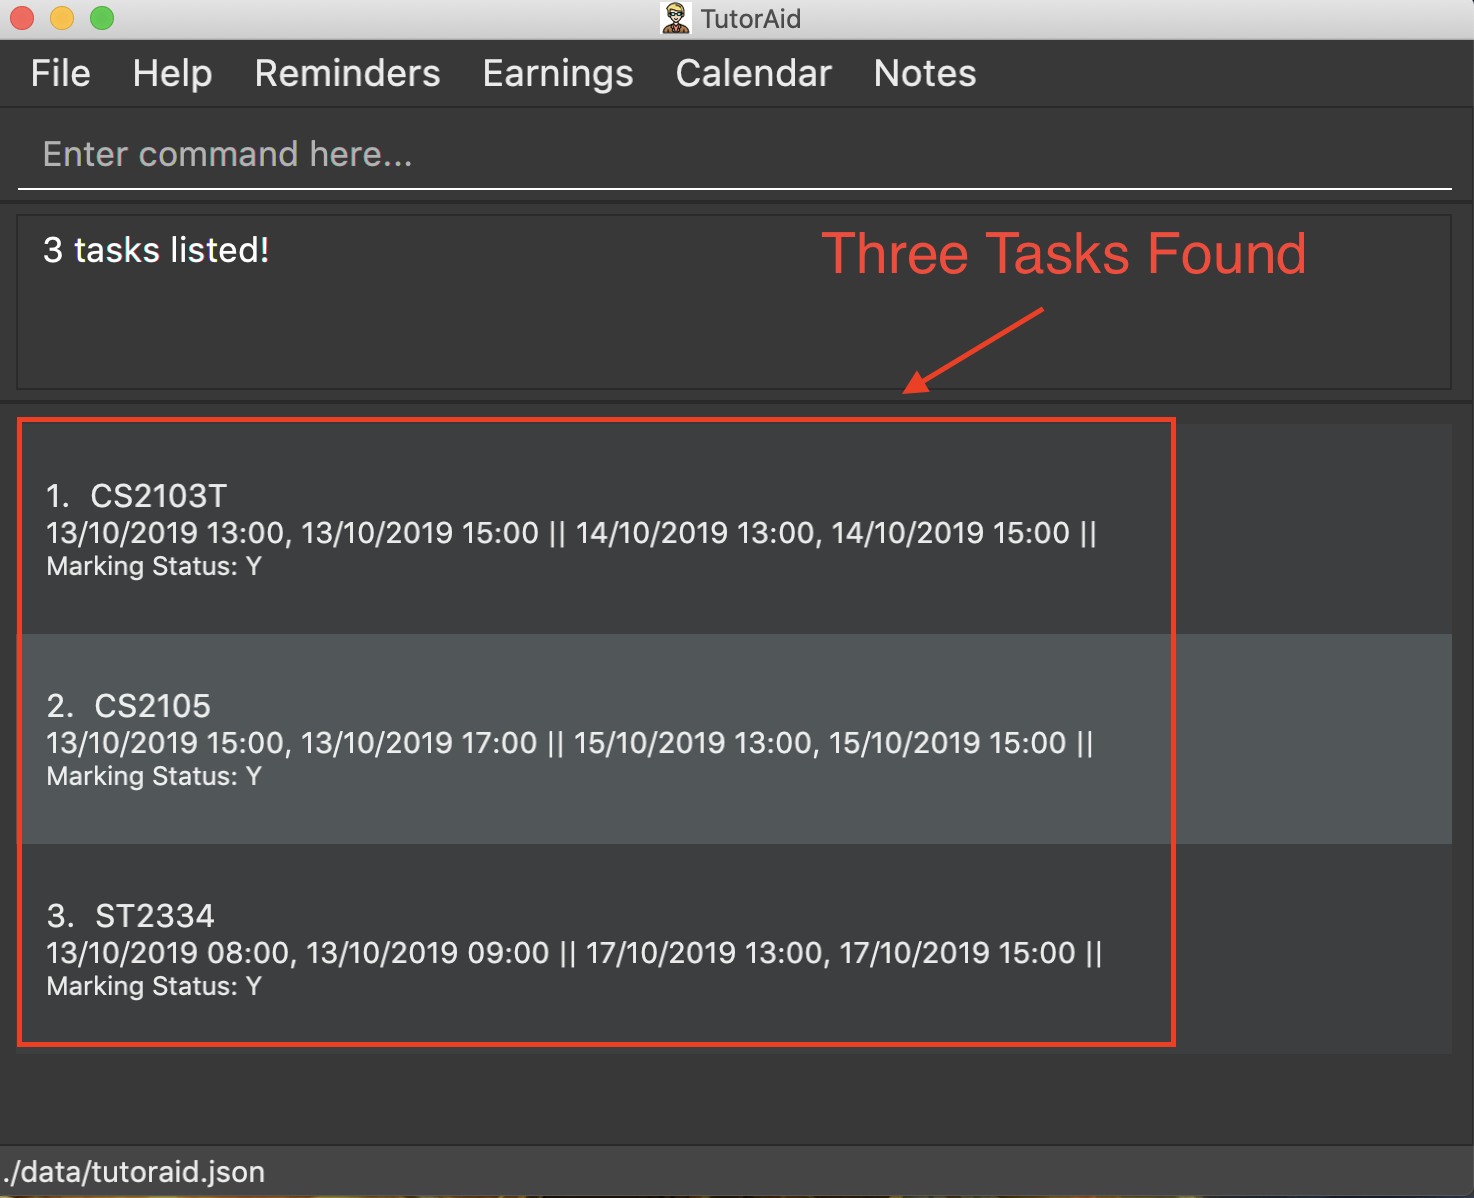
3.5.5. Finding tasks based on Date : find_task_by_date
Find specific tasks by Date and list them.
Format: find_task_by_date DATE
Examples:
-
find_task_by_date 20/10/2019
3.5.6. Listing all tasks : list_task
List all tasks.
Format: list_task
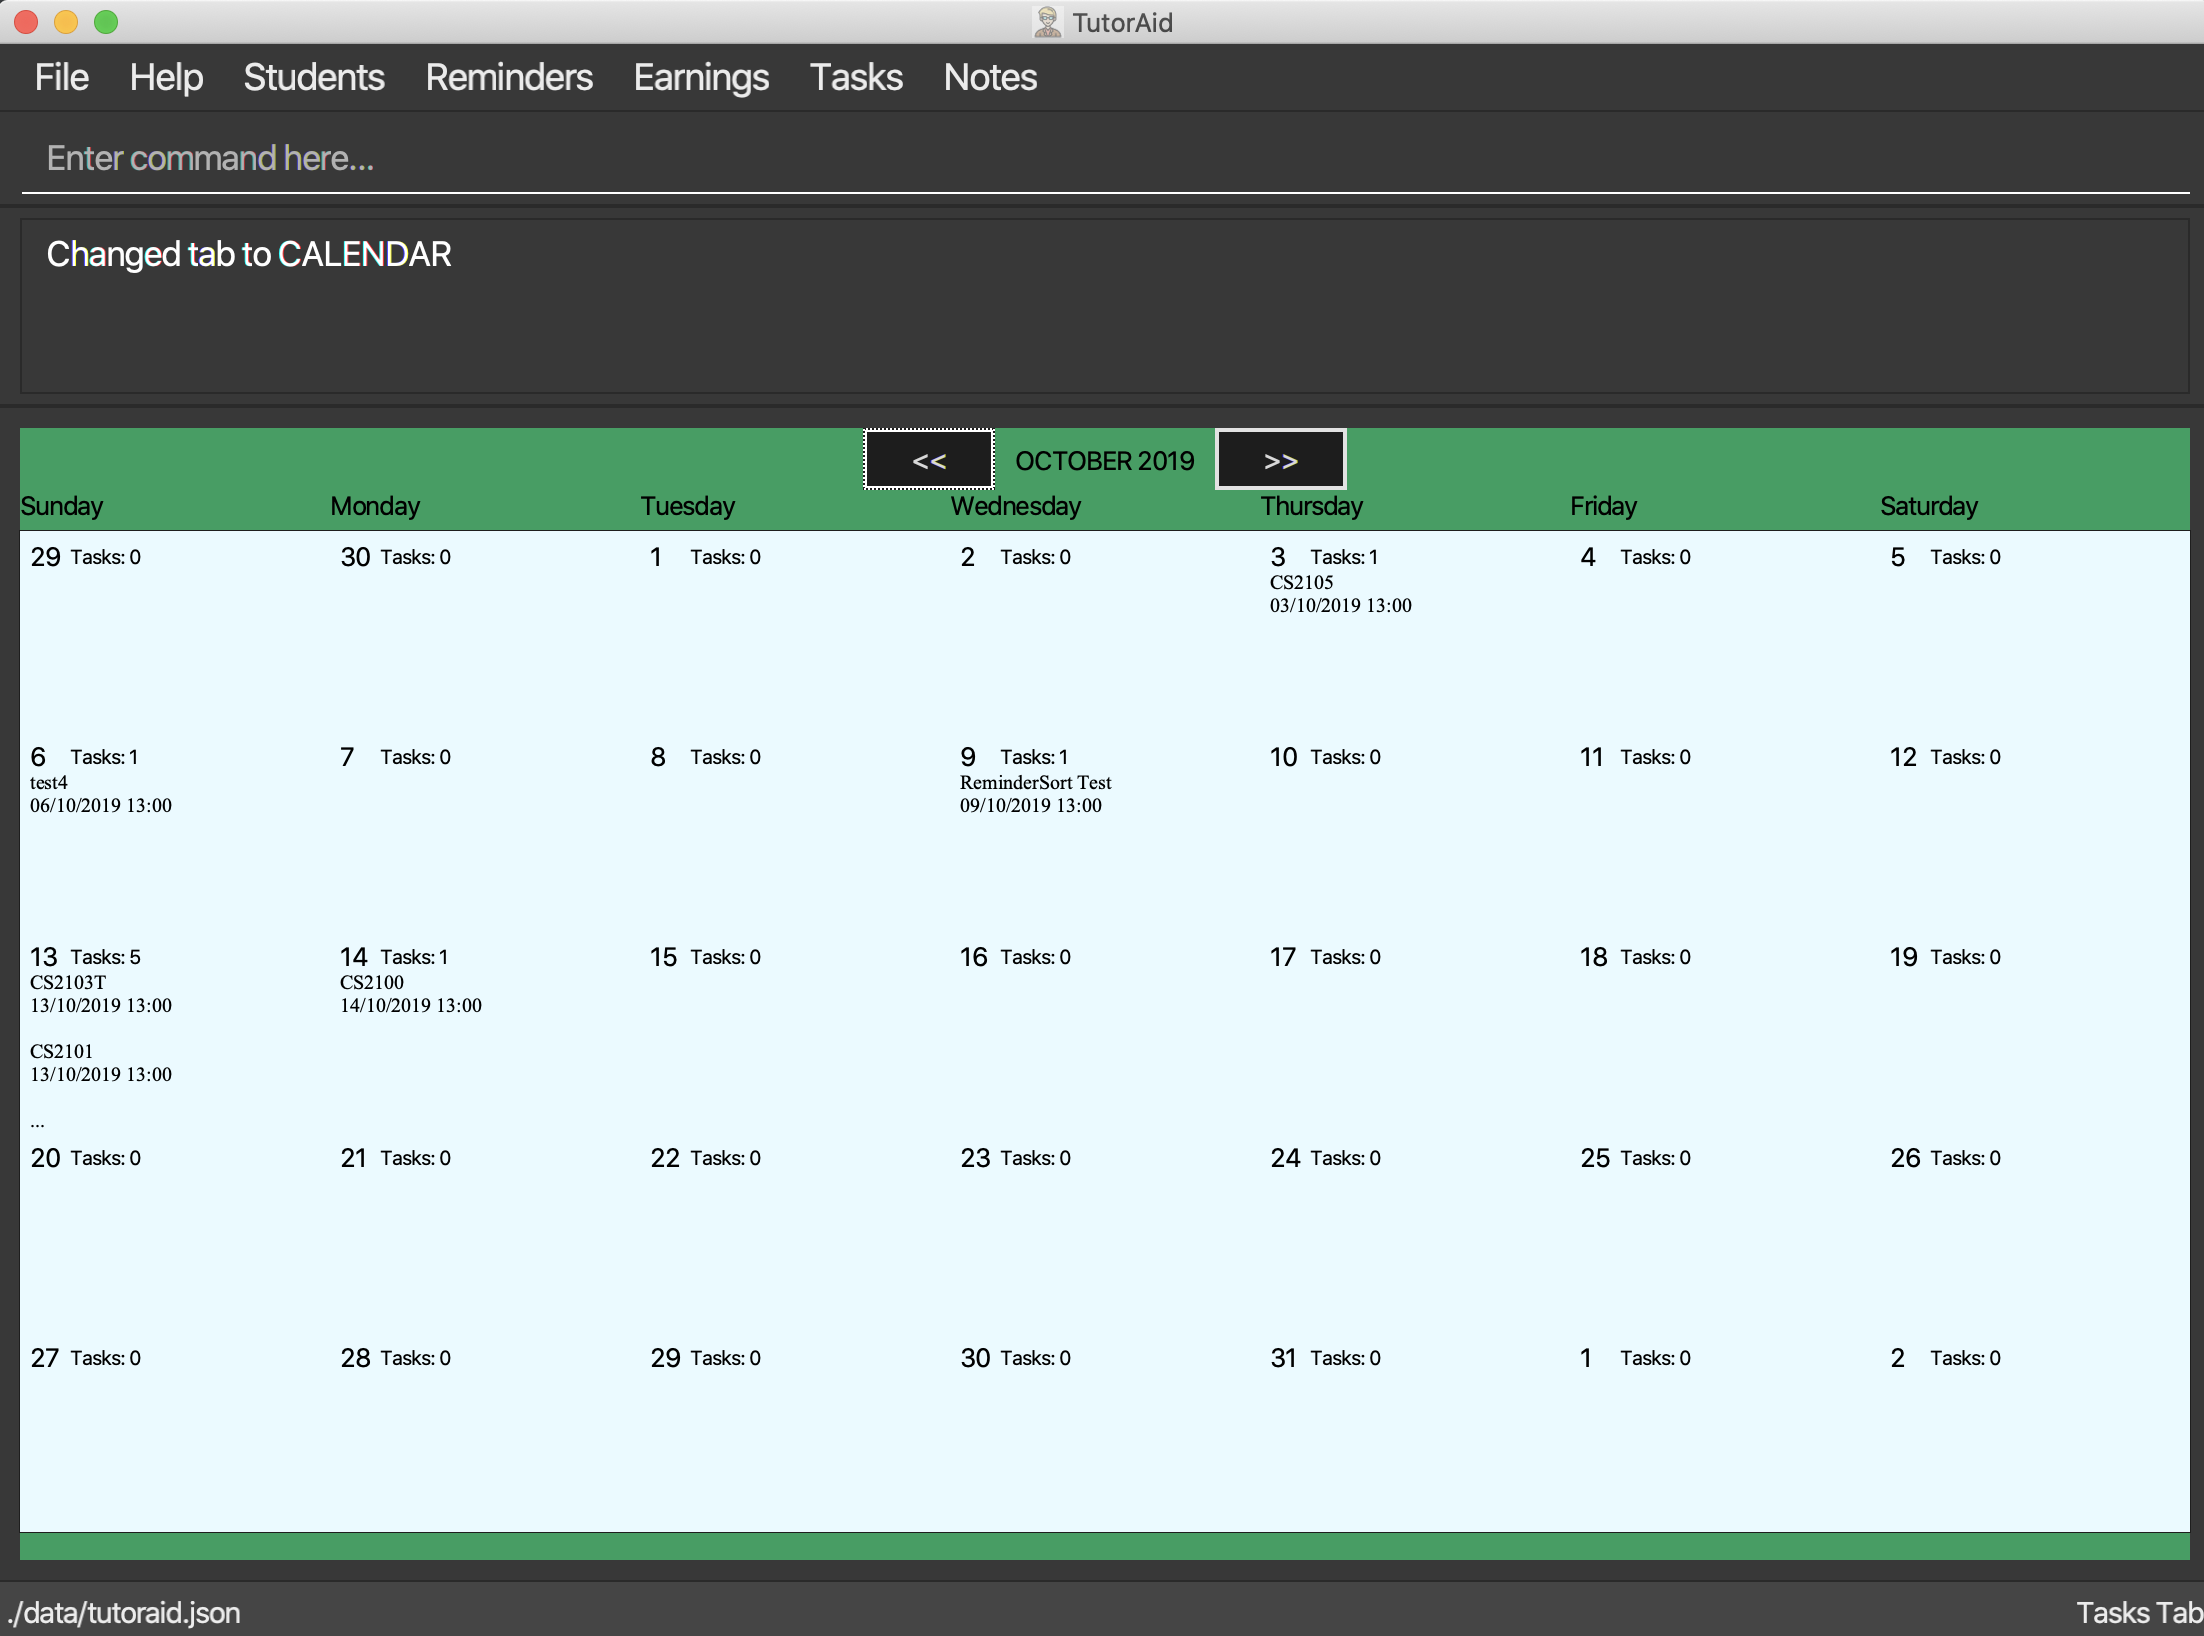
3.5.7. Calendar View
Views the Task in Calendar View
|
Clicking on a date will show the user the Tasks with that date as its Start Time in normal list view. The Calendar will display the tasks starting on that date and the amount of tasks starting on that date. If there is a Task starting on that date, only the Task’s DESCRIPTION and START_TIME will be displayed on the calendar.
|
3.6. Reminders
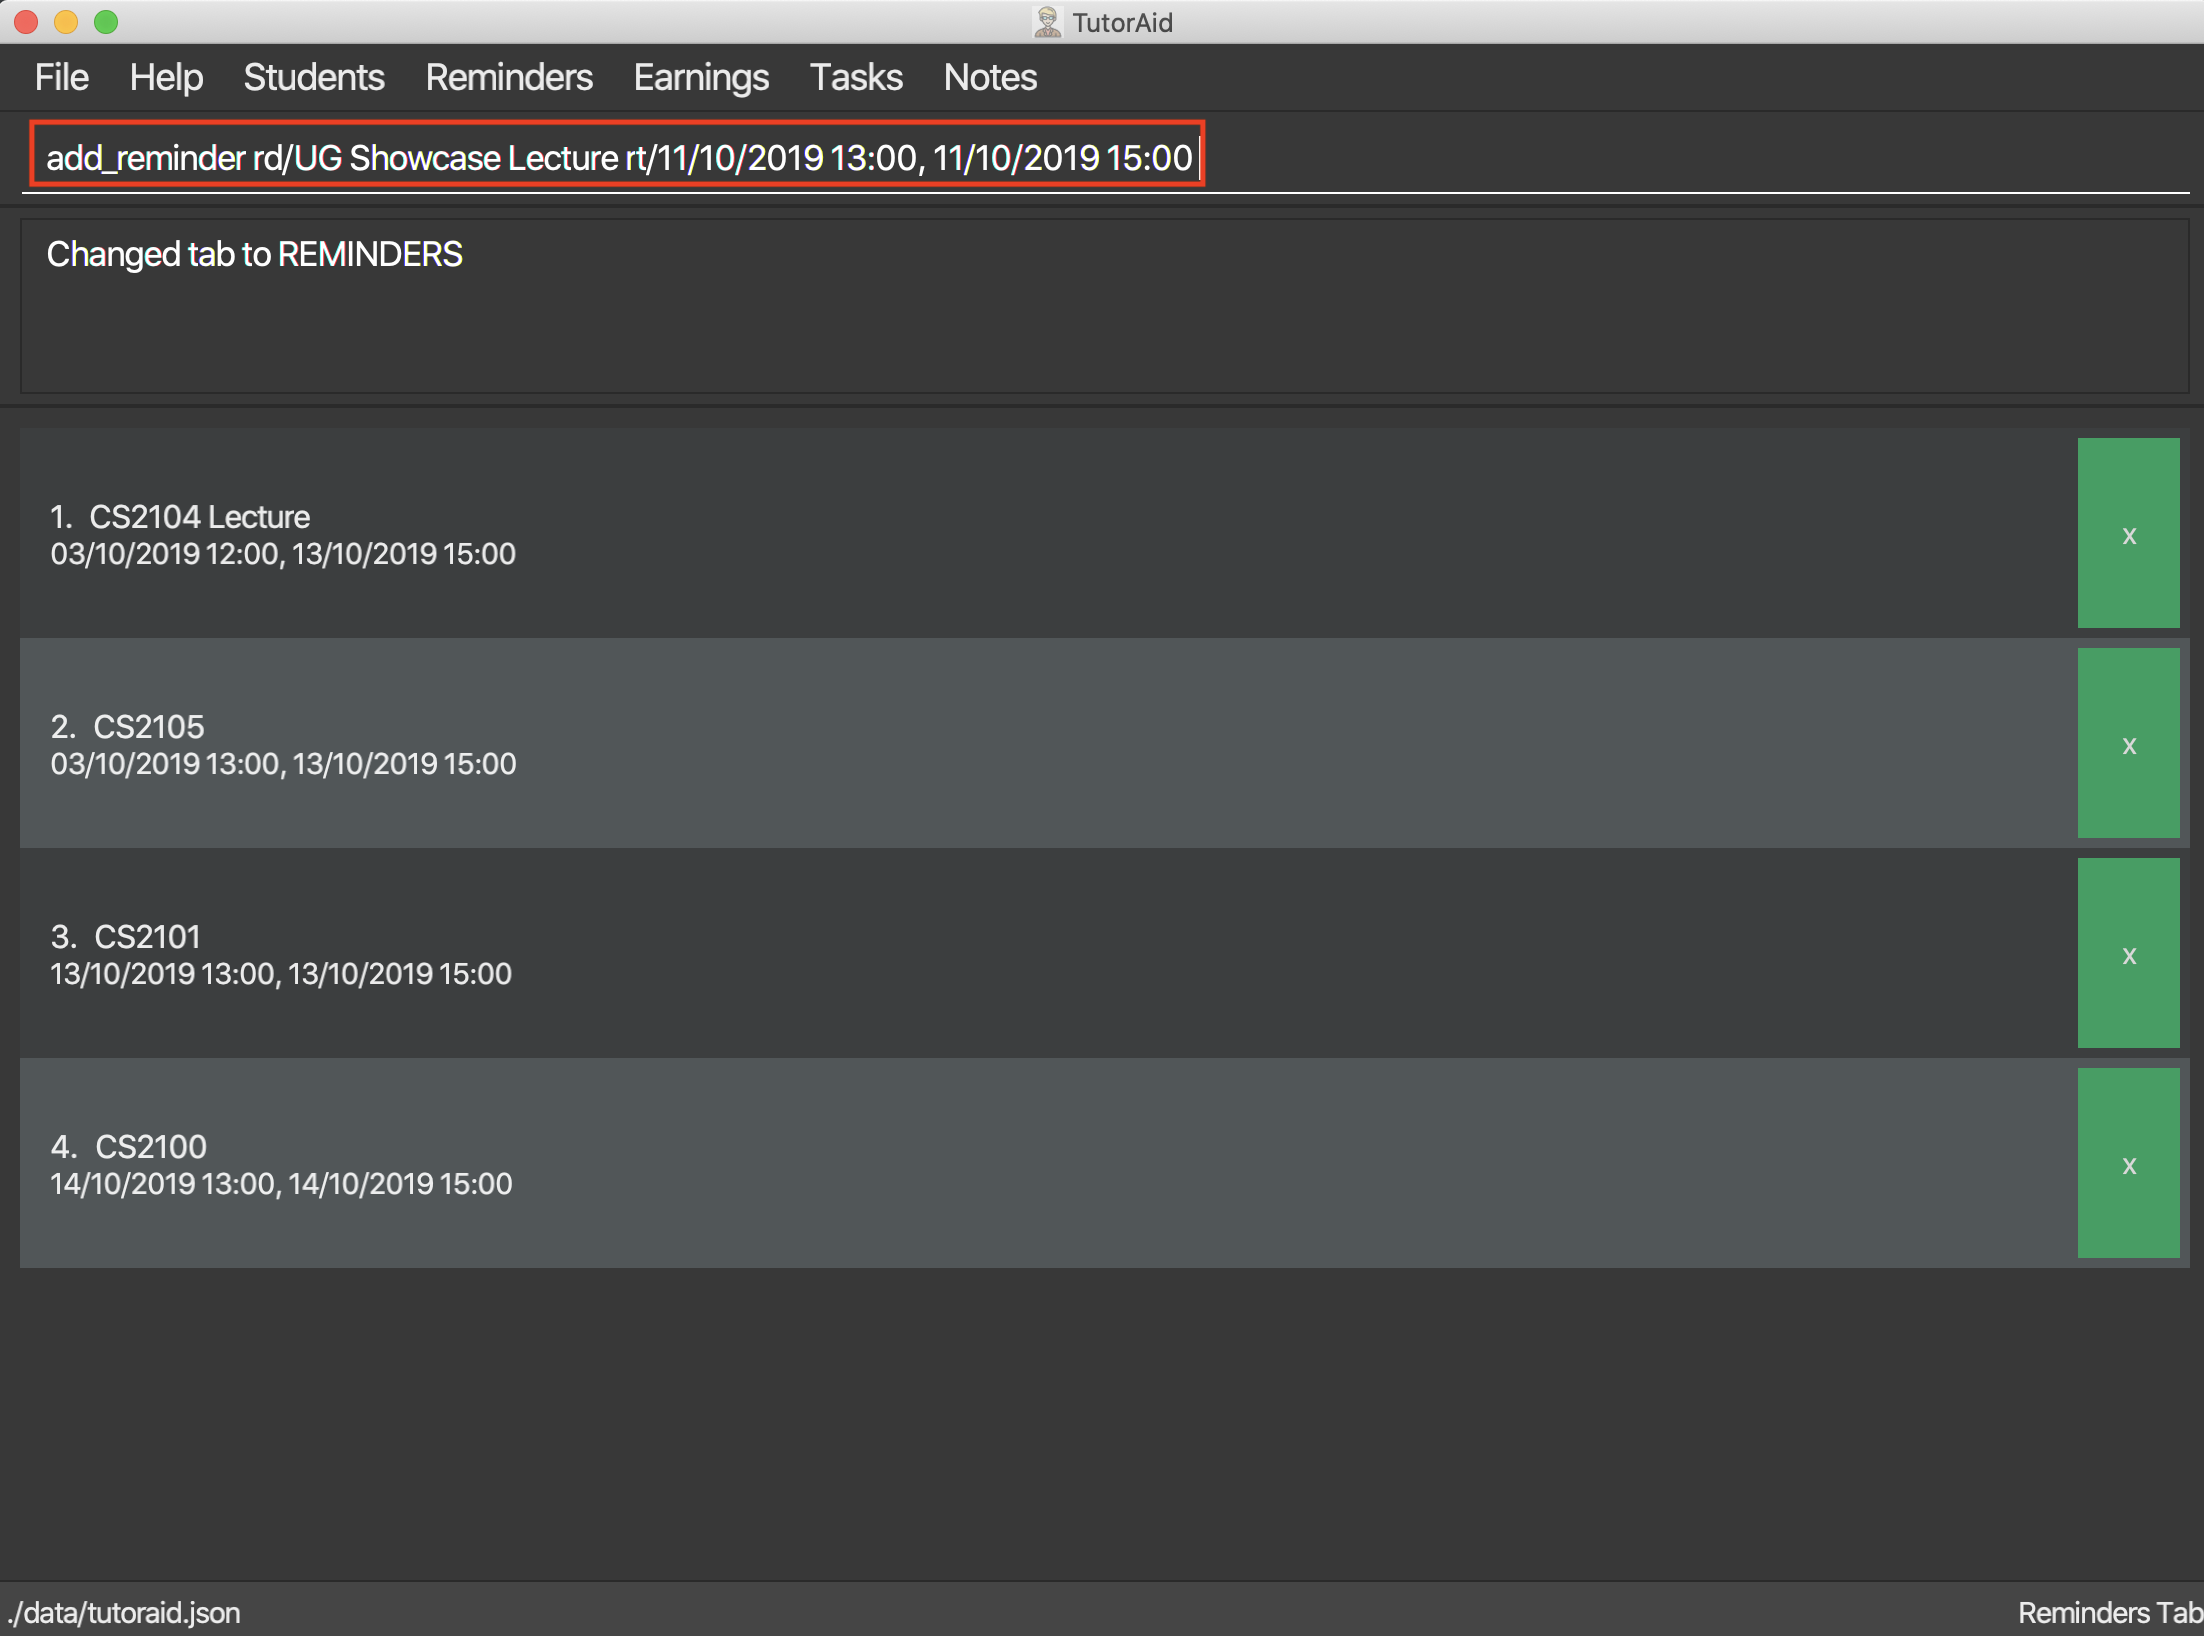
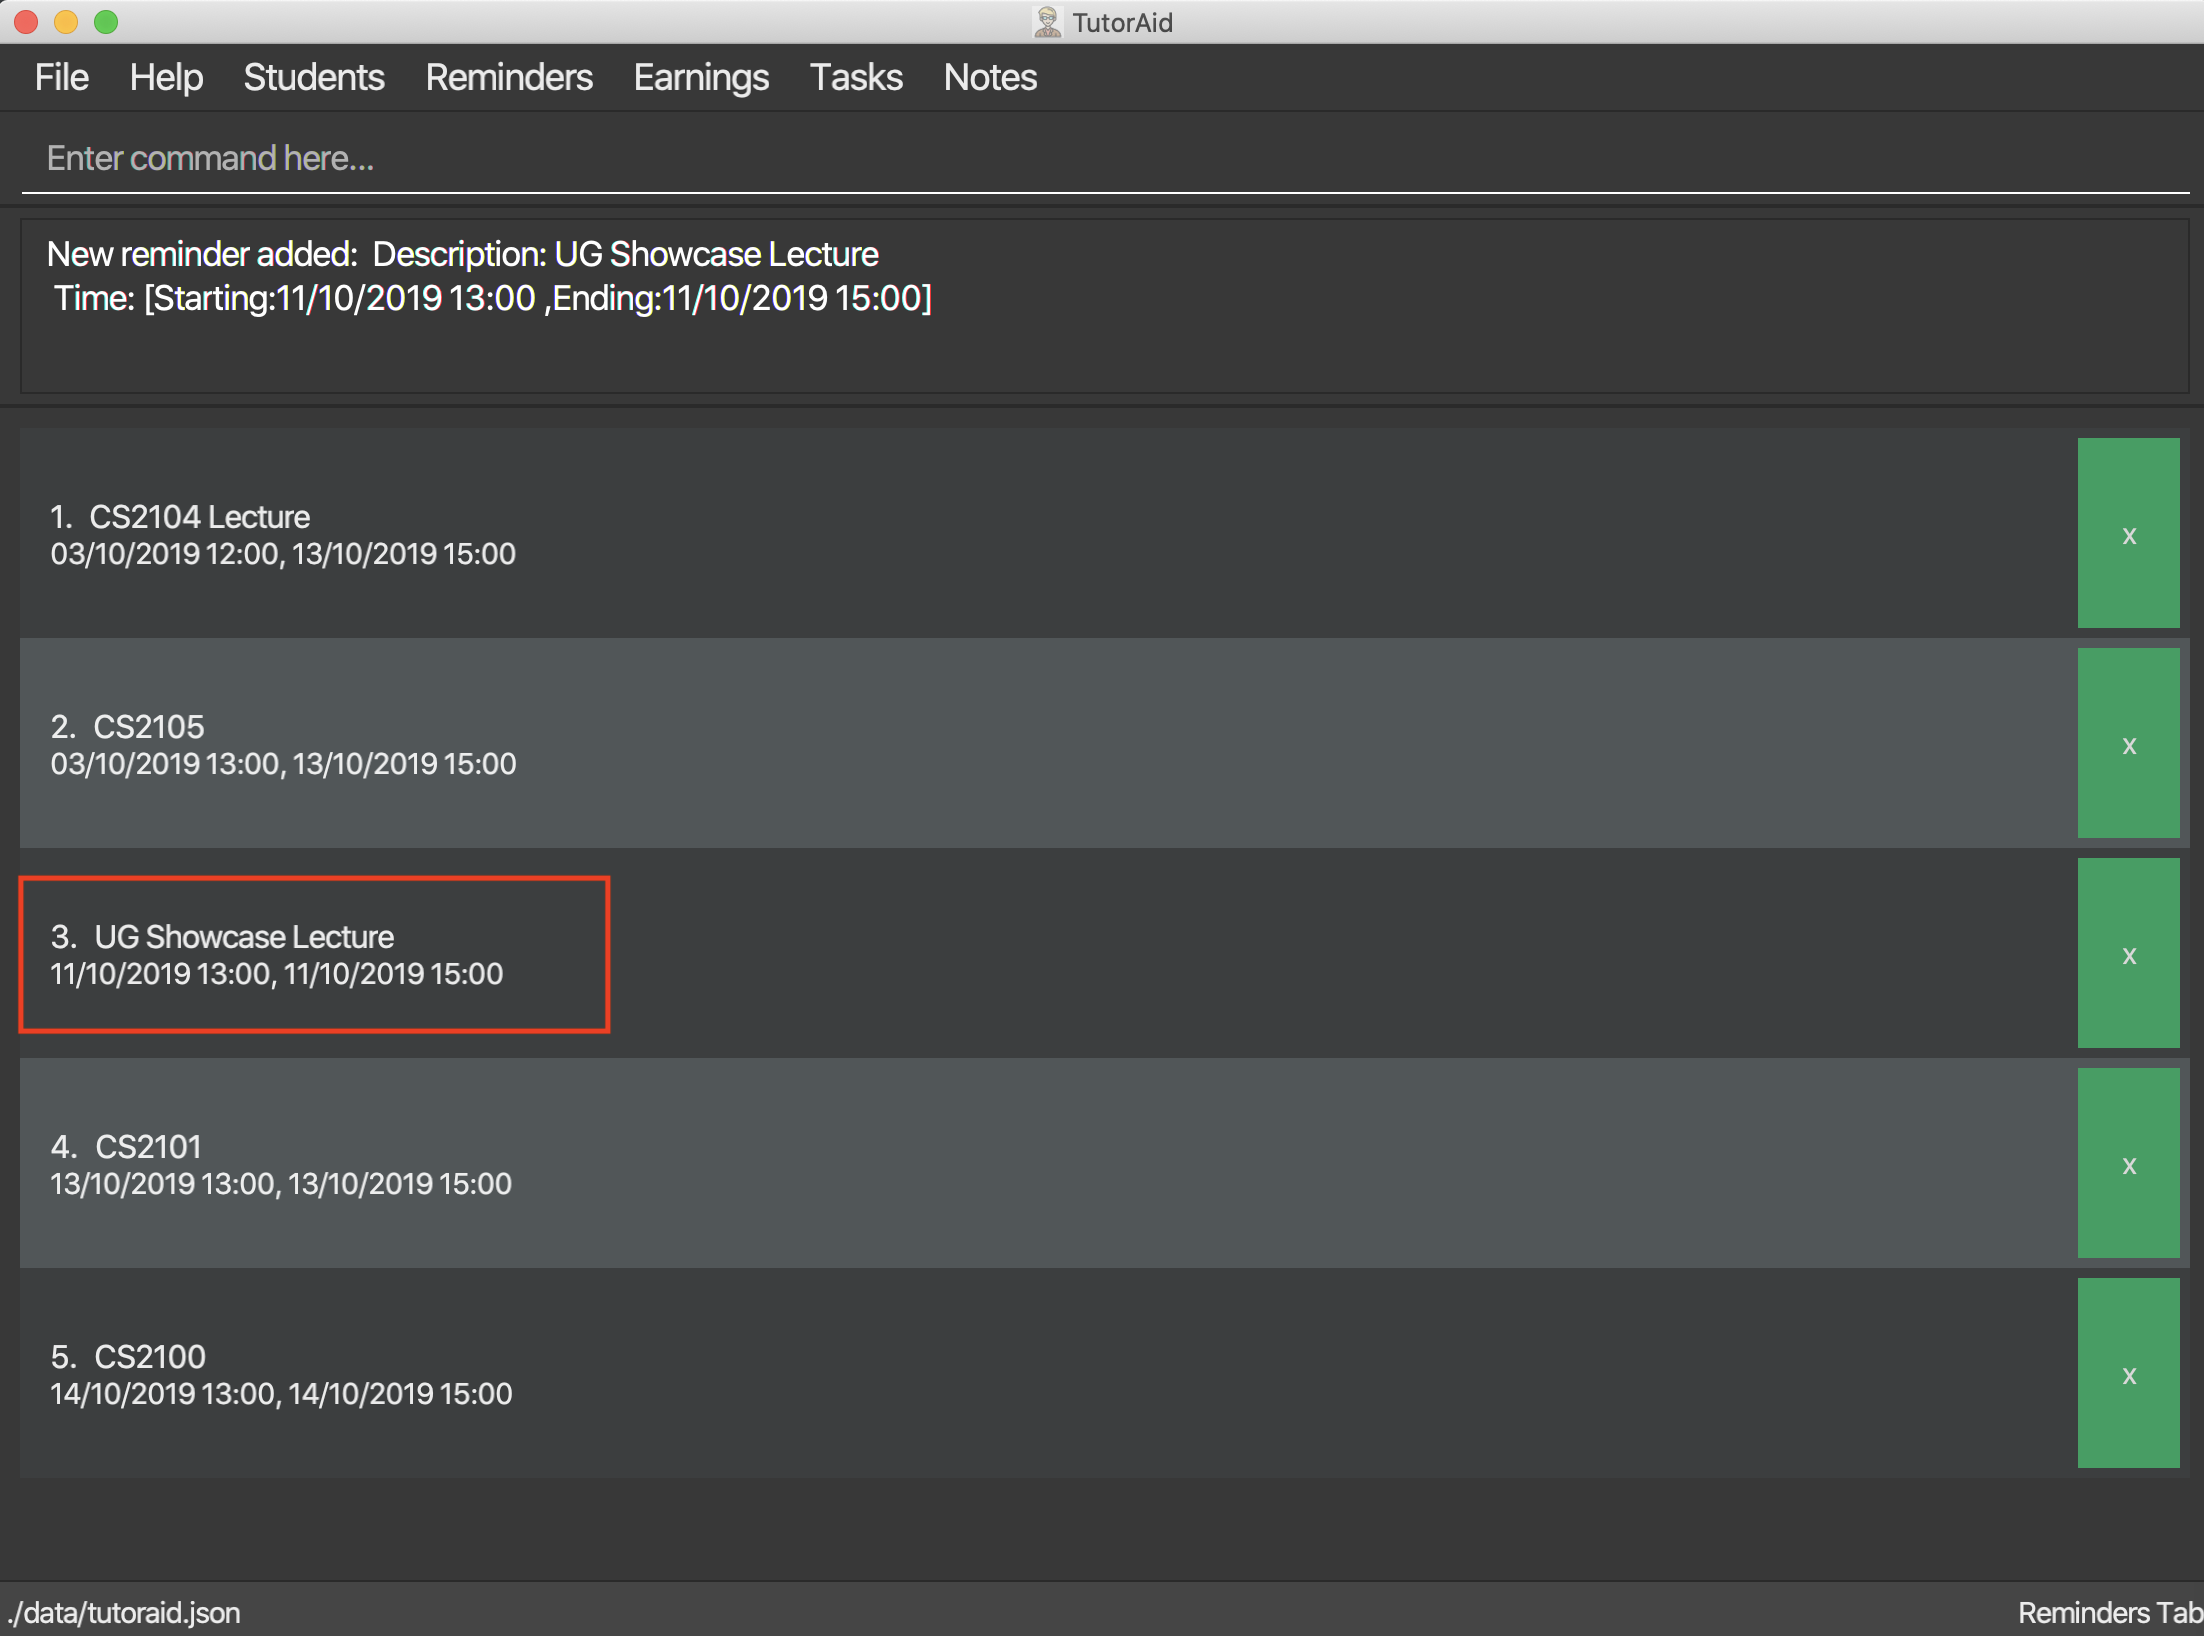
3.6.1. Add Reminder
Adds reminders.
Reminders must be unique and cannot have the same DESCRIPTION
Format: add_reminder rd/DESCRIPTION rt/START_TIME, END_TIME
| A Reminder can have more than one time slots. |
Examples:
-
add_reminder rd/CS2103T Homework rt/13/10/2019 13:00, 13/10/2019 15:00
3.6.2. Delete Reminder
Removes the reminder.
Format: delete_reminder INDEX
Examples:
-
delete_reminder 1
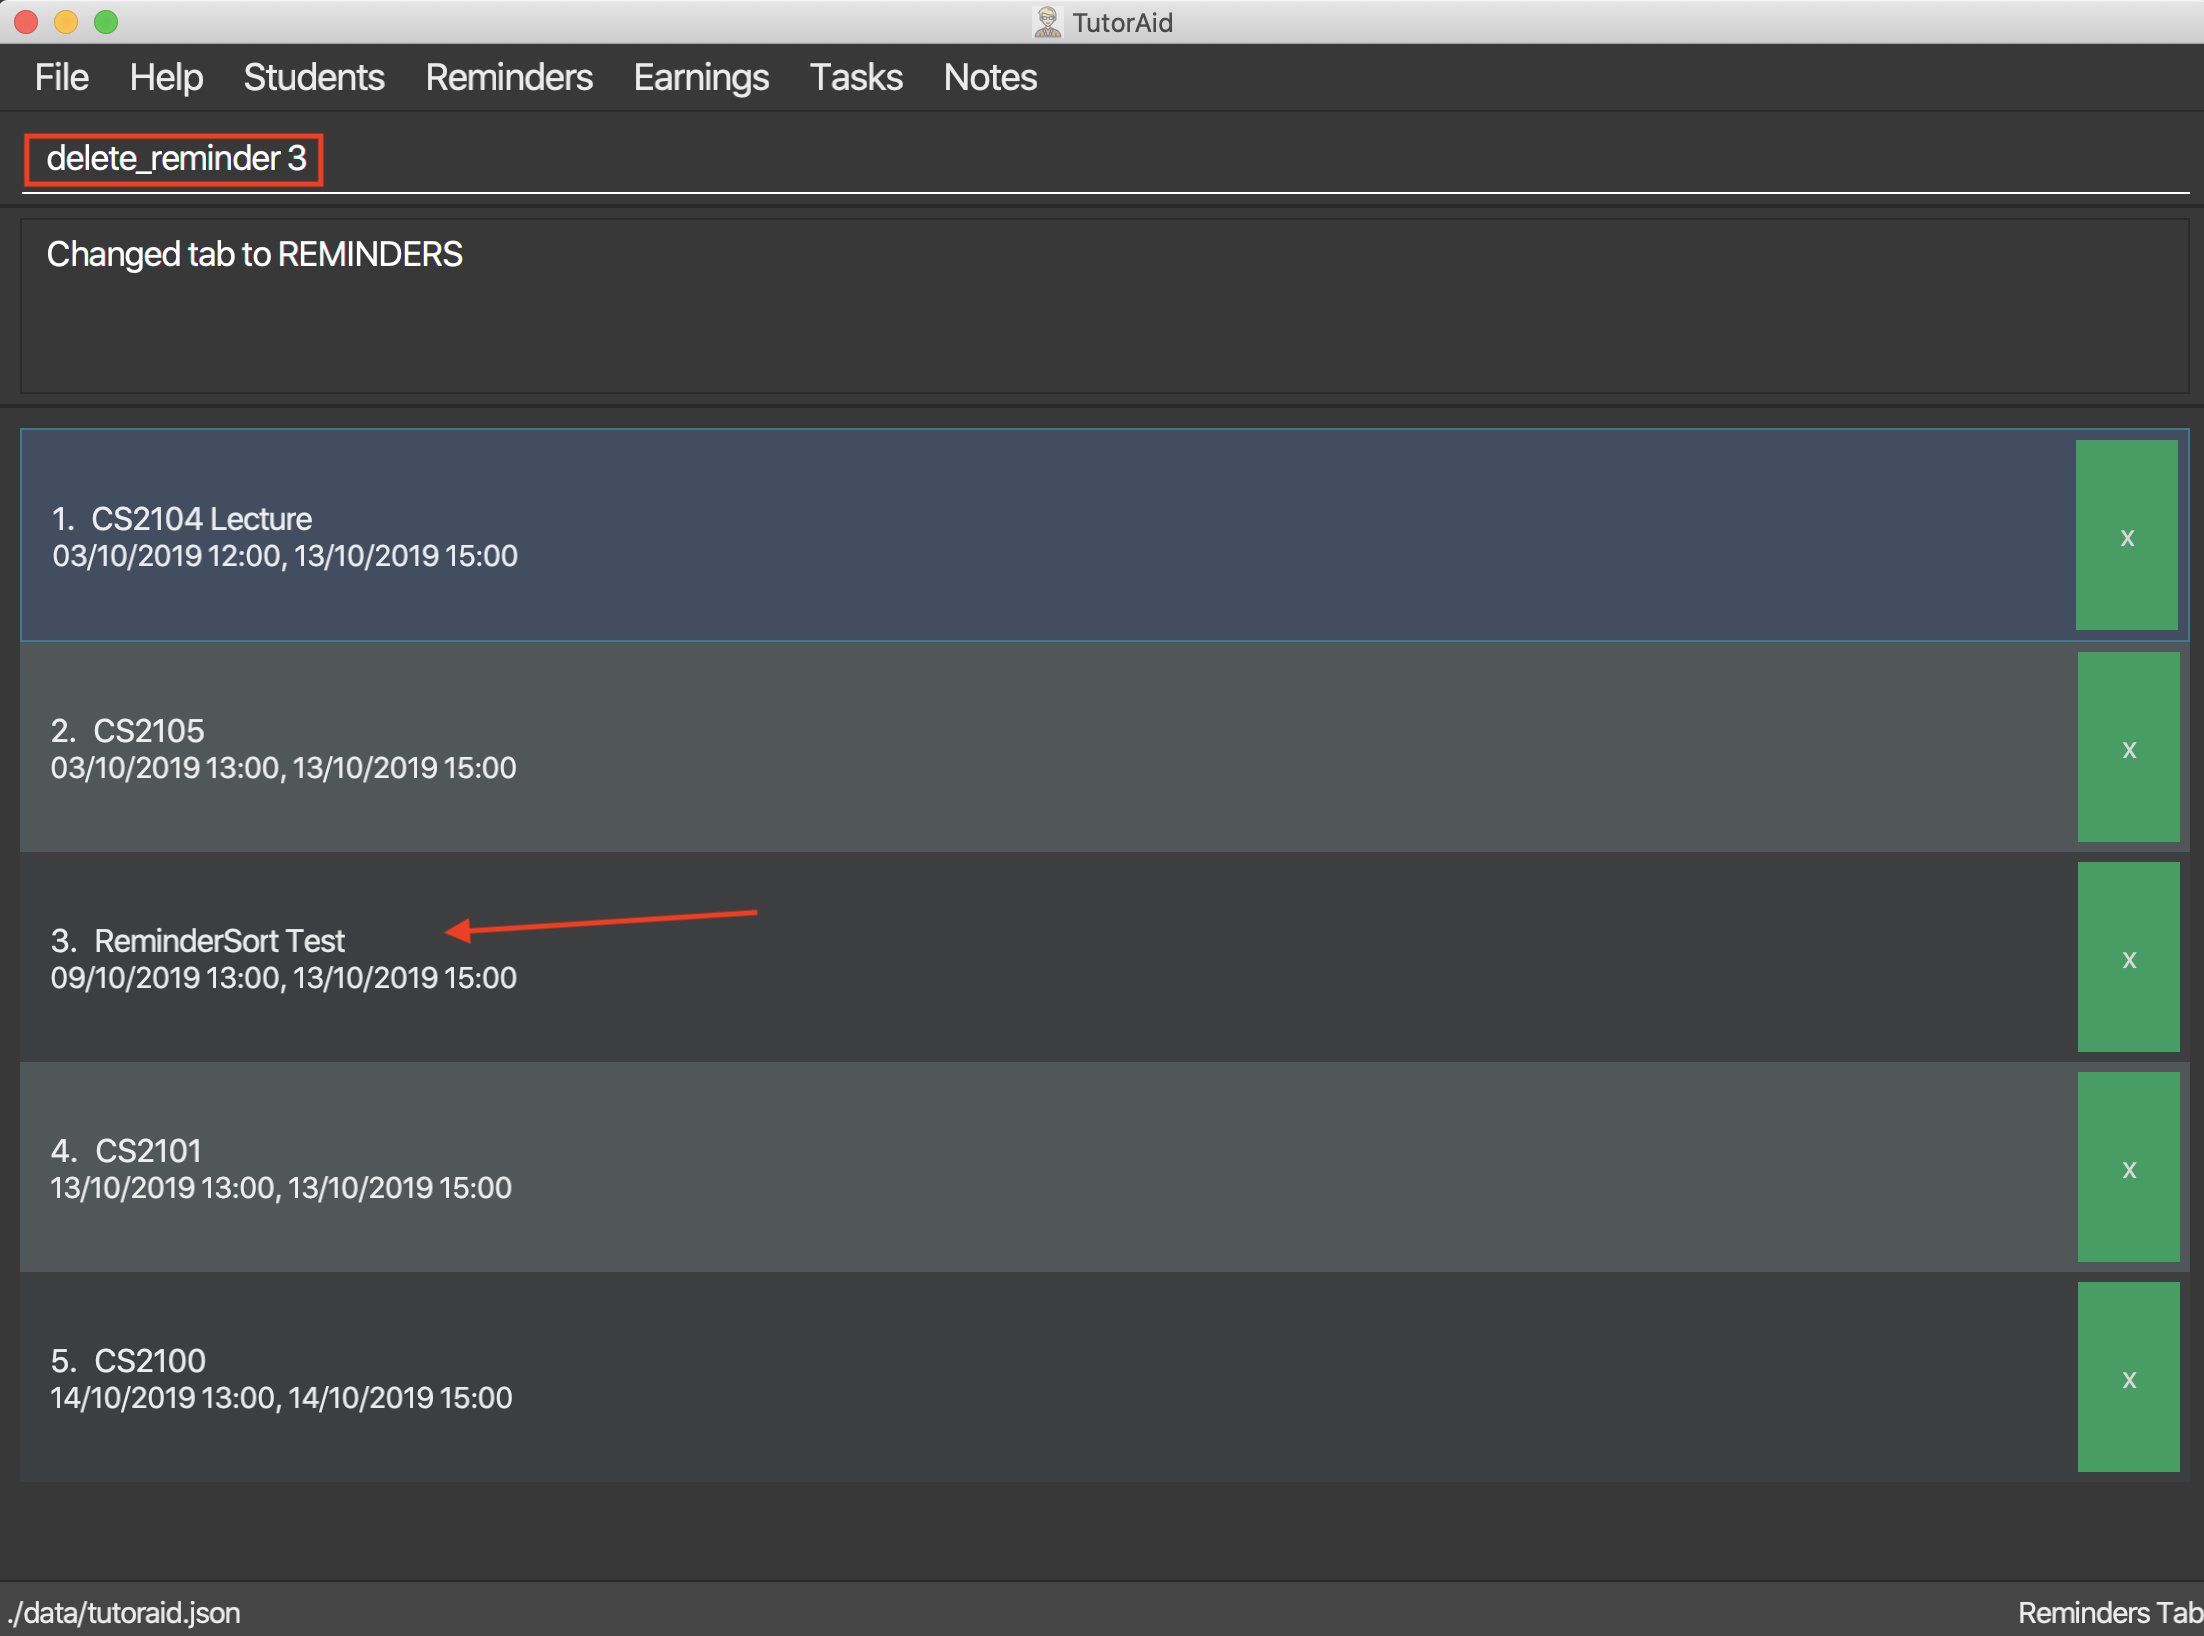
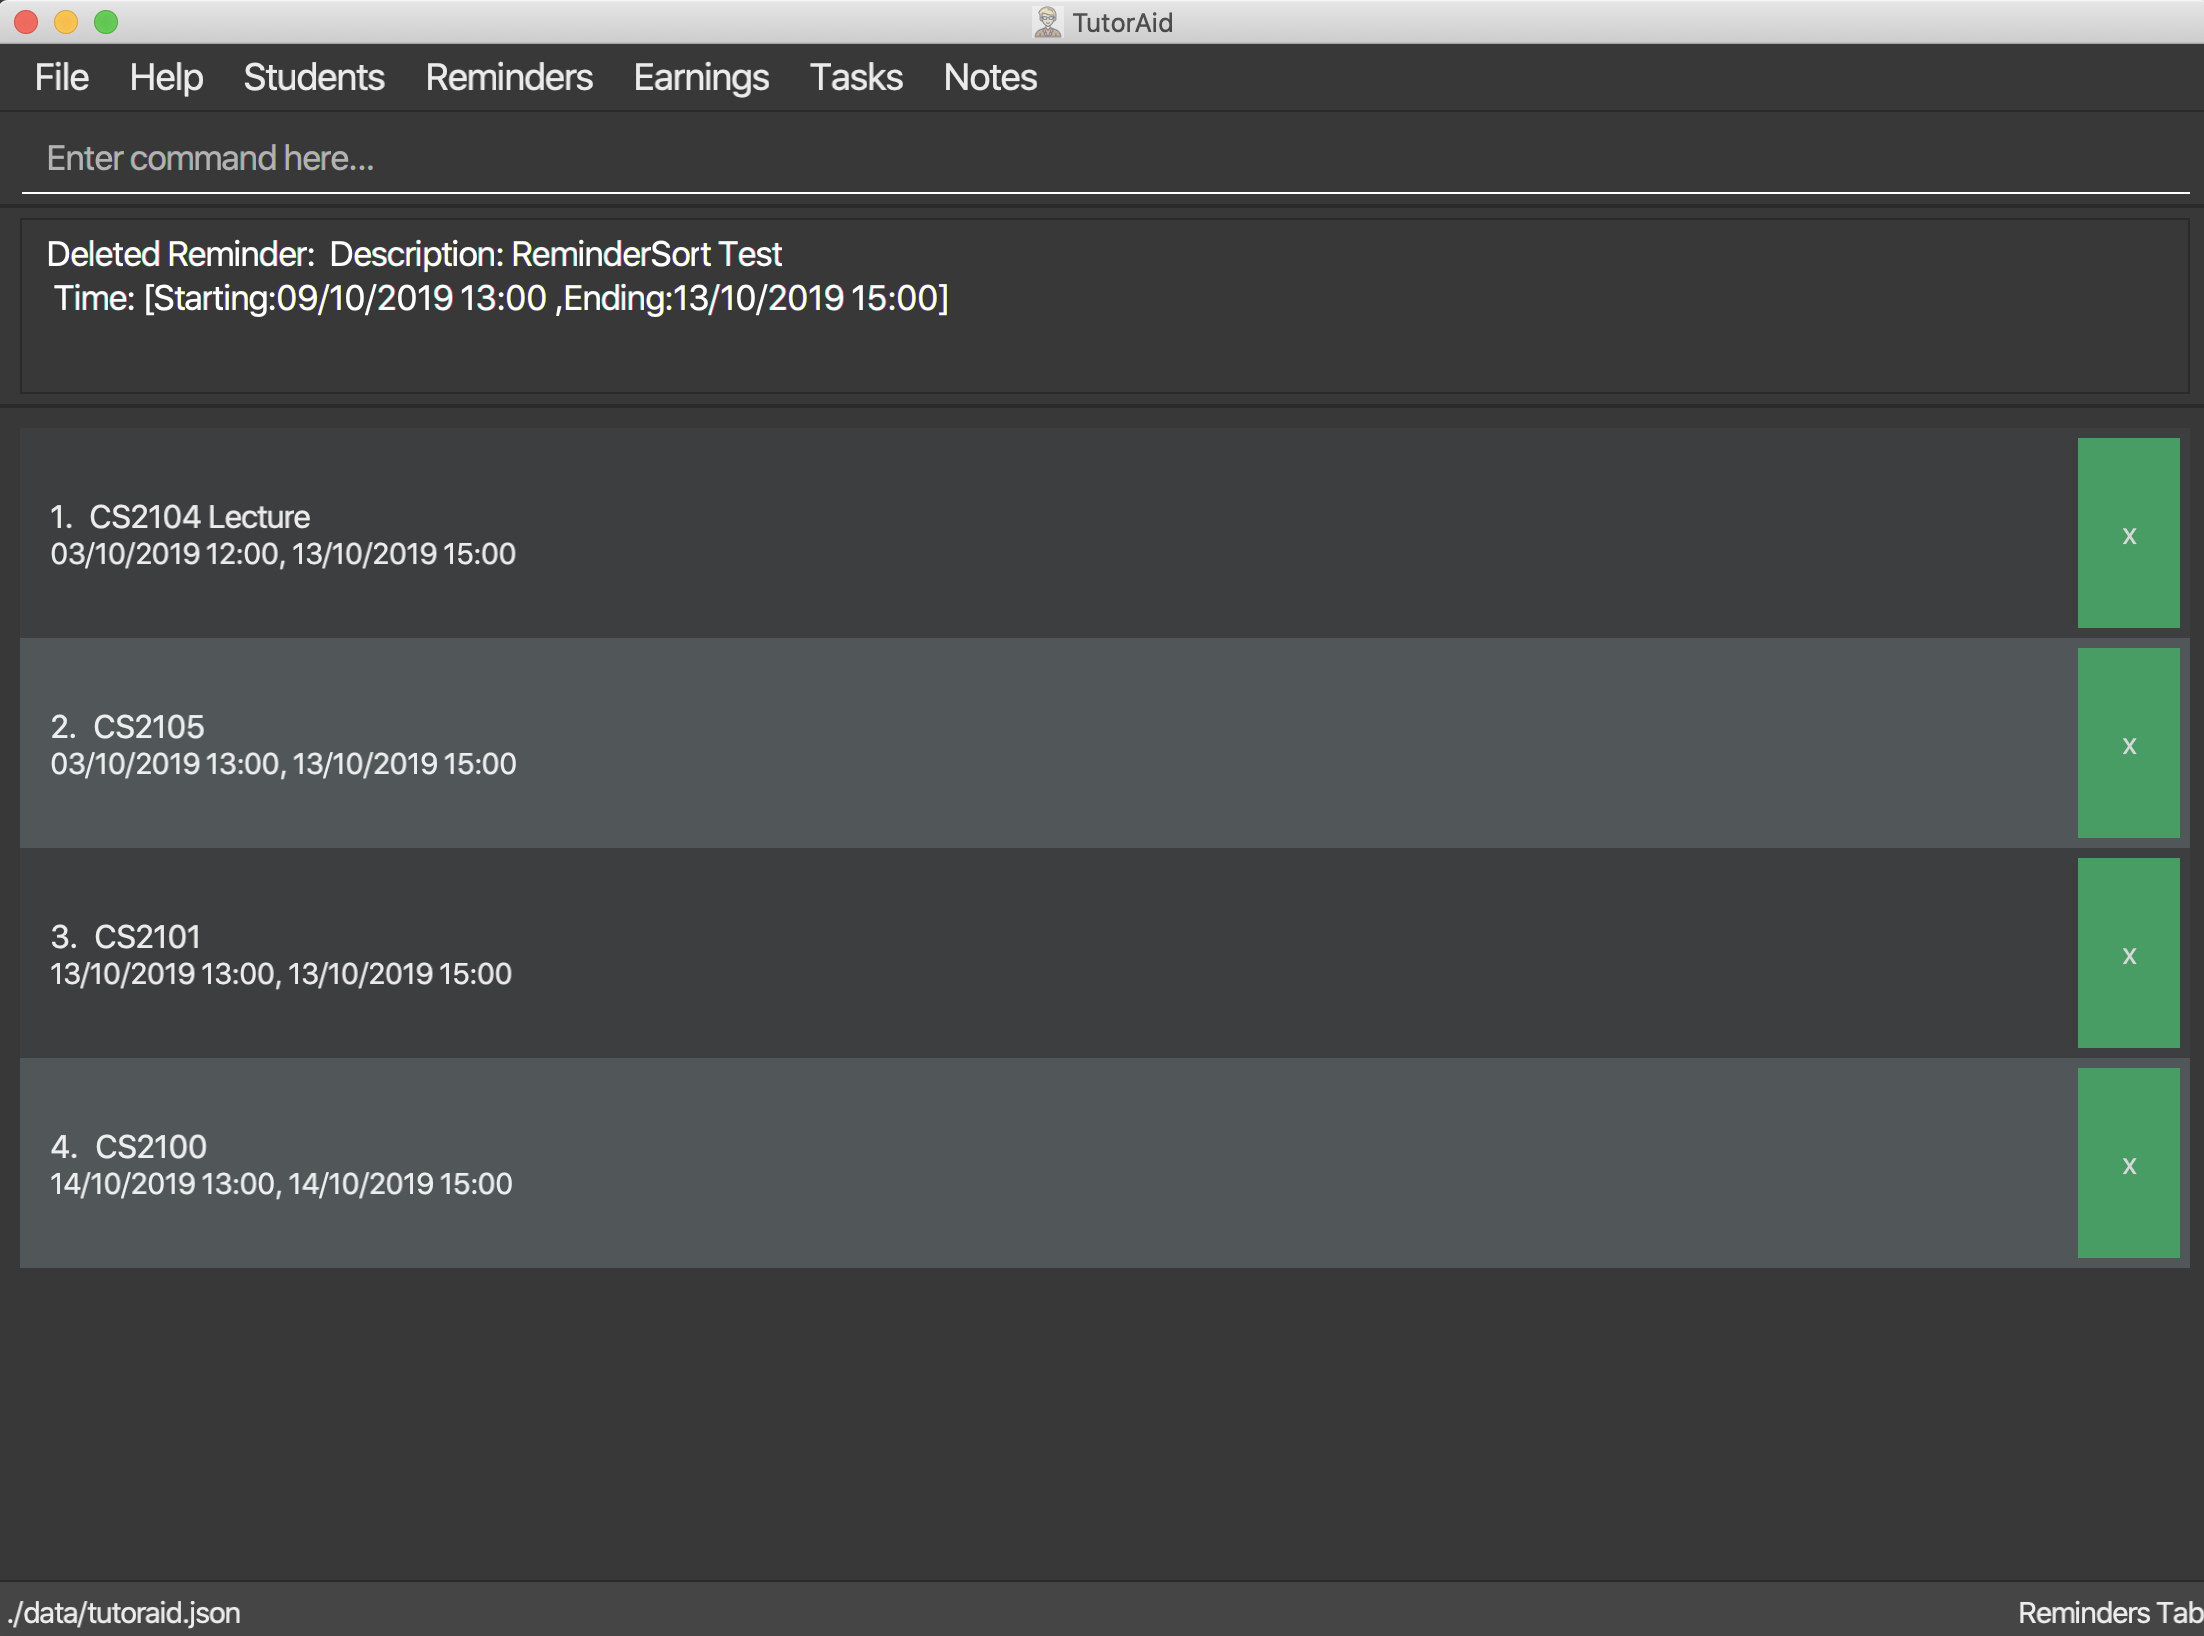
Reminders can also be deleted easily by clicking the delete button
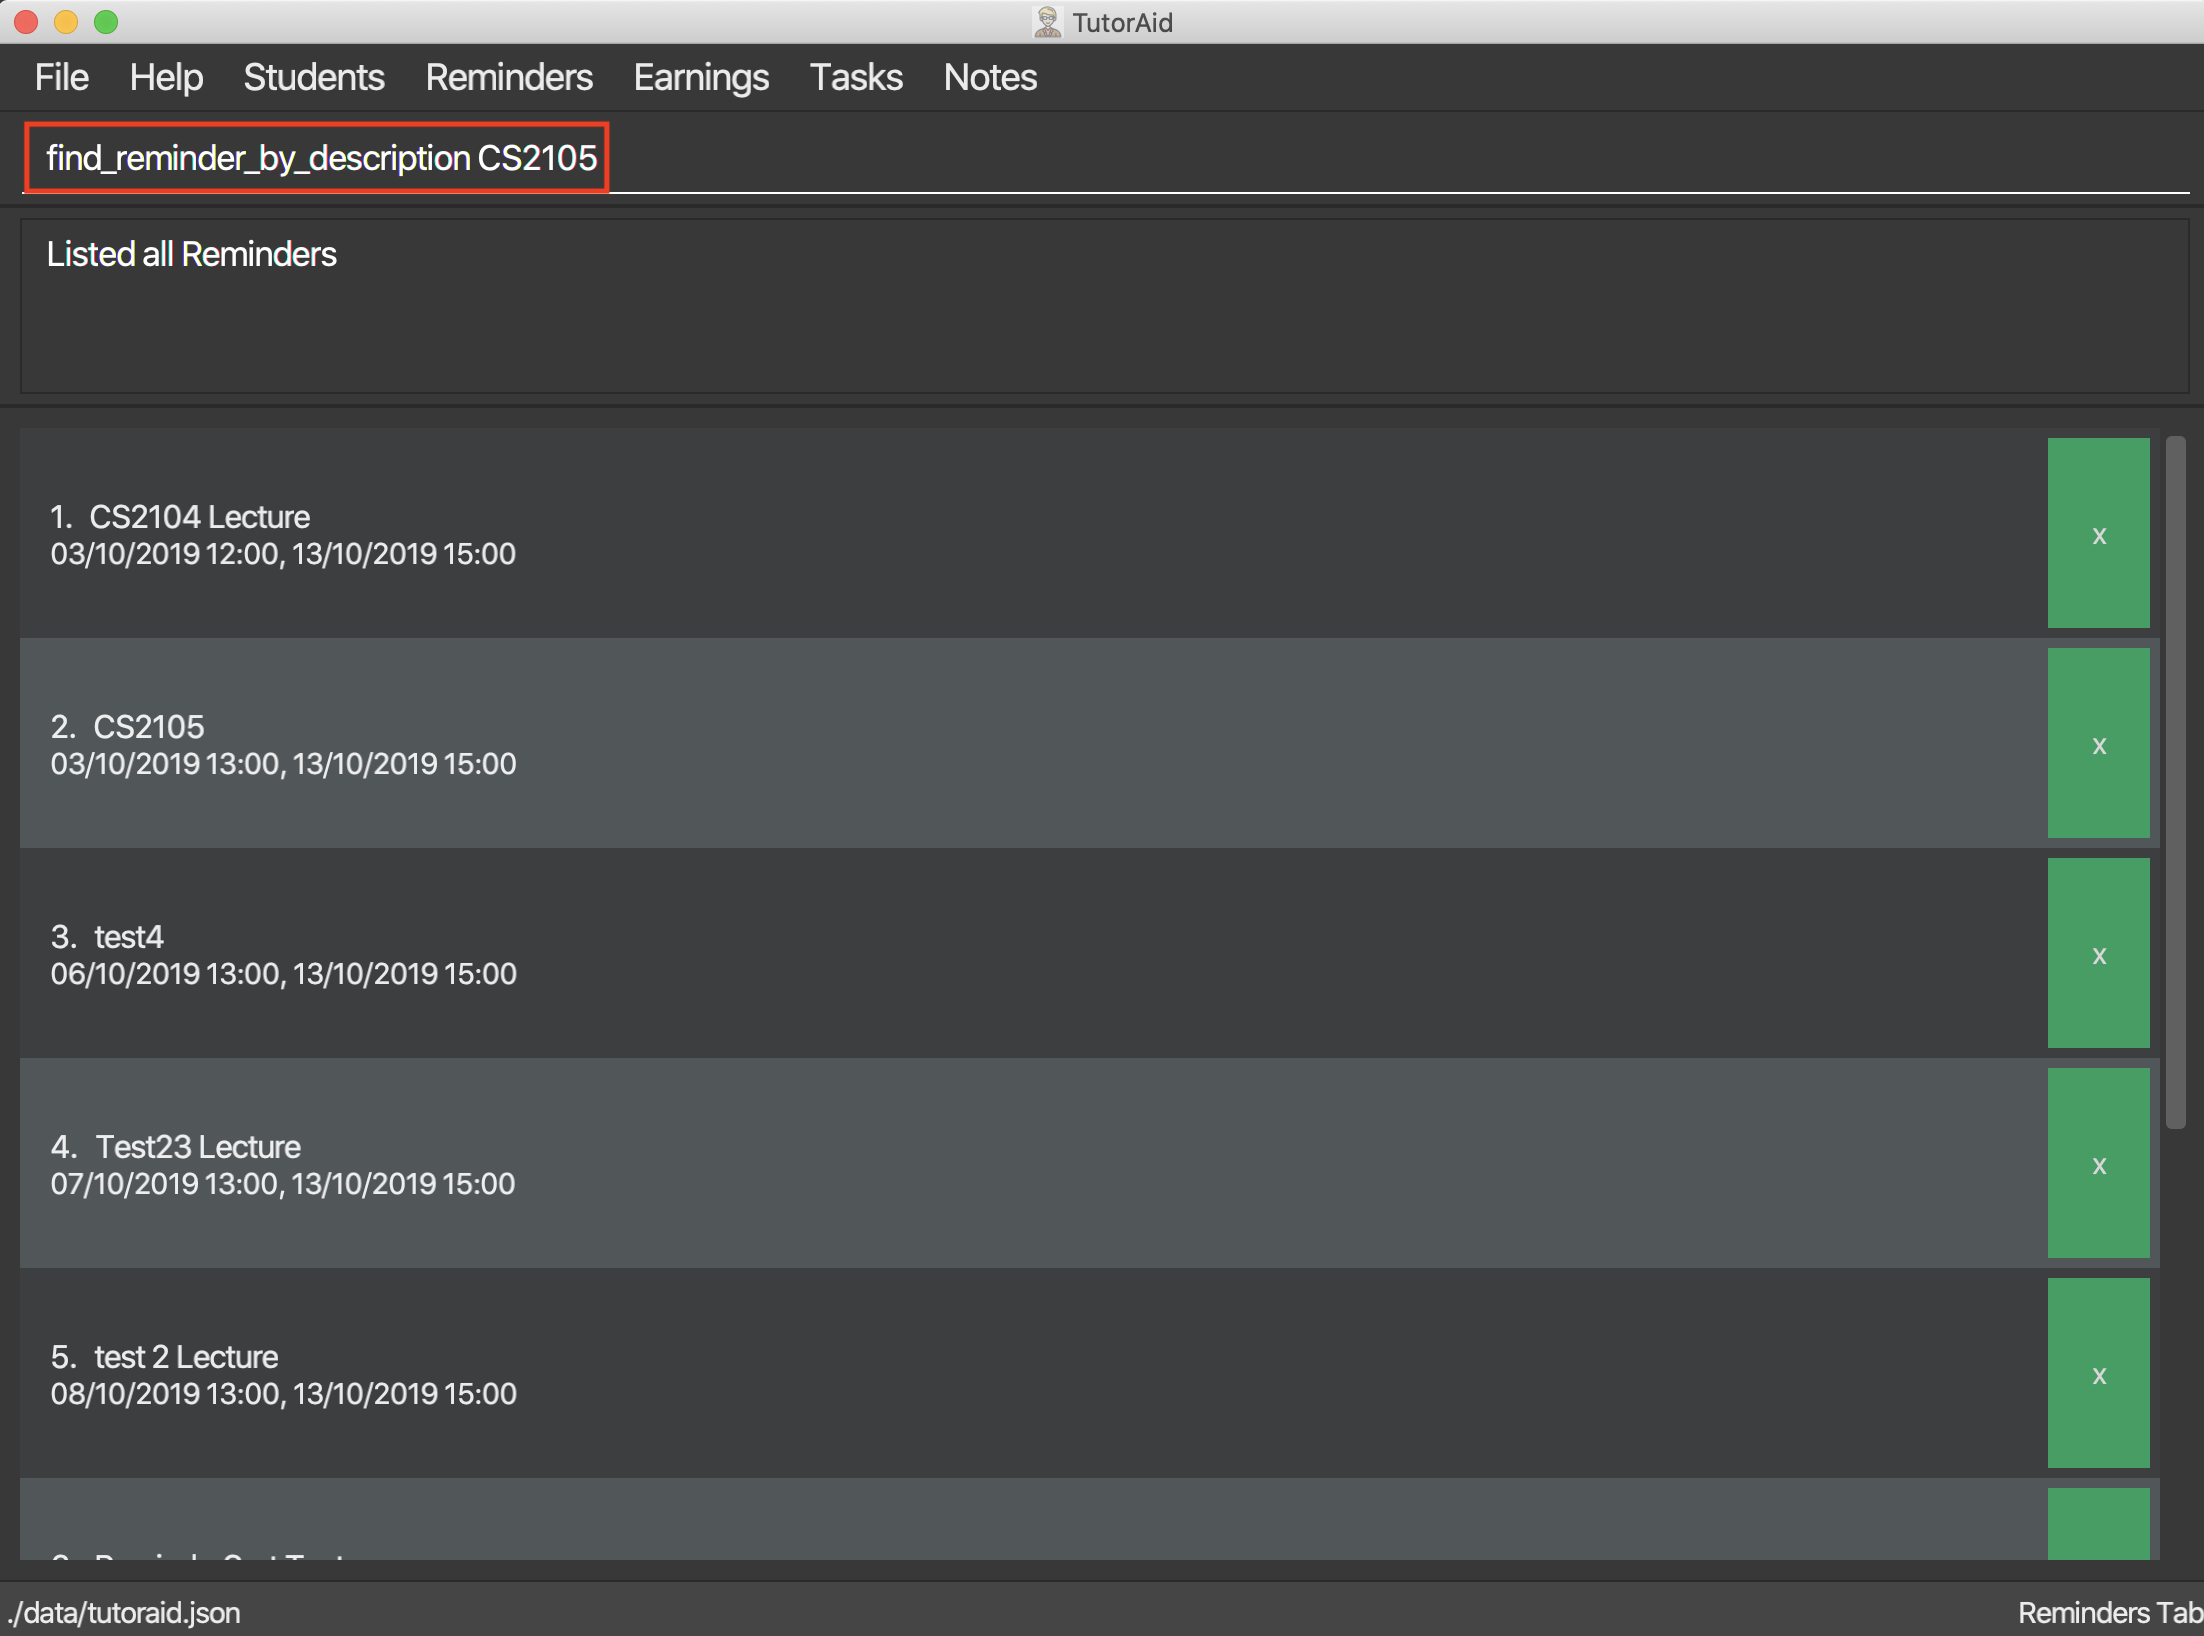
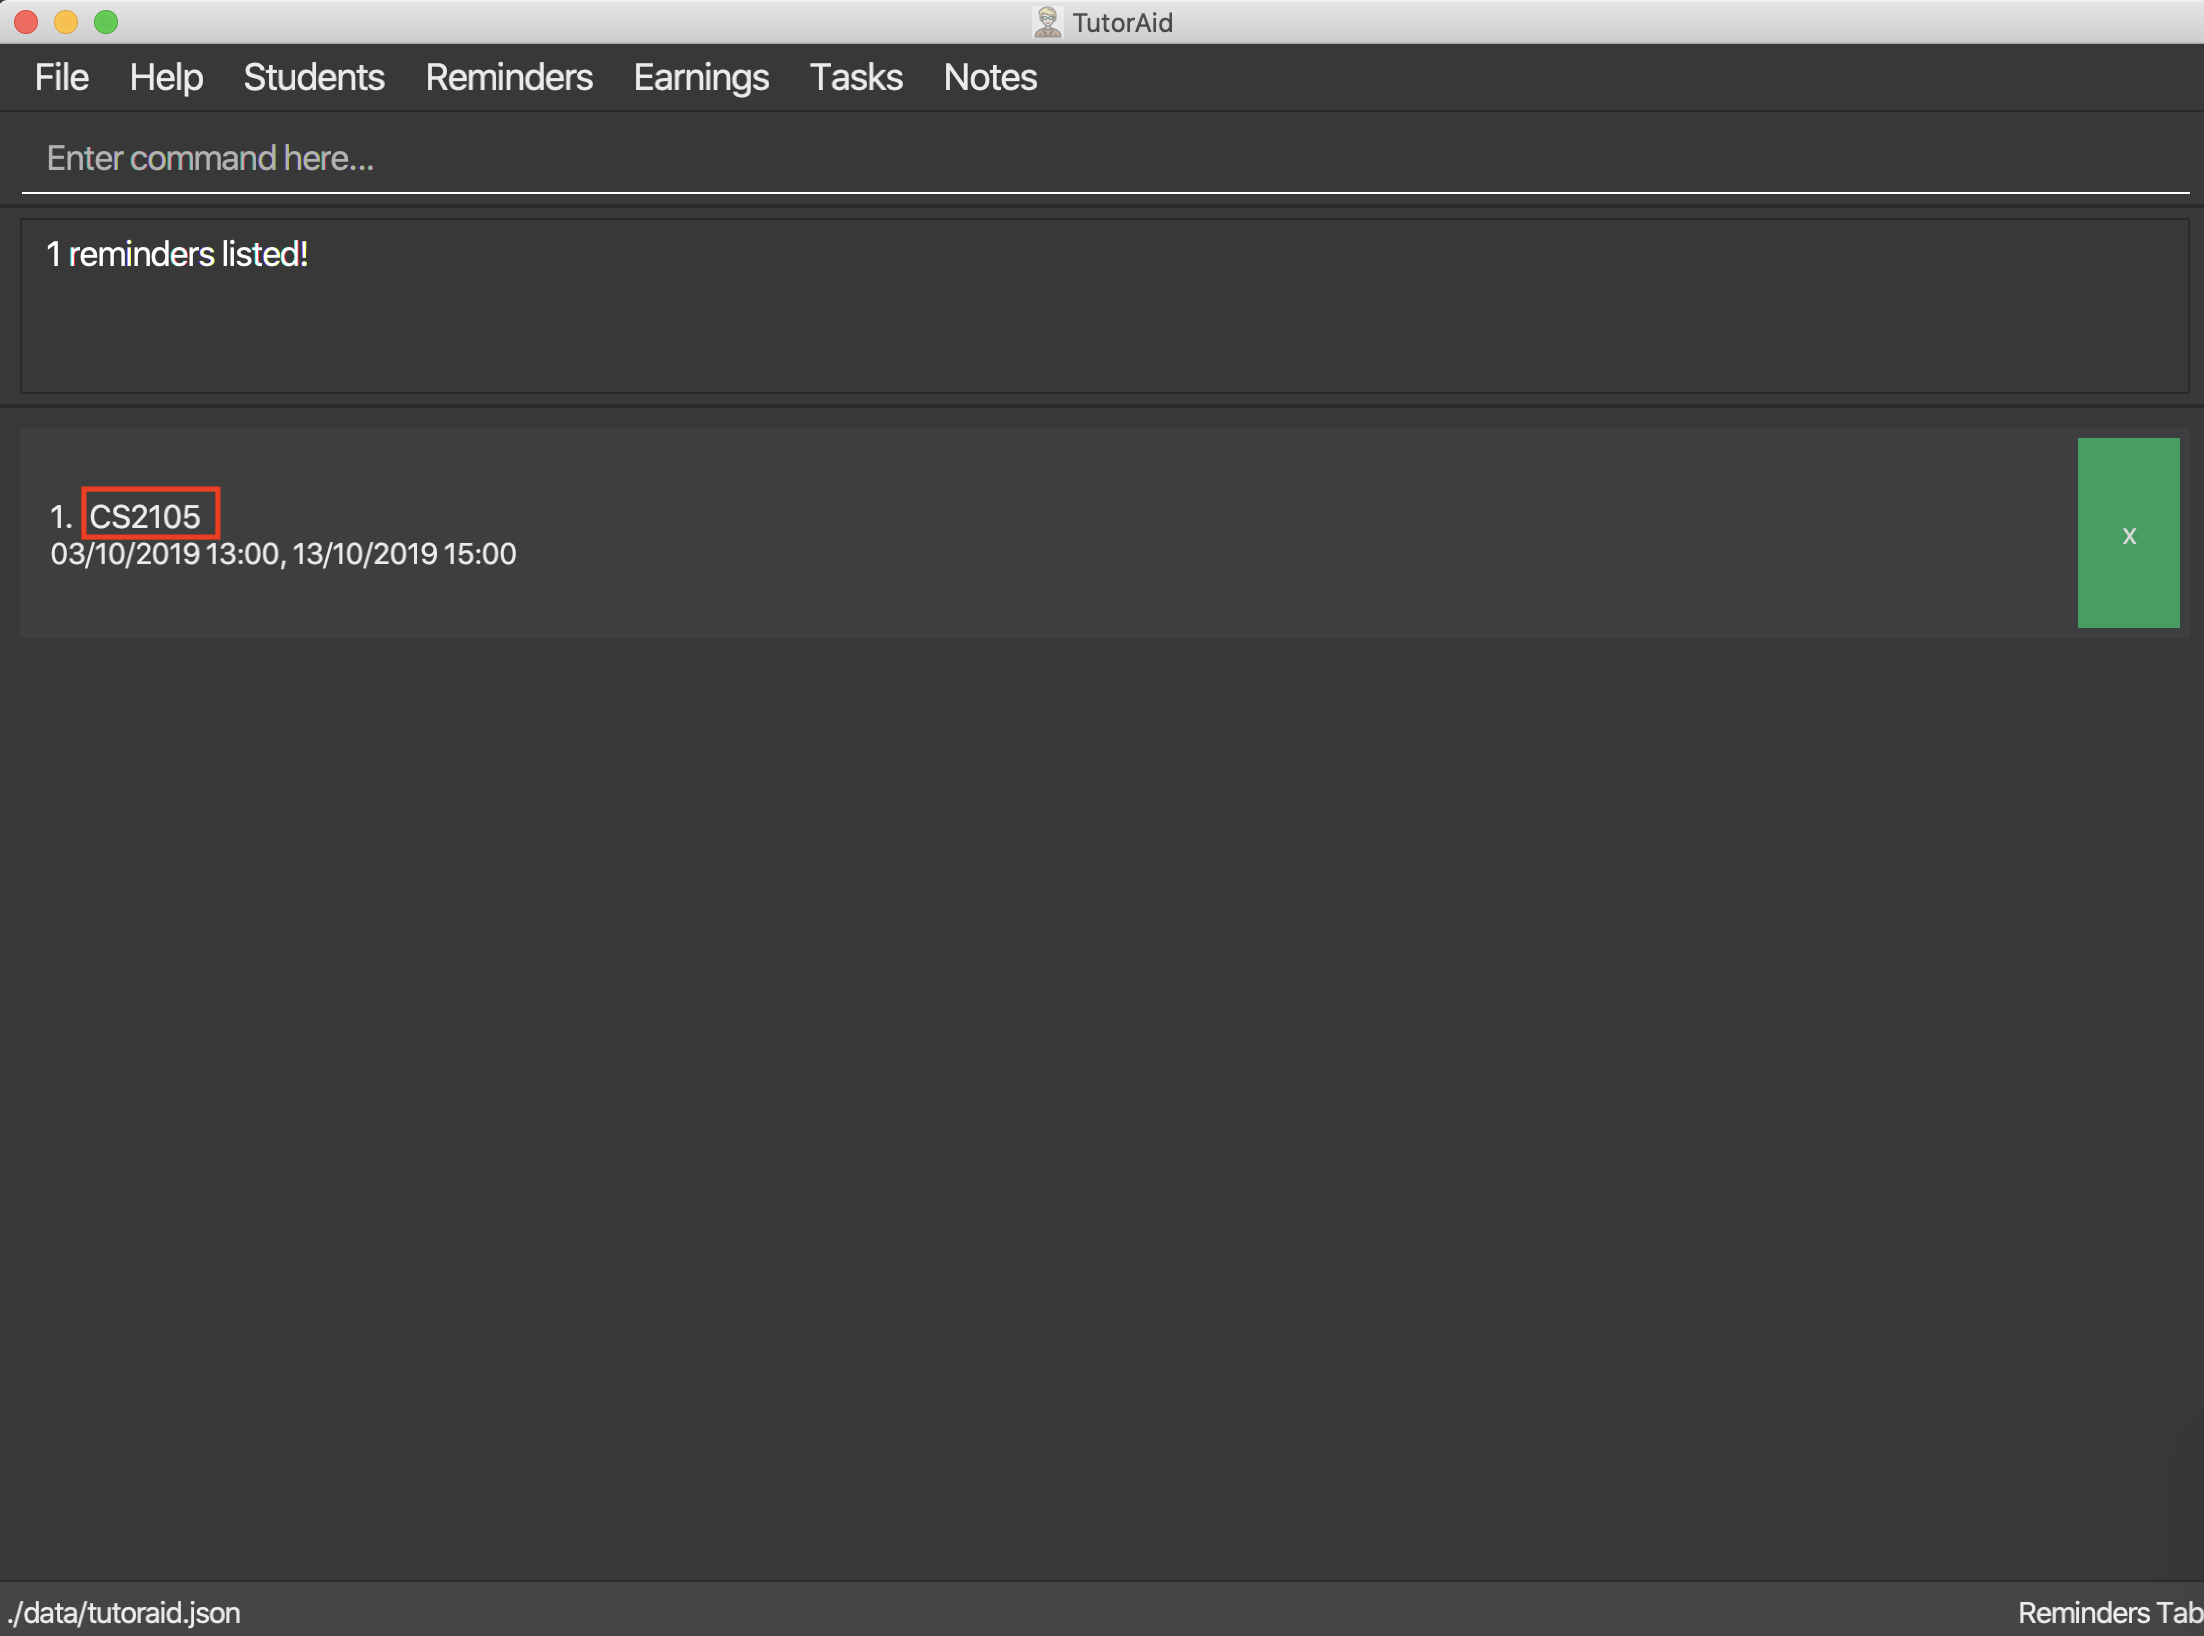
3.6.3. Finding Reminders based on Description : find_reminder_by_description
Find specific reminders by description and list them.
Format: find_reminder_by_description DESCRIPTION …
Examples:
-
find_reminder_by_description CS2103T -
find_reminder_by_description CS2103T, cs2100
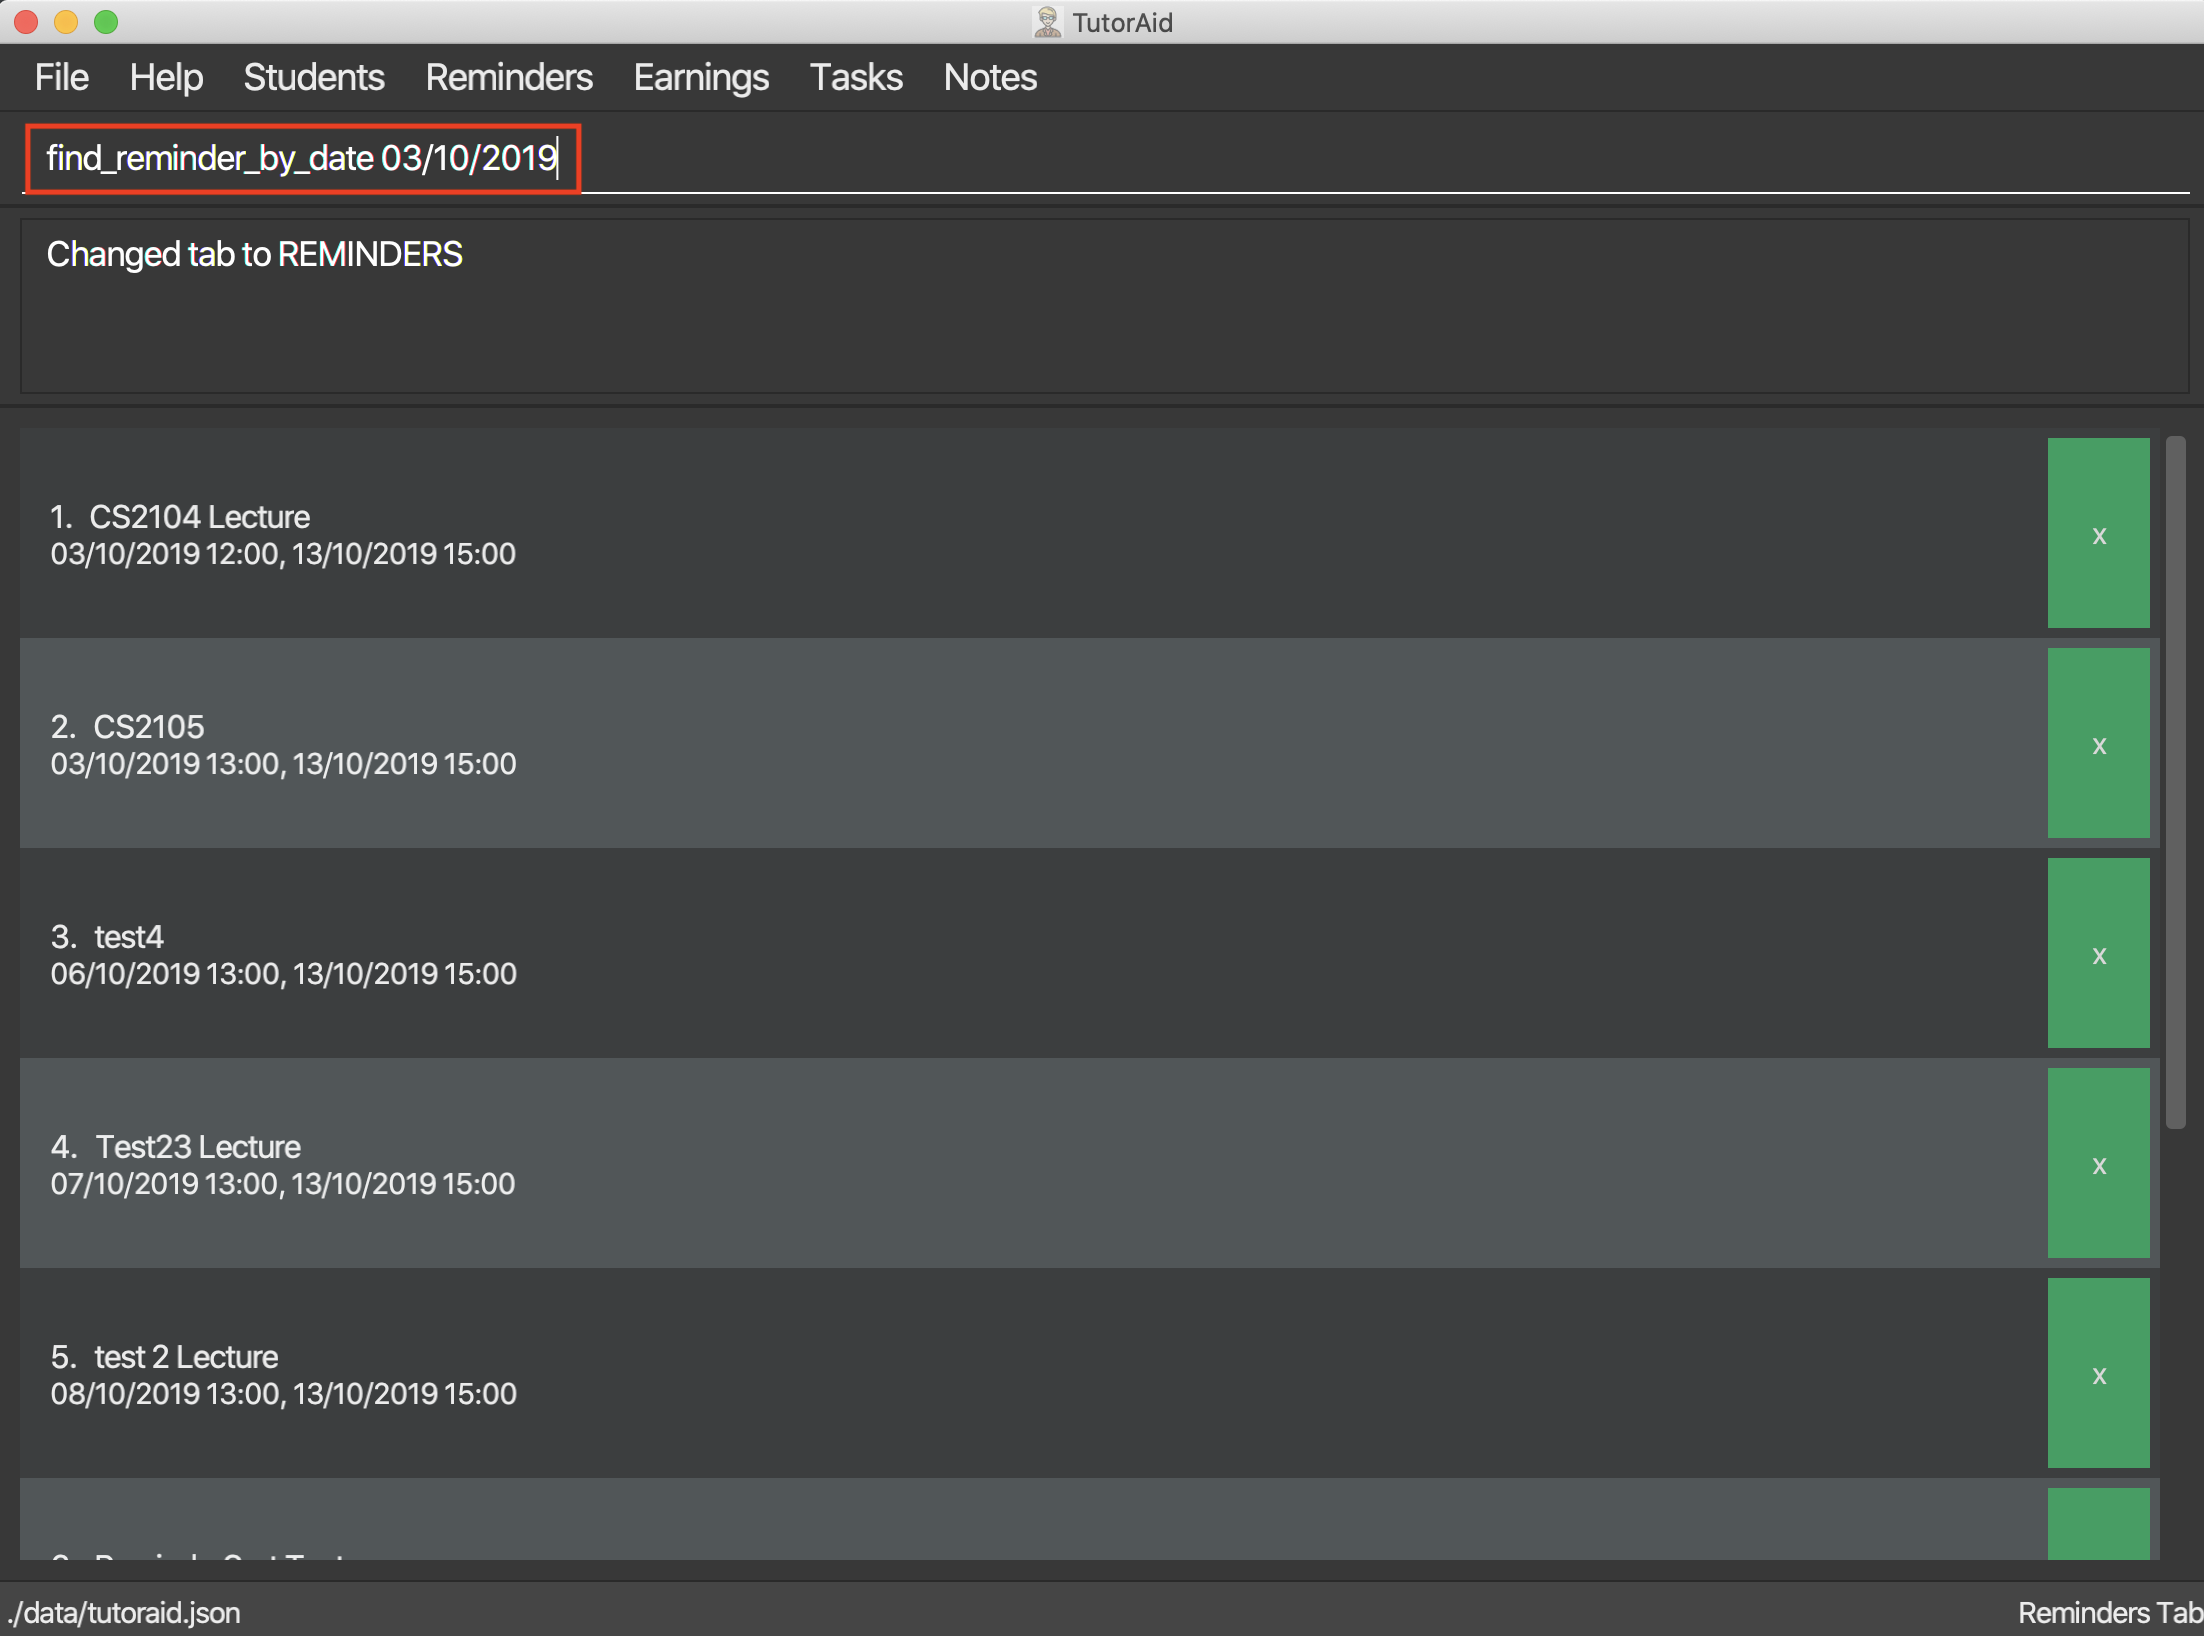
3.6.4. Finding Reminders based on Date : find_reminder_by_date
Find specific reminders by date and list them.
Format: find_reminder_by_date DATE …
Examples:
-
find_reminder_by_date 13/10/2019
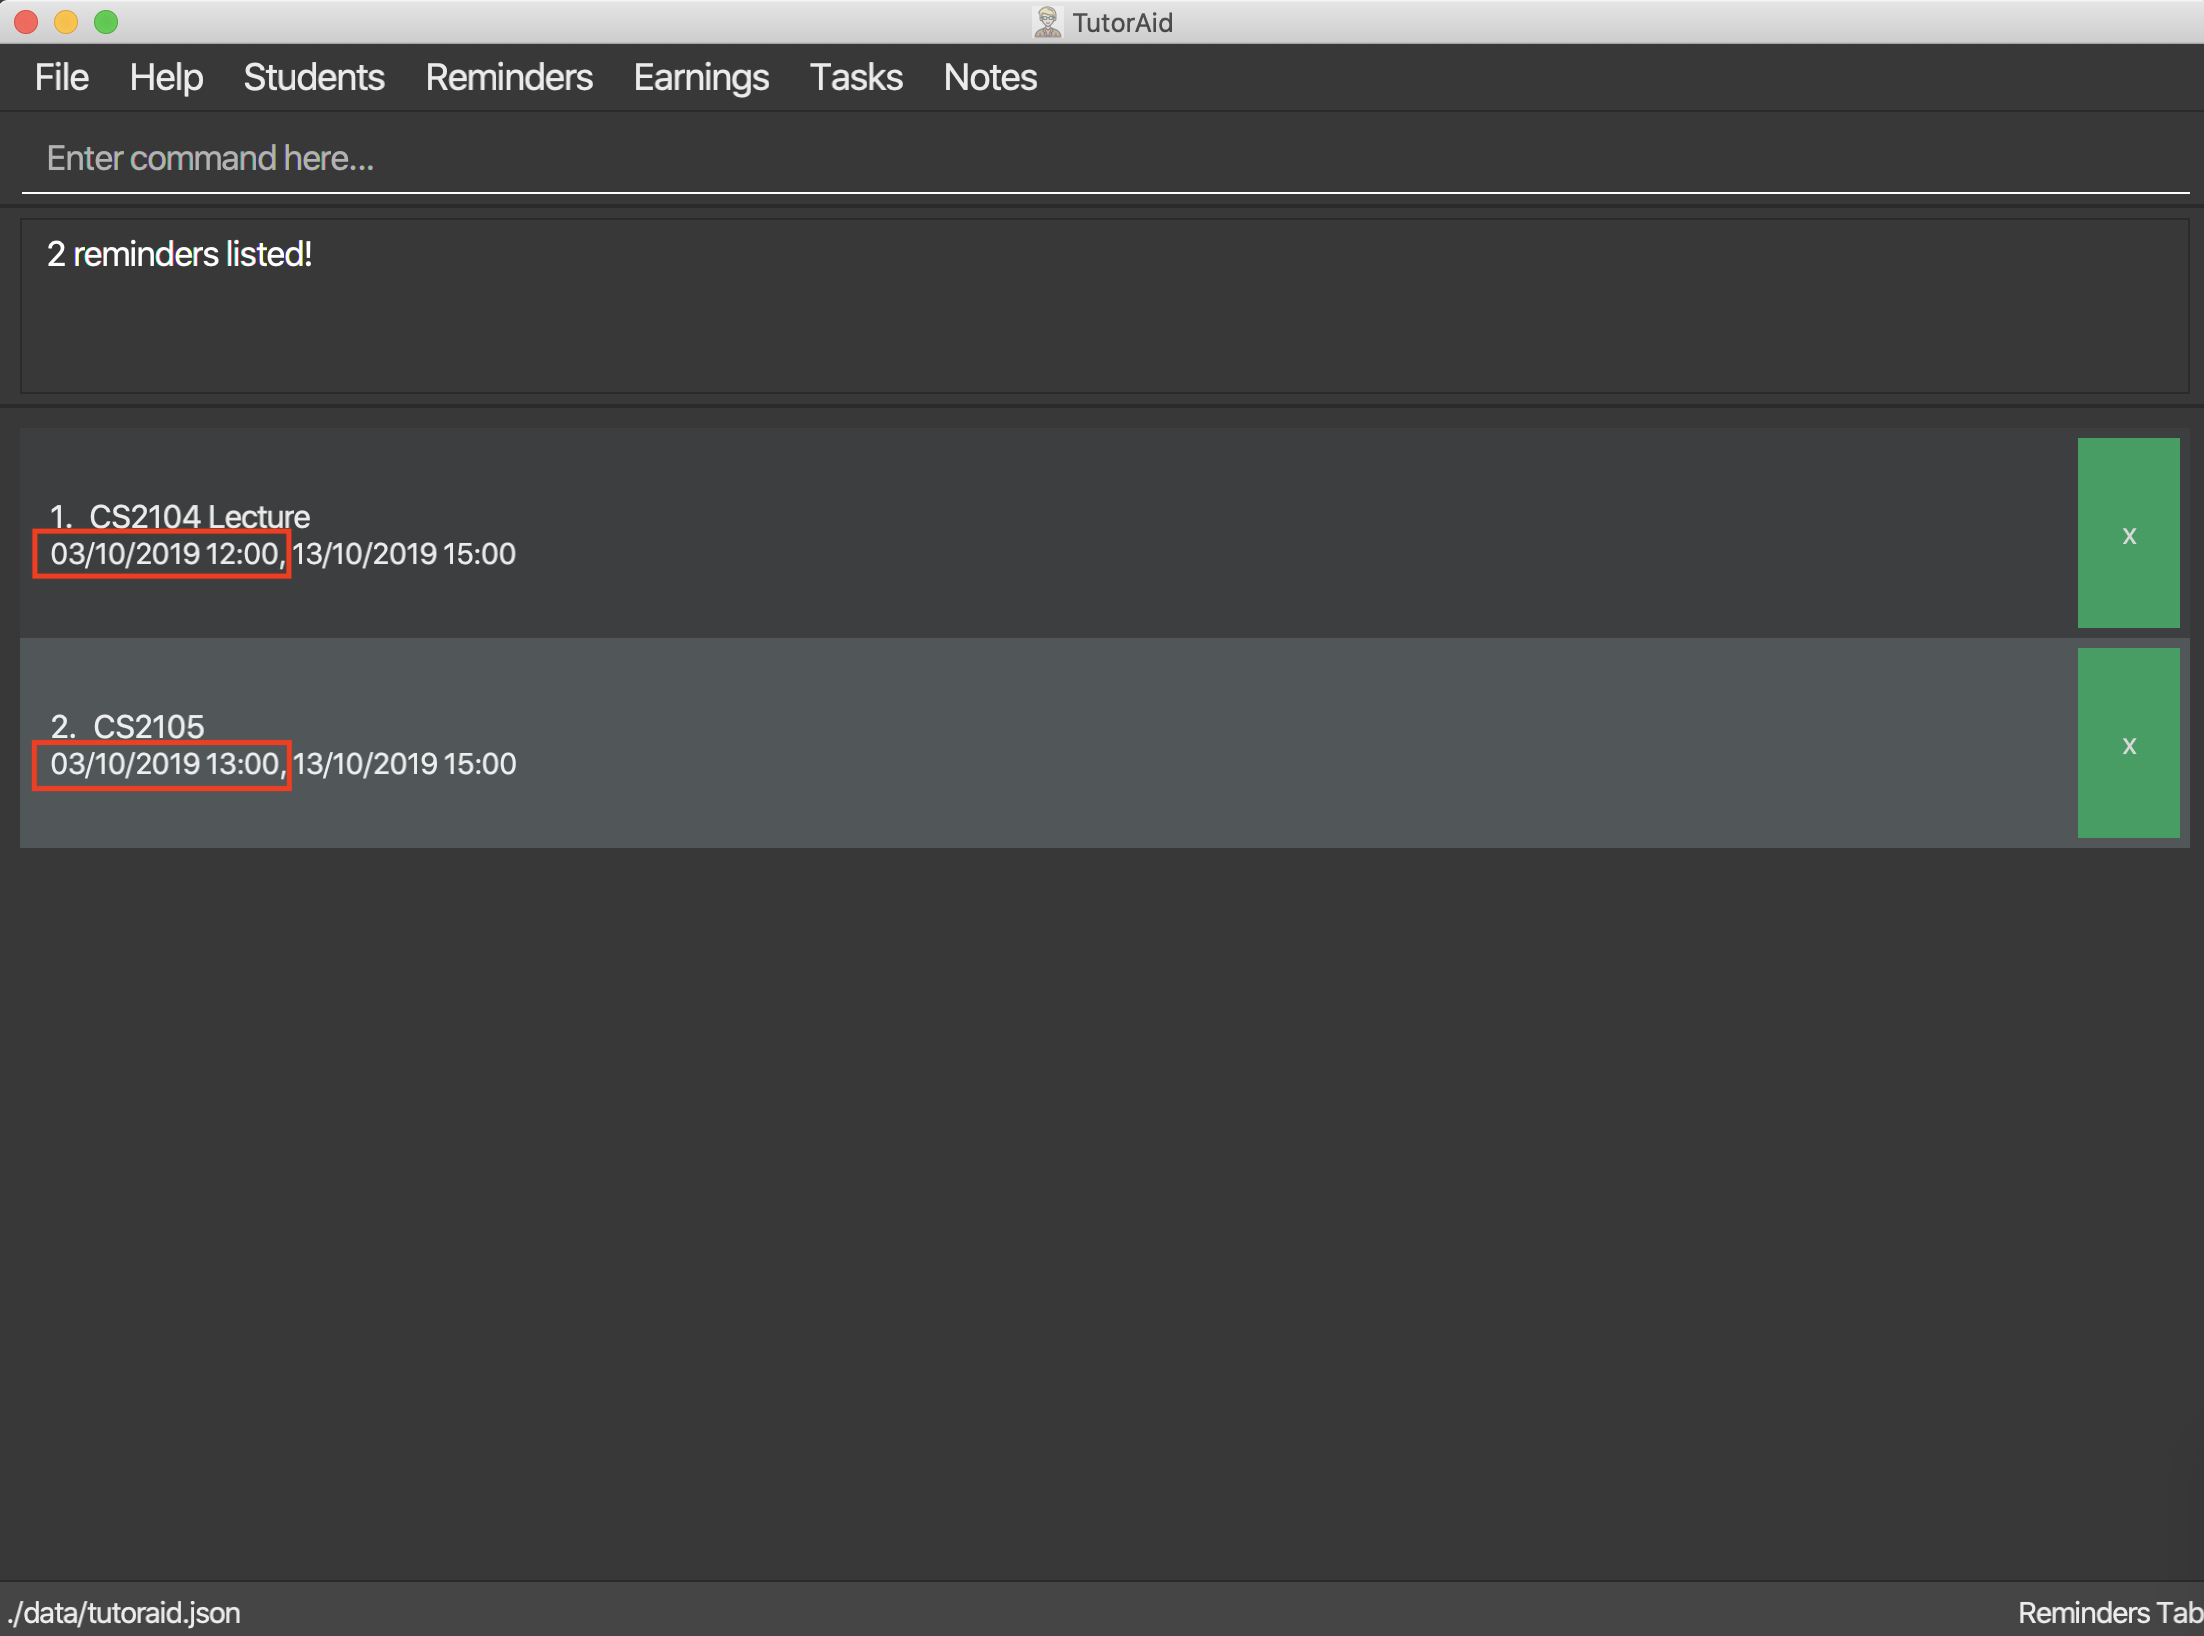
3.6.5. Listing all reminders : list_reminder
List all reminders.
Format: list_reminder
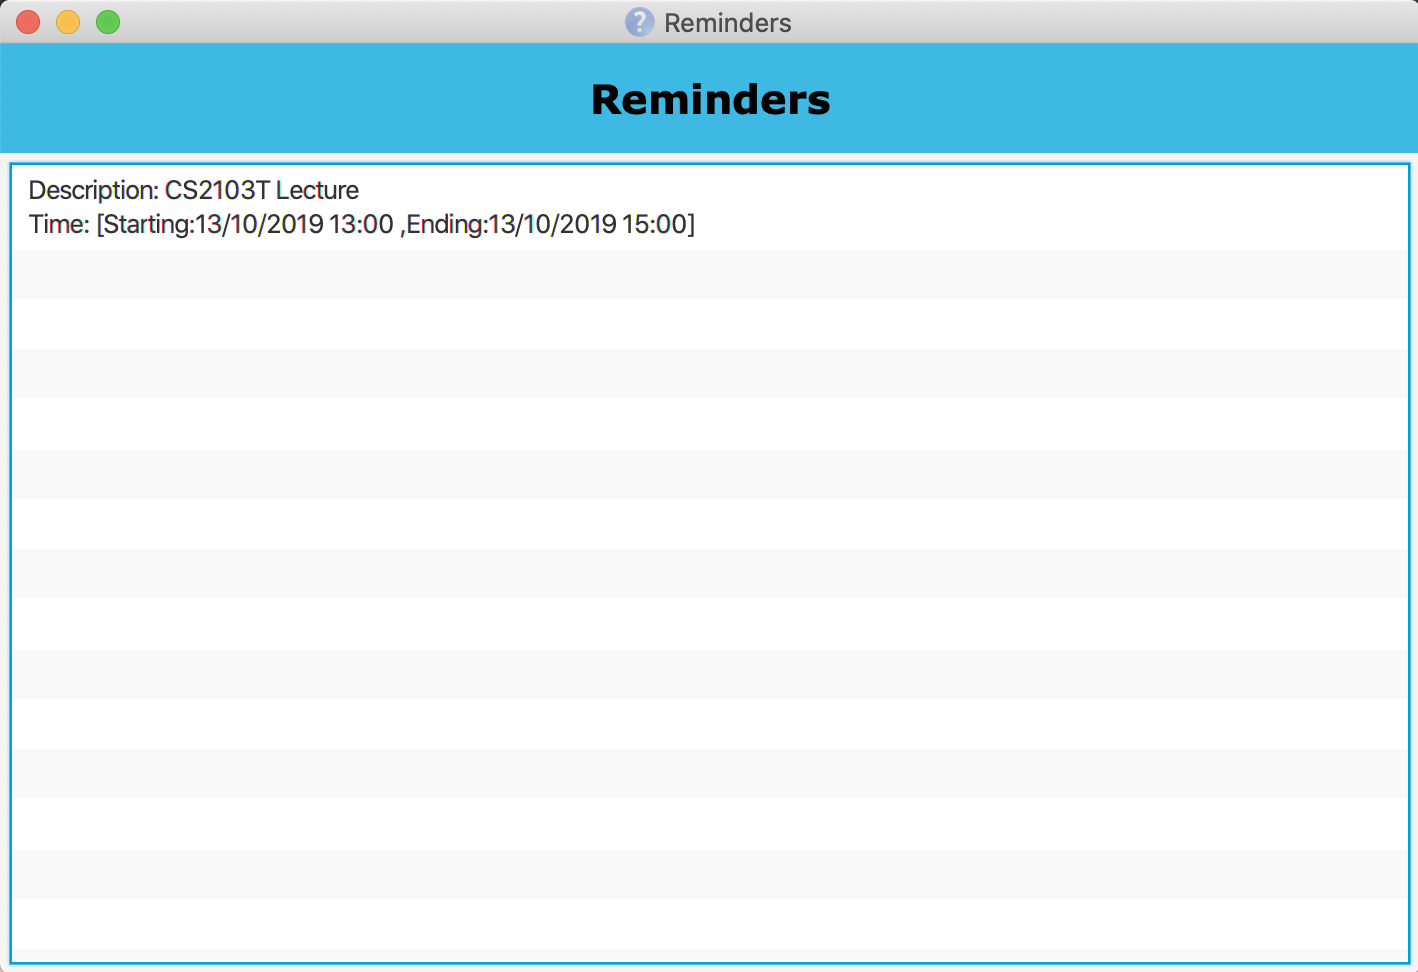
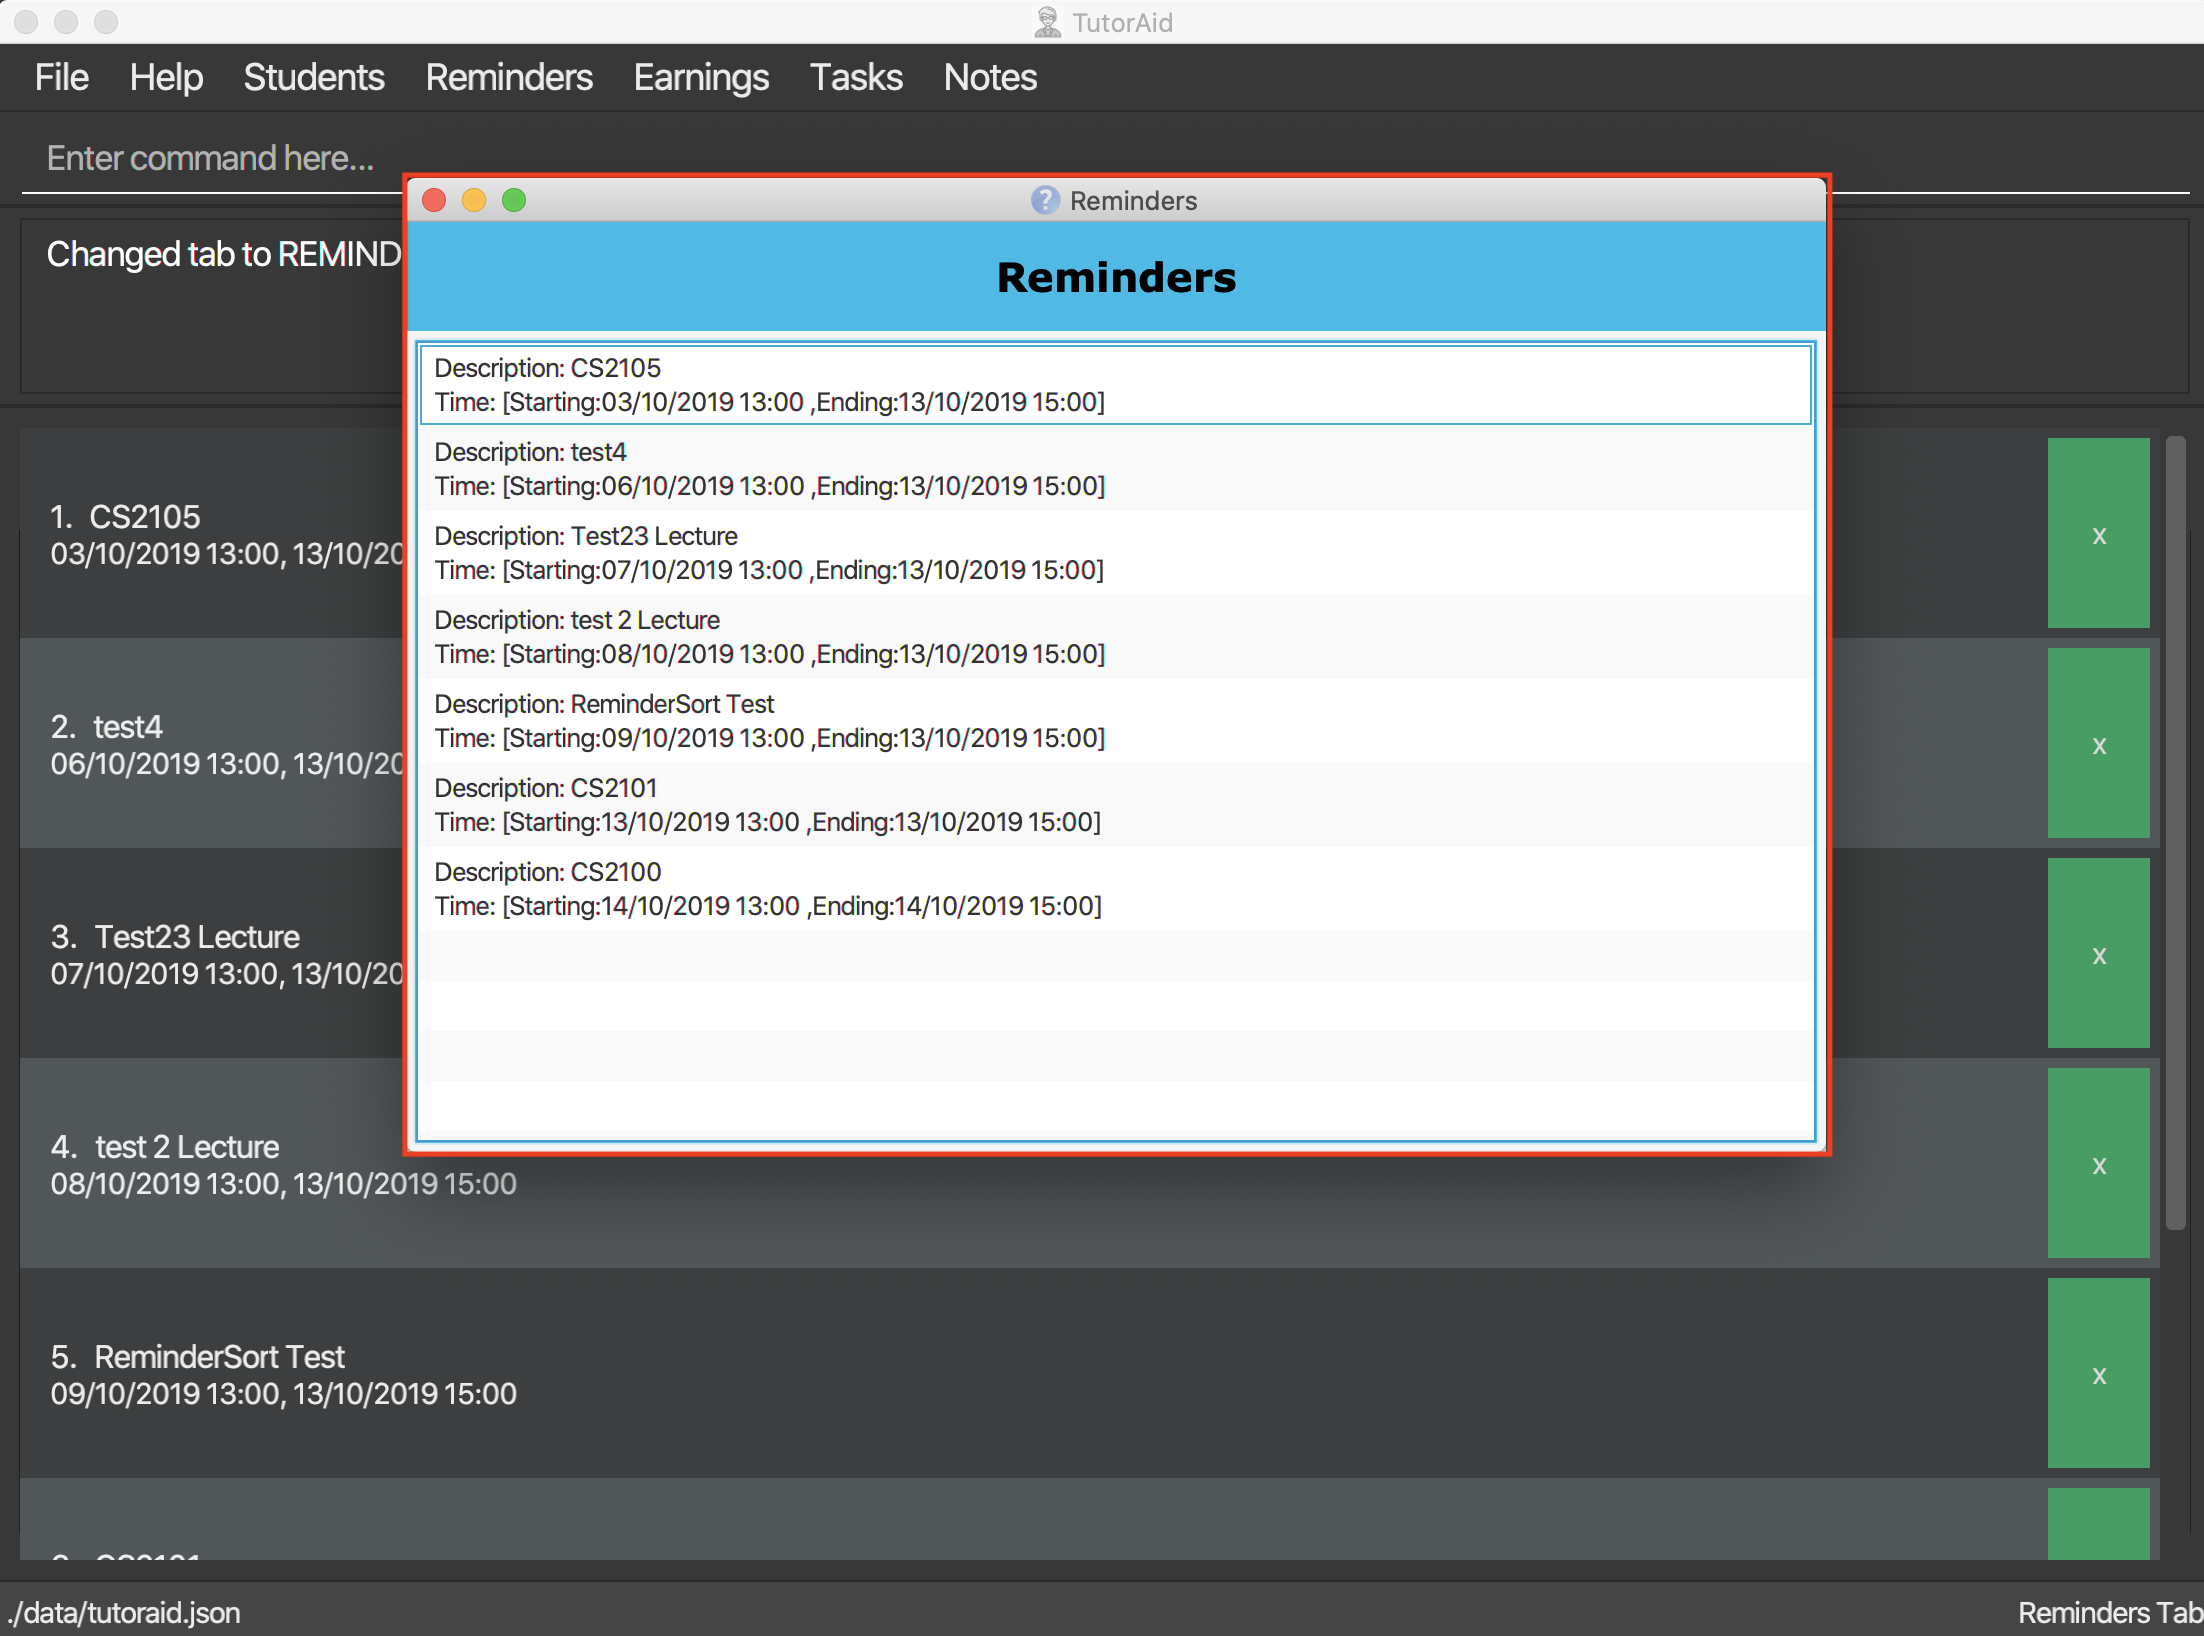
3.6.6. Reminder Window
The Reminder Window will pop up when Tutoraid is first loaded up.
It will list all the Reminders at hand.
3.7. Earnings
3.7.1. Add Earnings: add_earnings
Adds Earnings to the list of earnings.
Format: add_earnings d/DATE type/TYPE c/CLASSID amt/AMOUNT
Examples:
-
add_earnings d/19/09/2019 type/lab c/CS2103T amt/50.70
3.7.2. Update Earnings: update_earnings
Update Earnings in the list of earnings by adding one of the parameters at least.
Format: update_earnings INDEX d/DATE c/CLASSID amt/AMOUNT type/TYPE
Examples:
-
update_earnings 2 d/14/04/2020 type/lab
Not allowed to update earnings claim status through update_earnings method. Only can use claim_earnings
method.
|
3.7.3. Delete Earnings: delete_earnings
Delete Earnings in the list of earnings.
Format: delete_earnings INDEX
Examples:
-
delete_earnings 2
3.7.4. Total Earnings: total_earnings
Gives the user the total earnings earned by the user.
Format: total_earnings
Example:
-
total_earnings
3.7.5. Find Earnings: find_earnings
Find Earnings in the list of earnings.
Format: find_earnings keywords …
Examples:
-
find_earnings CS2103T
If more than one keyword is used, do not add commas between each keyword.
Partial matching is allowed as well for this command. find_earnings a will
match with apple, for example.
|
3.7.6. Claim Earnings: claim_earnings
Changes the user the earnings status in the list of earnings.
Format: claim_earnings INDEX c/CLASSID

Examples:
-
claim_earnings 2 claim/rejected
Only approved/rejected/processing/pending submission statuses are allowed.
Only one status is allowed at a time.
|
3.7.7. Auto Add Weekly Earnings: weekly_earnings
Automates the additon of earnings.
Format: weekly_earnings INDEX count/NUMBER_OF_WEEKS

Examples:
-
weekly_earnings 2 count/2 -
weekly_earnings 3 count/13
3.7.8. Adds Weekly Earnings: auto
Adds all the earnings that were invoked by weekly_earnings.
Format: auto
Example:
-
auto
3.8. Notes
3.8.1. Add Note: addnote
Adds Note to the list of notes.
Format: addnote c/MODULE_CODE type/CLASS_TYPE note/NOTE_CONTENT
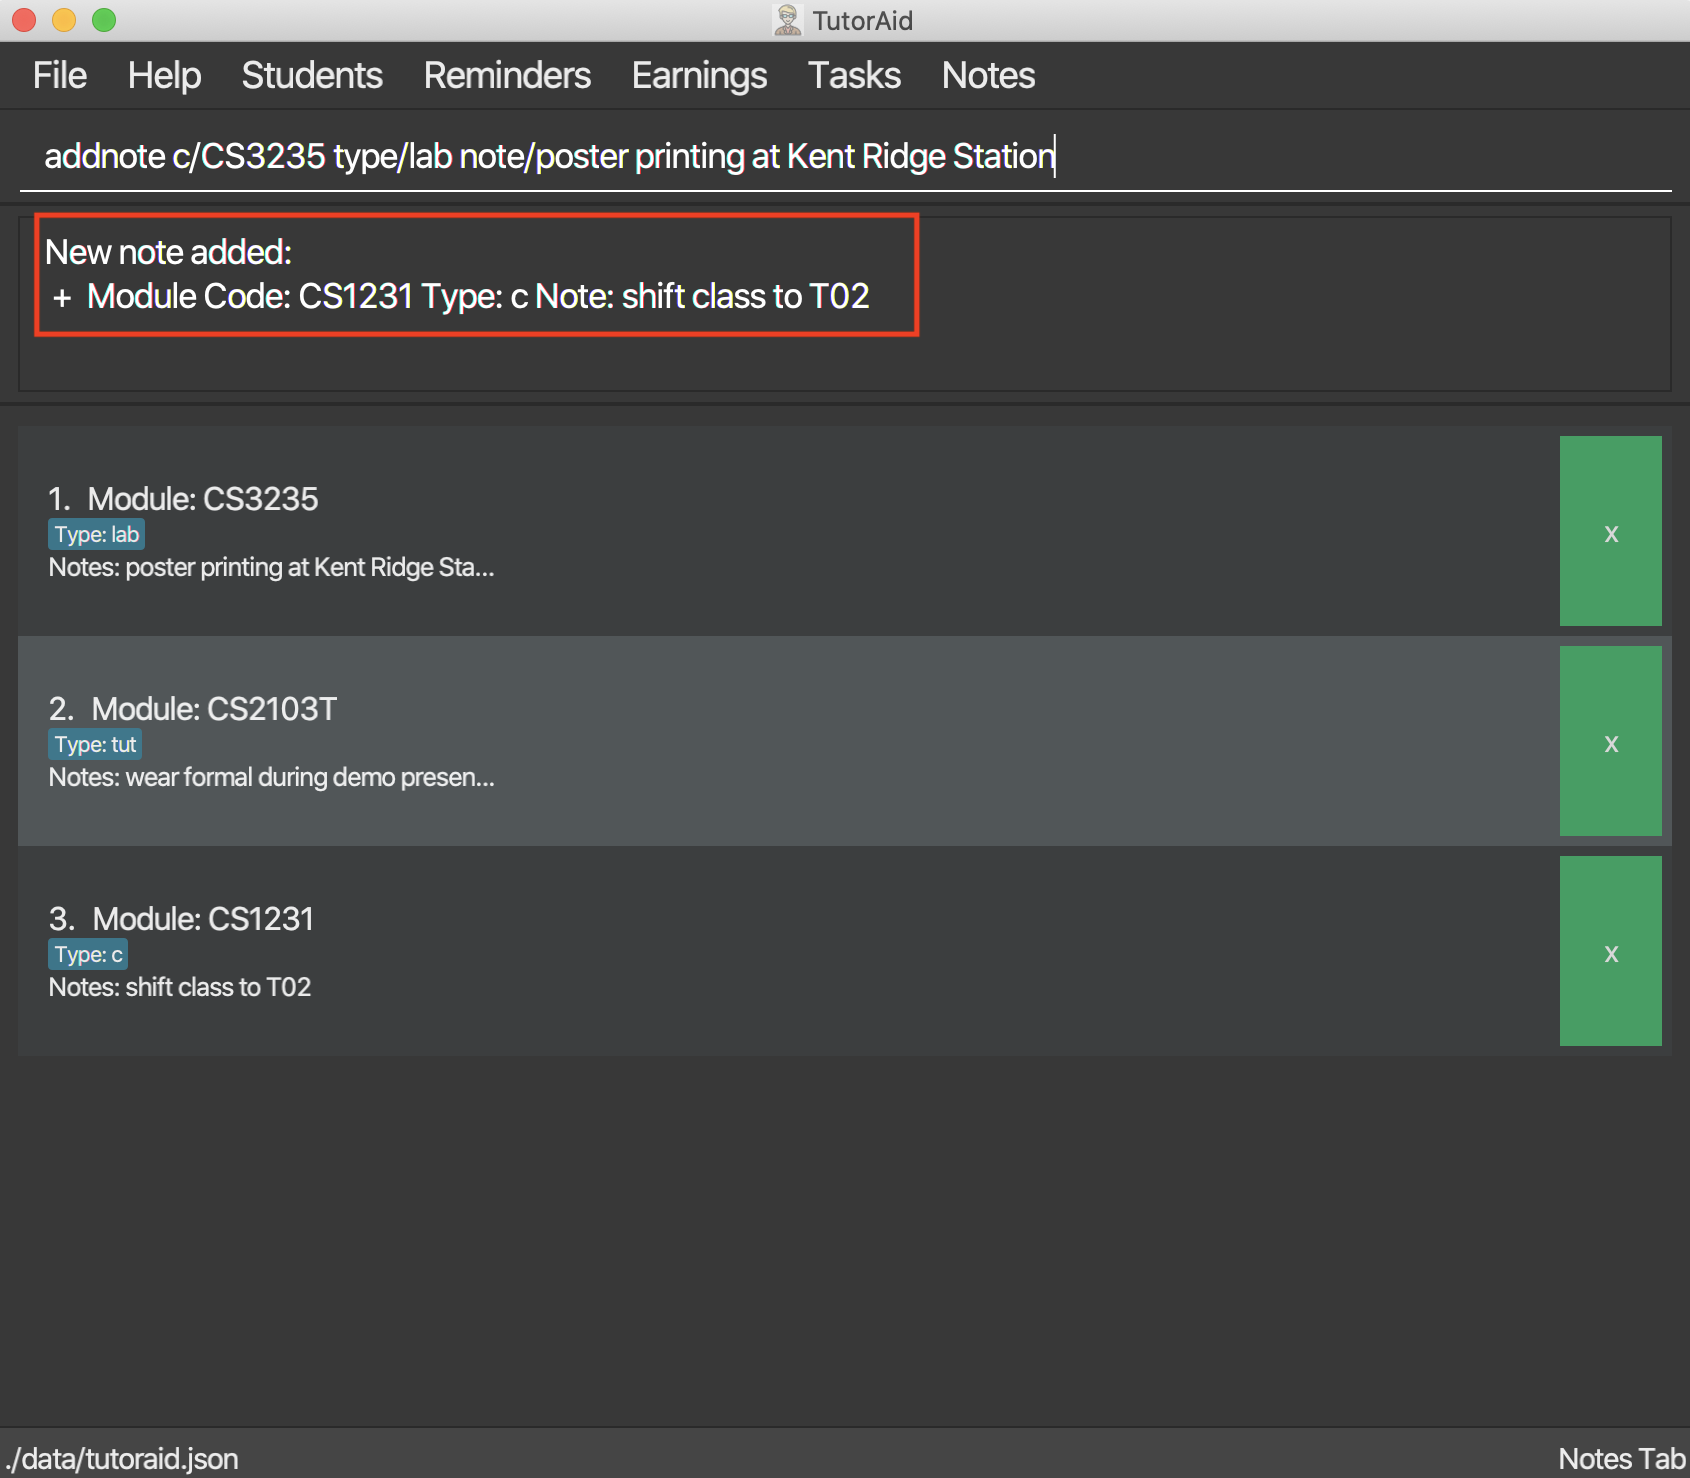
Examples:
-
addnote c/CS2103T type/lab note/Check for project submission date
Only tutorials/ tut / lab / consultations / c / sectionals / s
arguments are allowed for TYPE.
|
3.8.2. Edit Note: editnote
To provide a great flexibility, editing of the notes is allowed.
Update any Note in the list of notes.
Format: editnote INDEX c/MODULE_CODE type/CLASS_TYPE note/NOTE_CONTENT
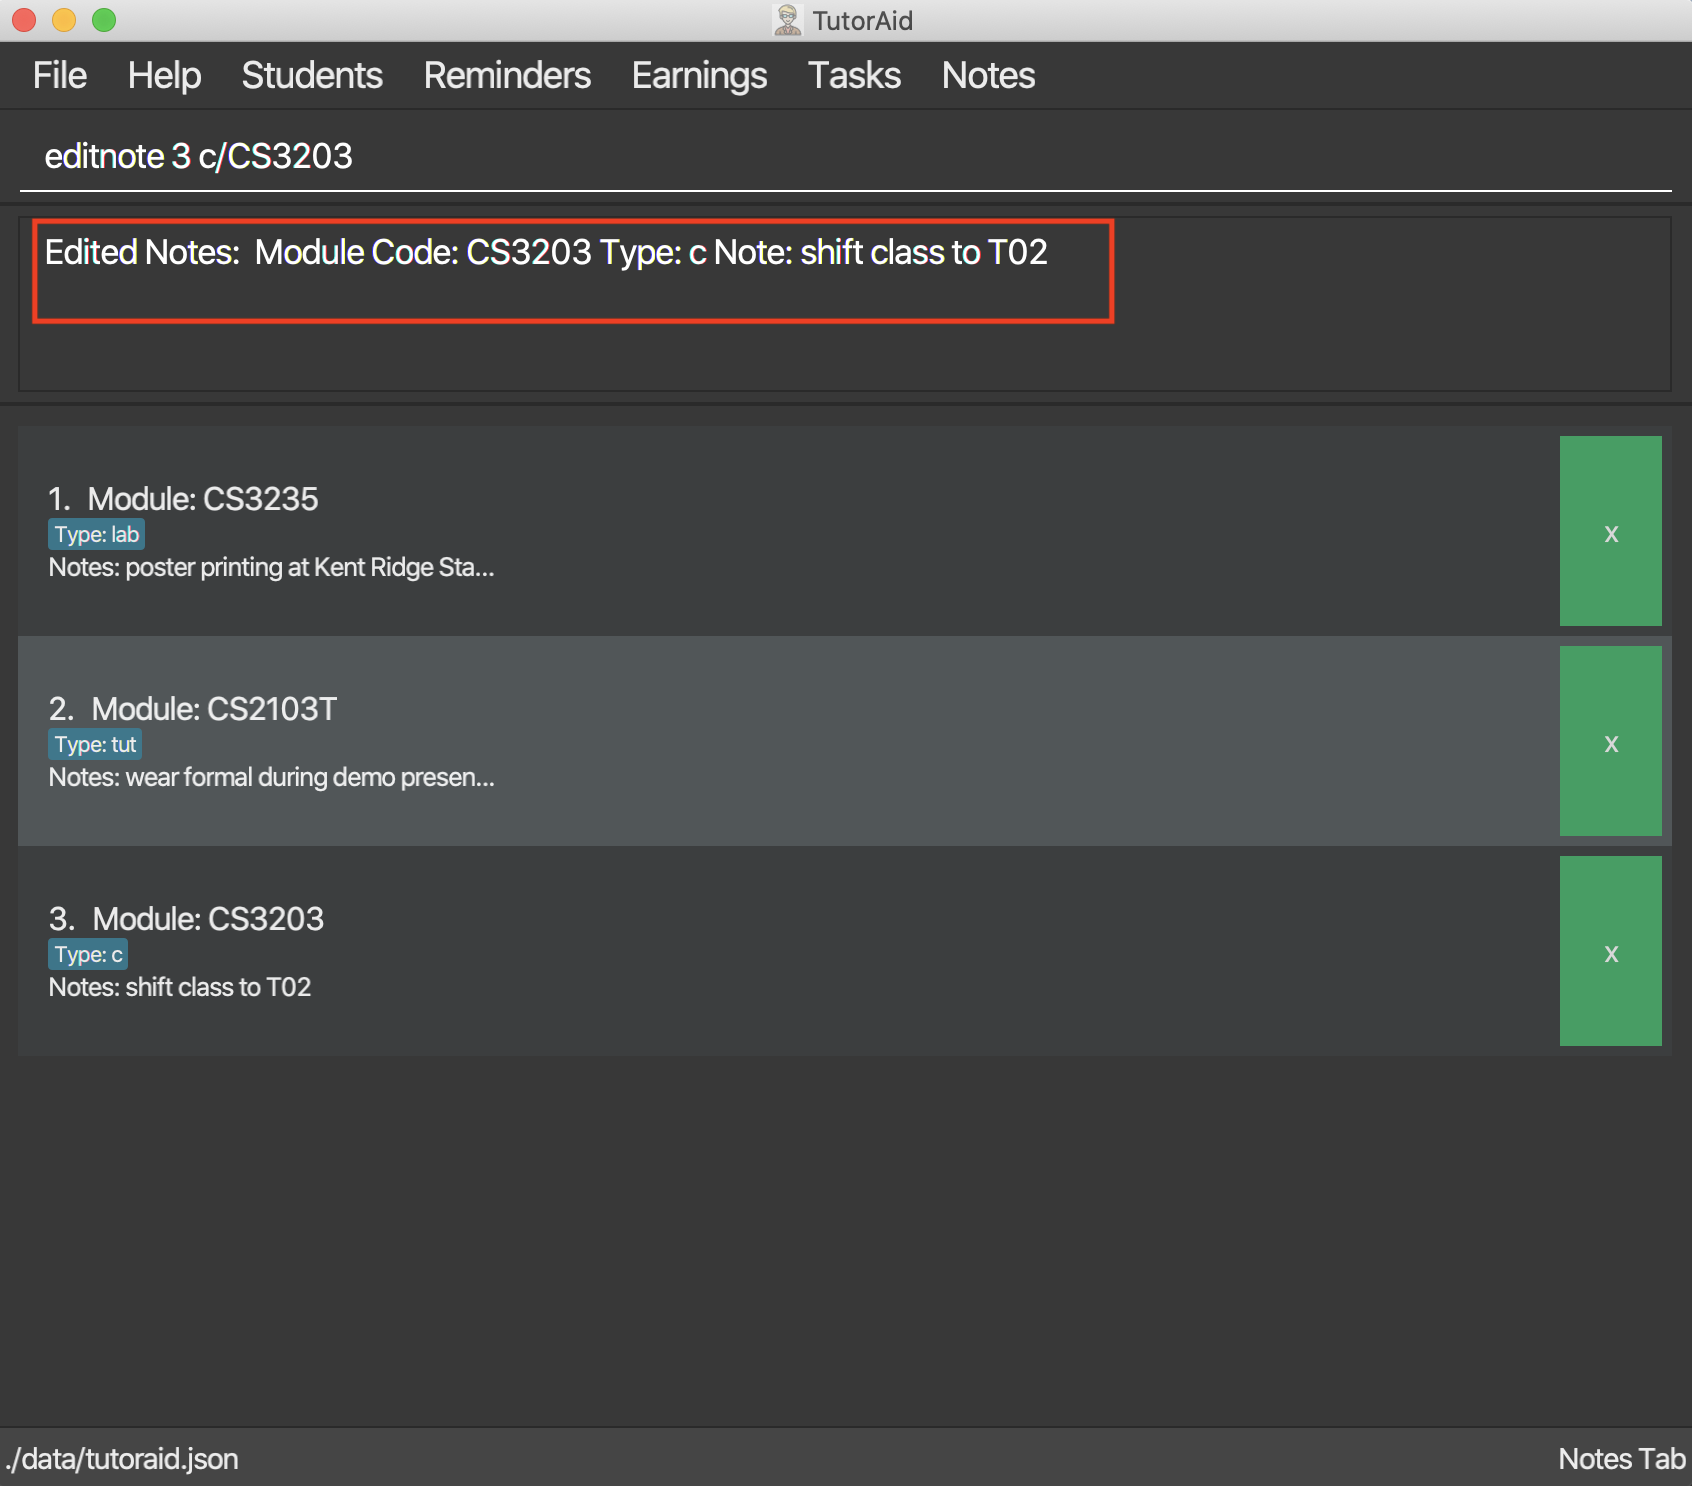
Examples:
-
editnote 1 c/CS2103T -
editnote 2 type/lab -
editnote 3 note/check for meeting time -
editnote 1 c/CS2103 type/tut note/update project content
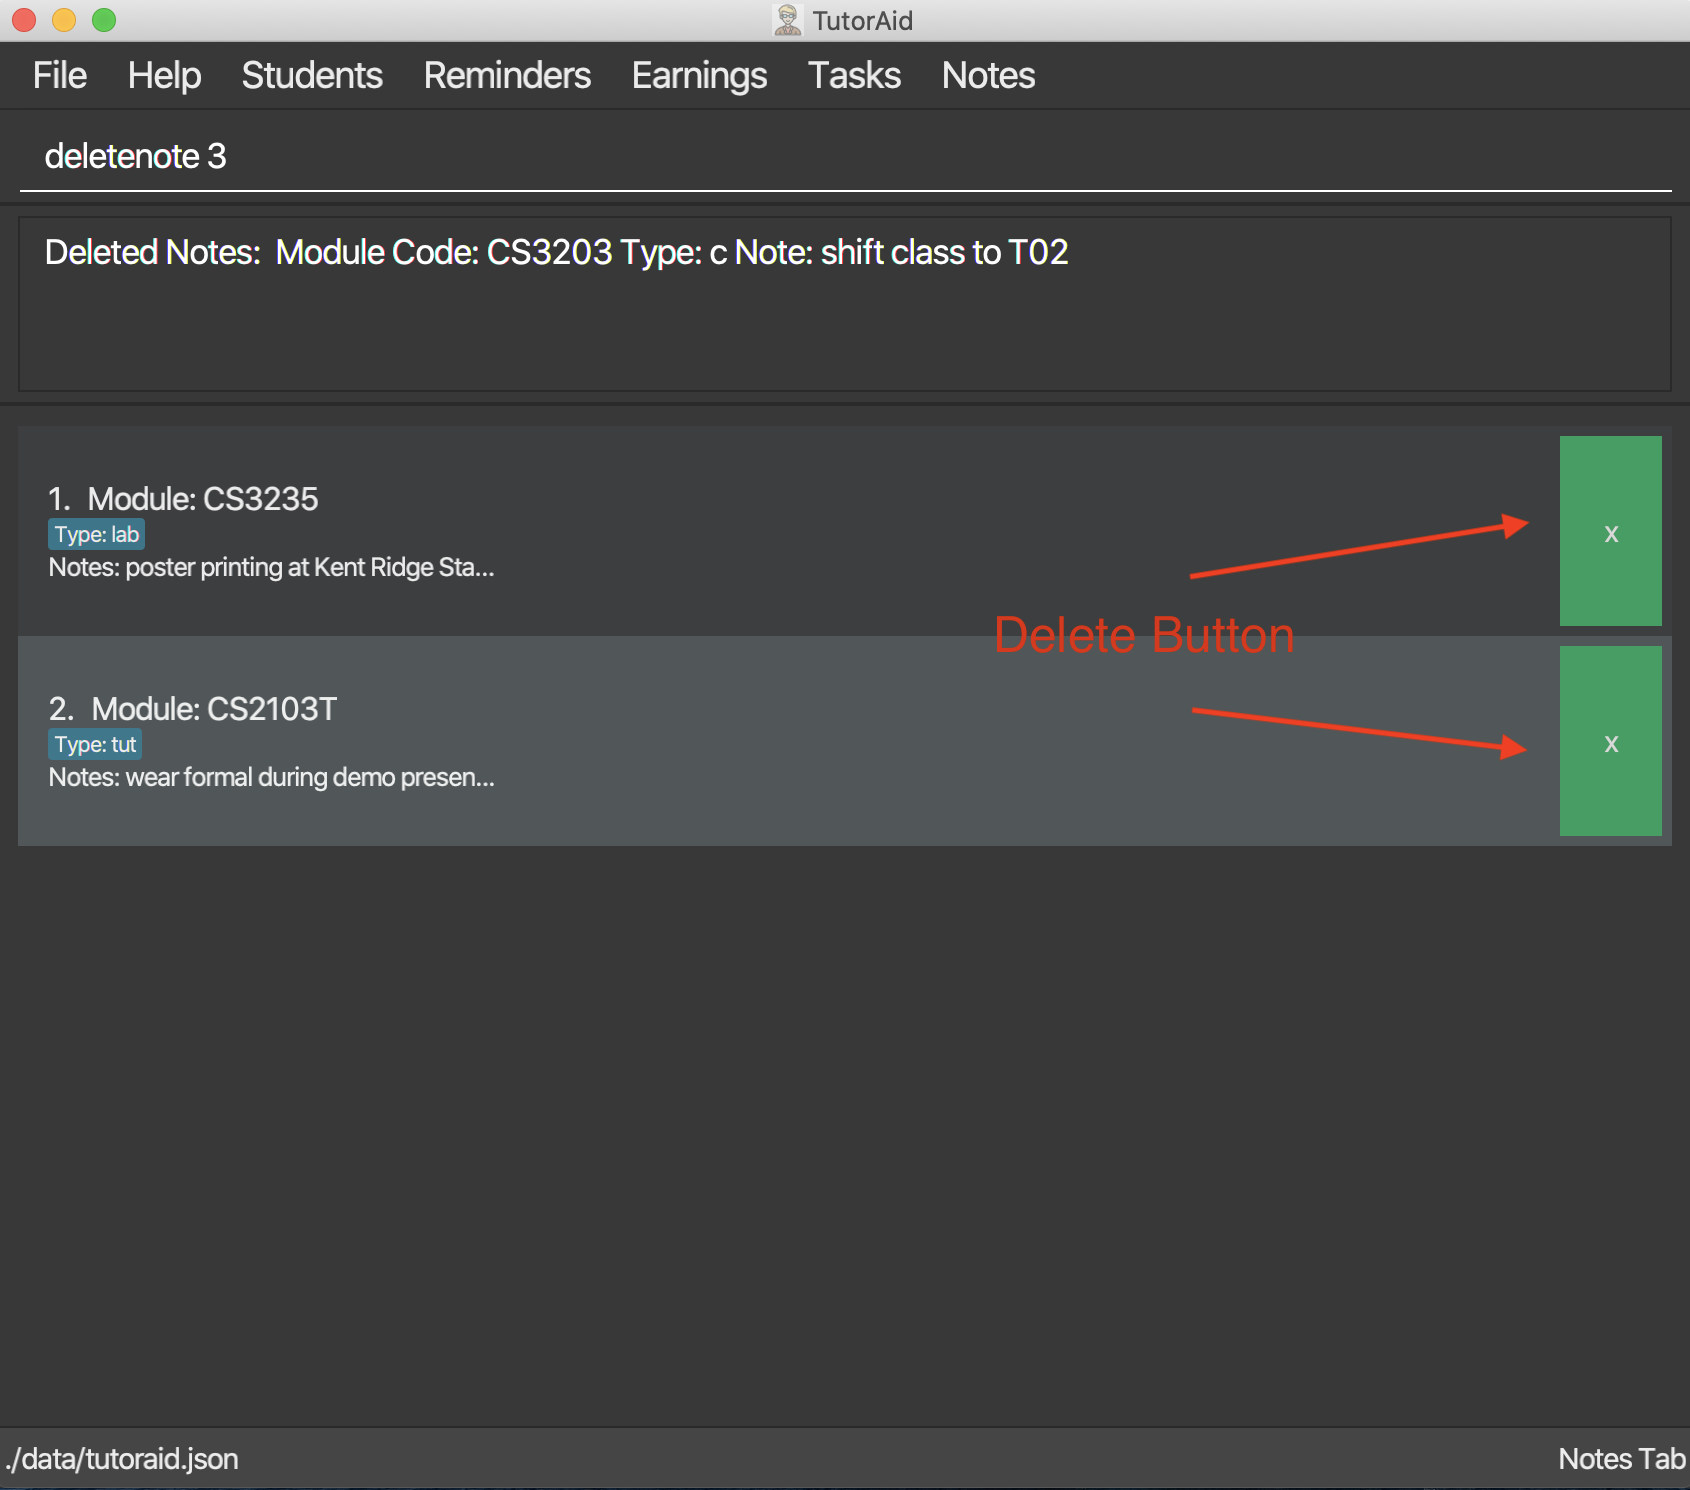
3.8.3. Delete Note: deletenote / deletebutton
Let’s say that if you would like to delete the note from the list there are two option available.
Option 1:
Delete Note in the list of notes.
Format: deletenote INDEX
Option 2: Delete Note with DeleteButton.
Examples:
-
deletenote 1 -
press the
xdelete button to delete the desire notes.
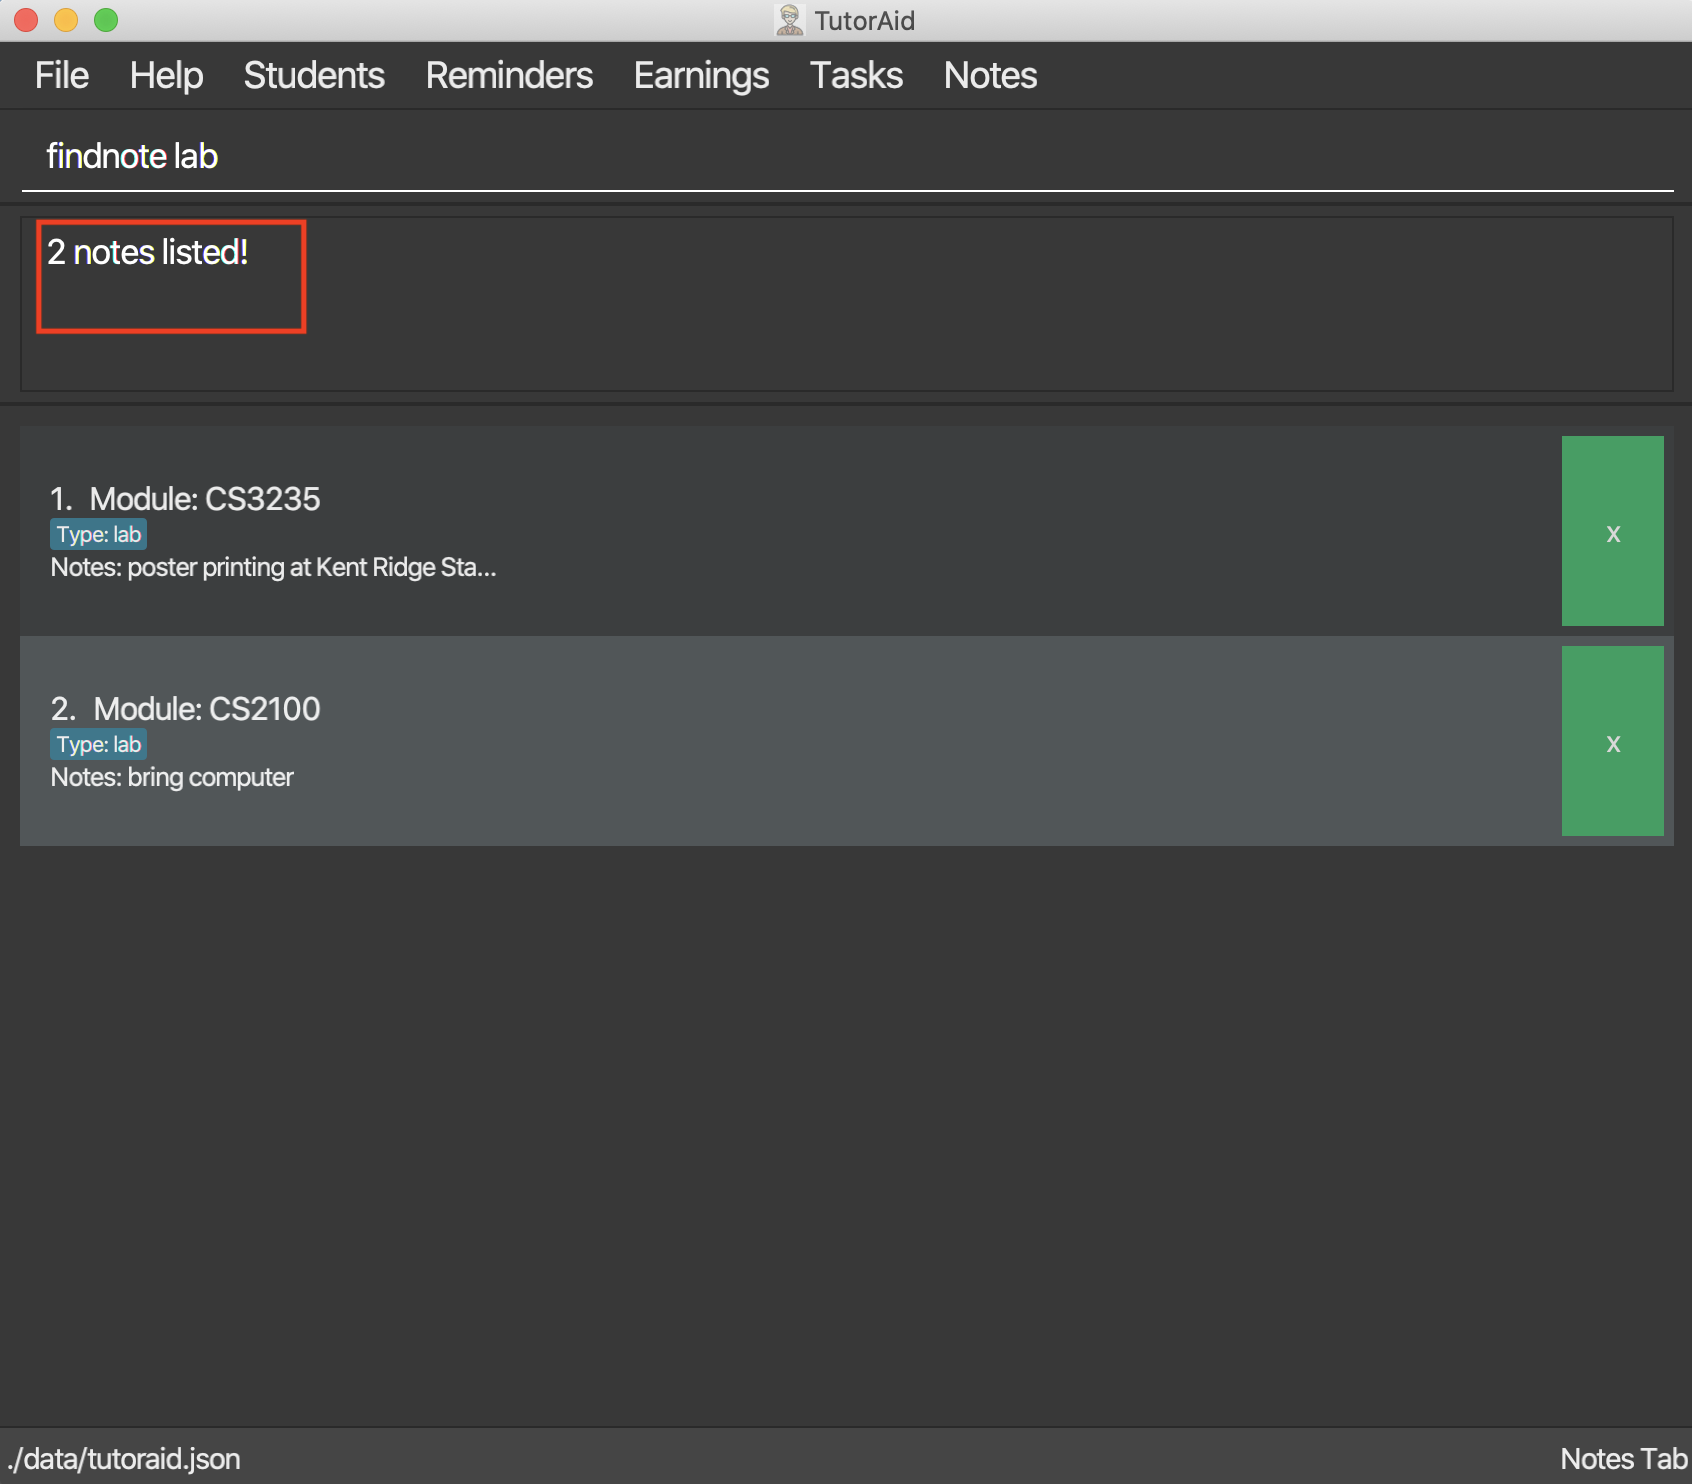
3.8.4. Find Note: findnote
In order to find the desire note, finding with keyword such as the module_code, class_type or note_content is allow.
Delete Note in the list of notes.
Format: findnote KEYWORD
Examples:
-
findnote CS2103T
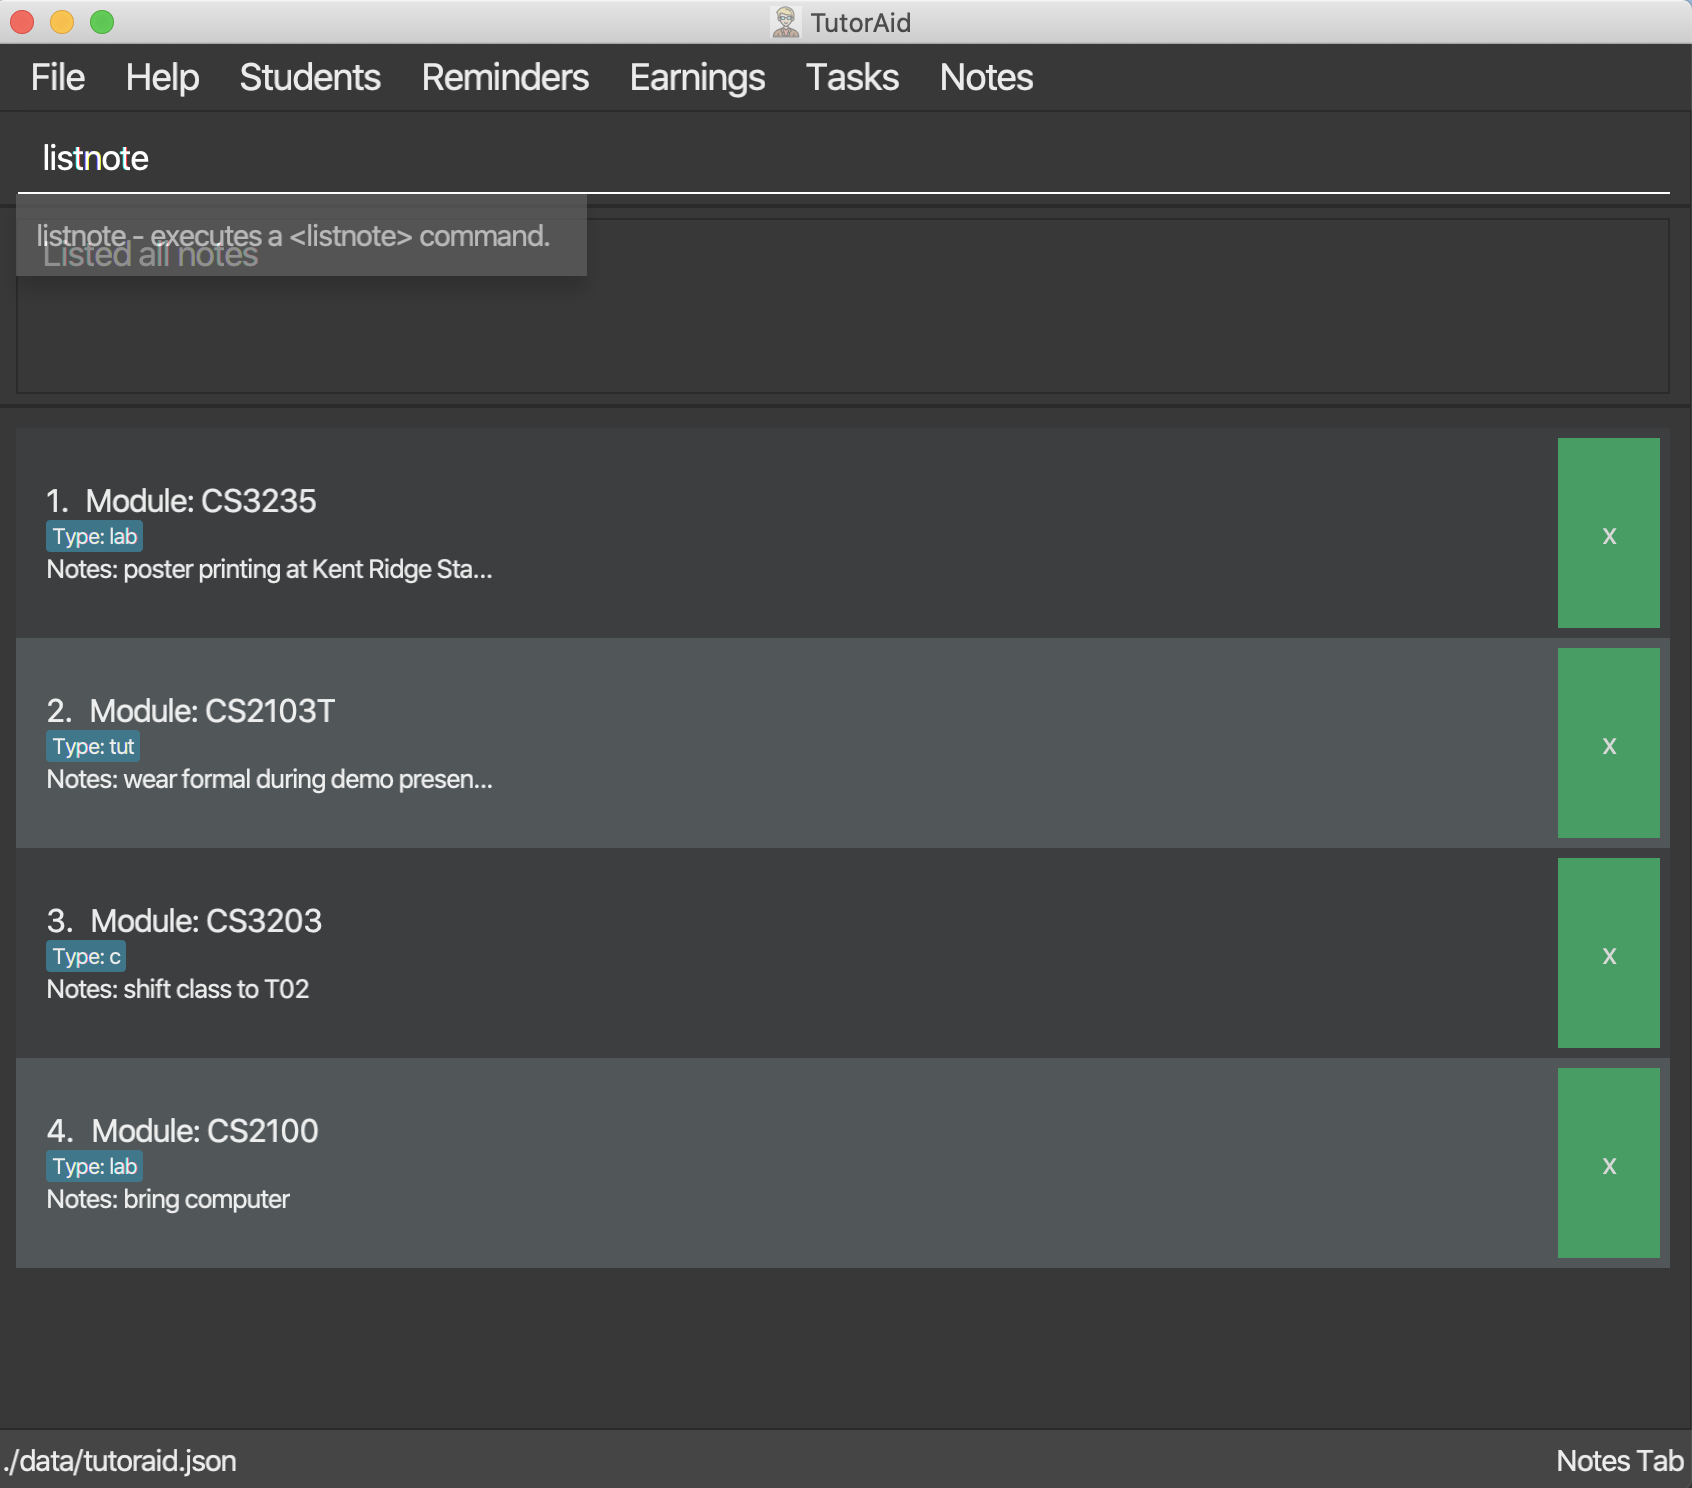
3.8.5. Listing all note : listnote
To view the list of note. Type listnote to view the full list of note.
List all note.
Format: listnote
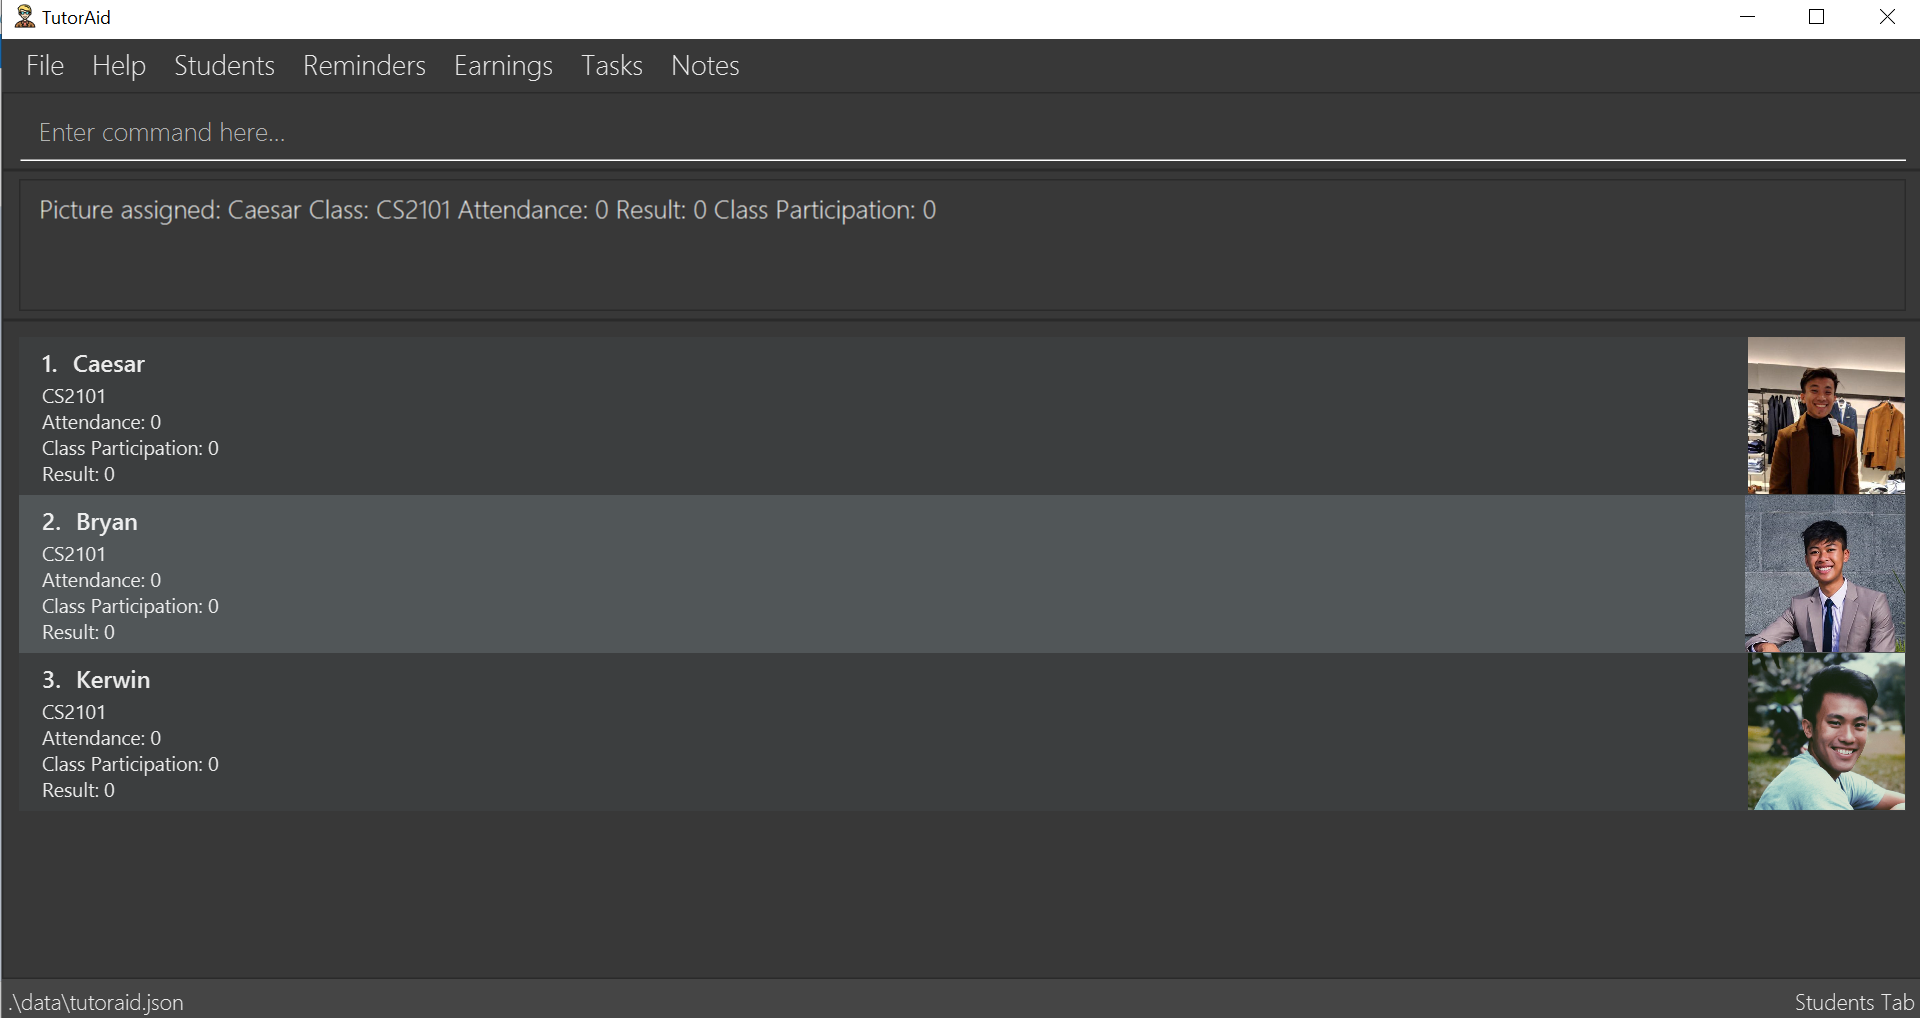
3.9. Student List
3.9.1. Add a student: 'add'
Adds a student to TutorAid.
Format: add n/NAME c/CLASSID
| You can add multiple students at a time by separating their names with a single ','. |
| Please also note that you can’t add students with the exact same name in the same class. e.g. You can add "Tom" in CS2030 and CS2040 but not 2 "Tom"s in CS2030. If there are students with the same first name in the class, please add their last name as well. |
Examples:
-
add n/Caesar,James,Todd c/CS2030
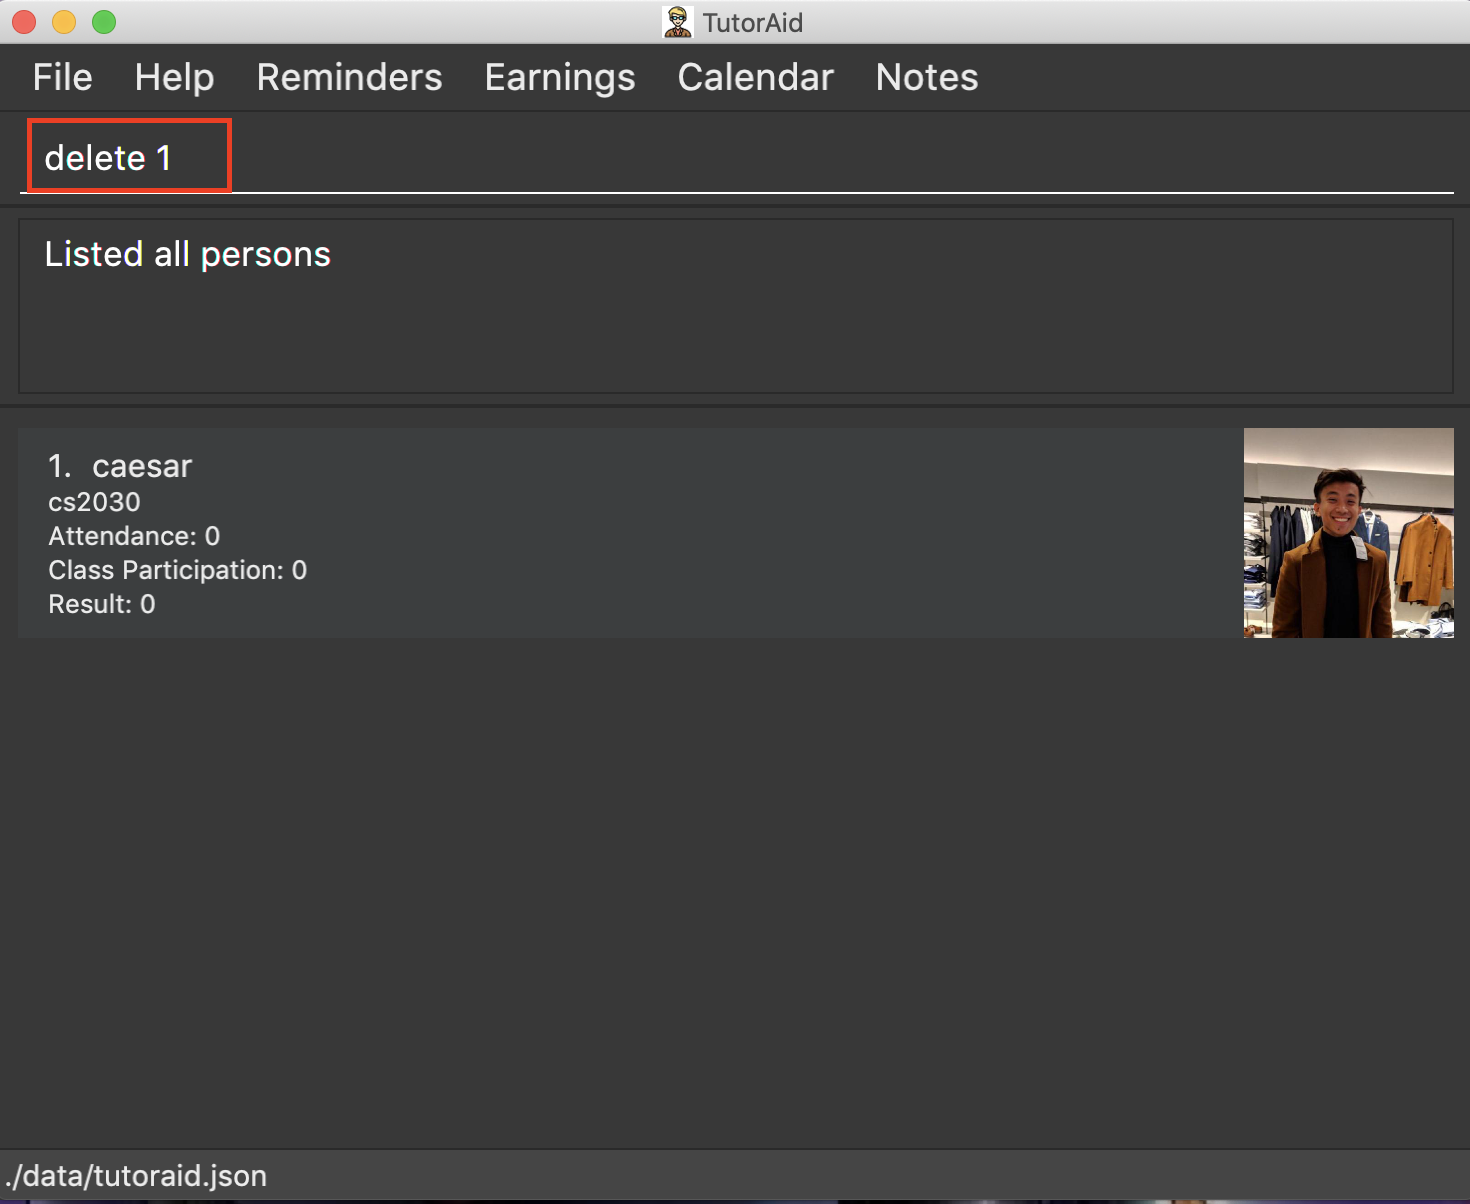
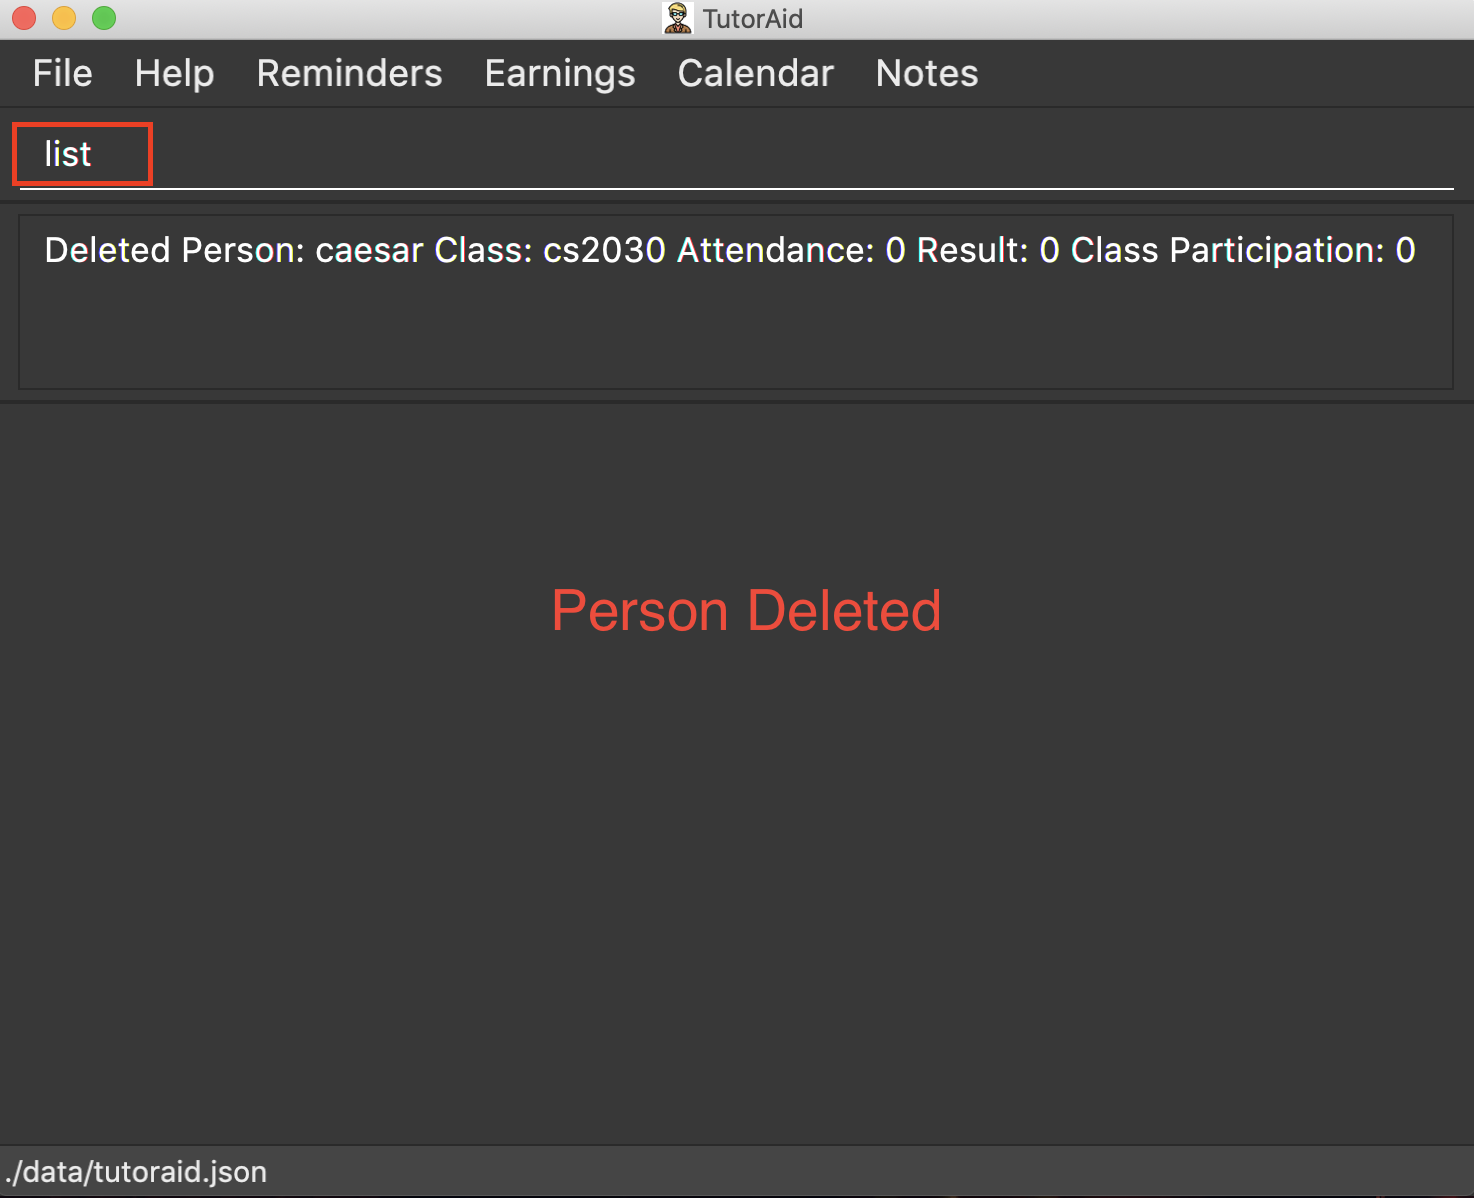
3.9.2. Delete a student: 'delete'
Deletes a student from TutorAid.
Format: delete INDEX
Examples:
-
delete 1(deletes the first student.)
3.9.3. Find a student: 'find'
Find a student matching the supplied name.
Format: find NAME
Examples:
-
find Tom
3.9.4. List all students in a class: 'list_class'
Lists all students in supplied class name.
Format: list_class CLASSID
Examples:
-
list_class CS2030
3.9.5. Mark attendance of students: 'mark_attendance'
Marks attendance of students currently displayed.
Format: mark_attendance INDEXES
mark_attendance increases attendance of all selected students by exactly 1.
|
Examples:
-
mark_attendance 1,2,3
3.9.6. Mark participation of students: 'mark_participation'
Marks participation of students currently displayed.
Format: mark_participation INDEXES
mark_participation increases participation of all selected students by exactly 1.
|
Examples:
-
mark_participation 1,2,3
3.9.7. Assign students to a class: 'assign_class'
Assigns a class to a student or a group of students.
Format: assign_class INDEXES c/CLASSID
Examples:
-
assign_class 1,2,3 c/CS2030
3.9.8. Edit a student: 'edit'
To edits a Student’s fields.
Format: edit INDEX n/NAME pic/PICTURE r/RESULT att/ATTENDANCE part/PARTICIPATION c/CLASS
User does not have to edit all fields of a Student. He can just edit whatever needs to be changed (see example). As such, result of a student can be assigned using this command. e.g. edit 1 r/79
|
Examples:
-
edit 1 r/20 att/10 part/10 c/CS2030
3.9.9. List students: 'list'
To list all students in TutorAid.
Format: list
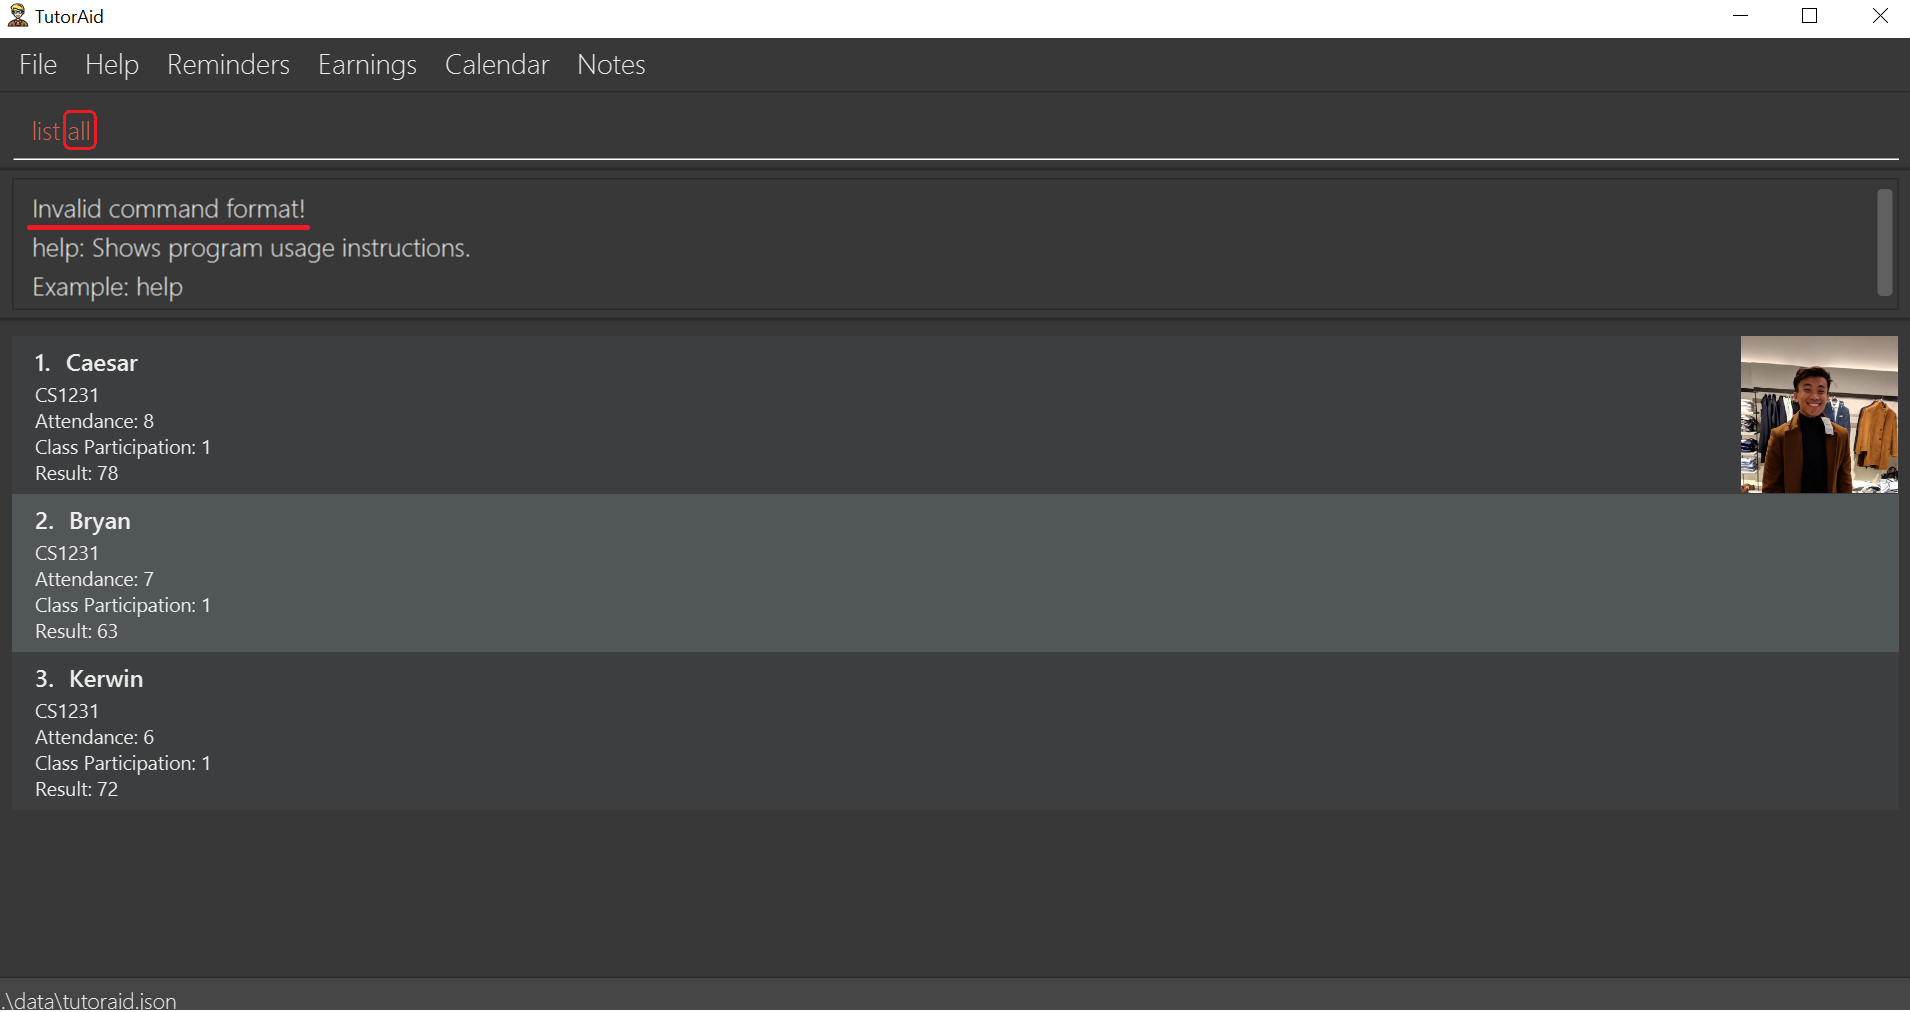
list command does not take any arguments.
|
3.9.10. Add a picture to a student: 'set_pic'
To add a picture to a student.
Format: set_pic INDEX pic/FILENAME
| The picture specified must be in either .jpg, .png or .bmp format. It must also be located in the same directory as TutorAid. |
Examples:
-
set_pic 2 pic/Tom.jpg
3.9.11. Reminders Feature Improvements [Coming in v2.0]
Improvements on Reminders Feature such as increased integration with Tasks. To include real time notifications on upcoming Reminders. Add categories of Reminders eg. urgent, important.
| Reminders to be more flexible such as allowing deletion of reminders associated with certain task. |
Examples:
-
reminder_cat cat/Important(Categorizes reminder as important)
3.9.12. View serial absentees with defined threshold: 'absentees' [Coming in v2.0]
To display list of all students who have not met the set threshold in terms of attendance.
Format: absentees THRESHOLD_PERCENTAGE
| Calculation will be done from start of semester to the current date. |
Examples:
-
absentees 50(Gives a list of students whose attendance fall below 50%)
3.9.13. Check on status of student: 'check_status' [Coming in v2.0]
To check on status of students currently displayed in the list by sending them an e-mail enquiring on their status.
Format: check_status
To be used in conjunction with absentees. A preset generic email will be sent by TutorAid to the student’s school email account.
|
3.9.14. Upload a picture of the student: 'upload_pic' [Coming in v2.0]
To launch a separate window where the user can either choose an image file on his computer or take a picture with his webcam.
The picture will be assigned to the indicated student and be displayed in TutorAid.
Format: upload_pic INDEX
| Replaces current picture, if any. |
Examples:
-
upload_pic 1
3.10. Learn wrong commands as custom commands
To help map the command you entered wrongly into TutorAid to the command you originally intended to execute.
Example:
Let’s say you frequently use the add command but can never remember it and always type in plus instead.
This feature helps you map plus to add so you no longer need to remember the add command.
To learn the wrong command plus as add:
-
You want to do an
addcommand but carelessly type inplusinstead and accidentally hit Enter to try and execute the wrong command.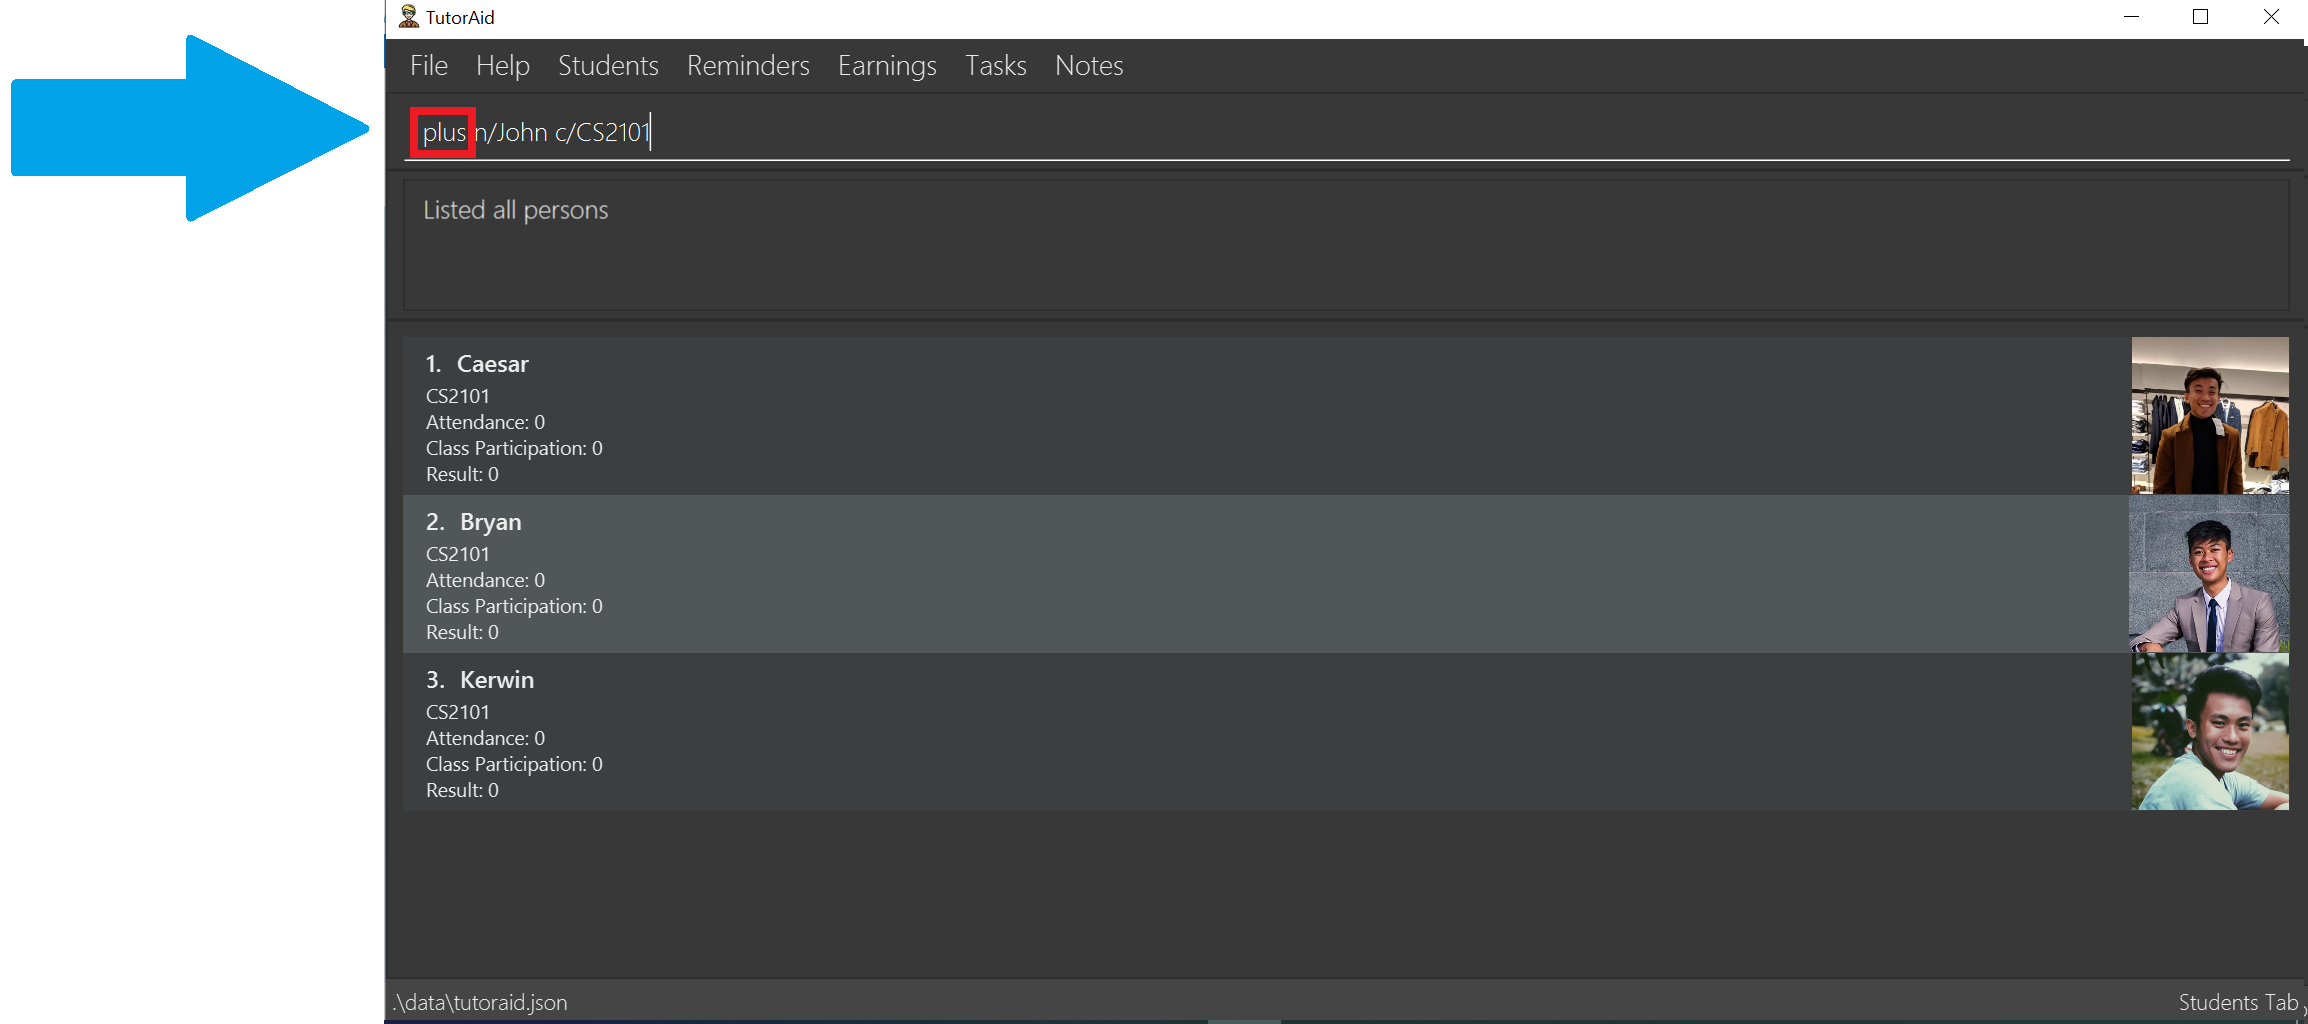
-
Oh no! TutorAid does not know what
plusmeans! You realise you’ve entered an unknown command. Thankfully, TutorAid offers to help you learnplus. You should type inaddnow since it’s what you actually intended to do. Hit Enter!
You can also choose to discard the wrong command at this stage and carry on with normal operations if you do not want to map plustoadd. Just typecancelto go back to normal mode. Please also note that you can only type command words such asaddorfindat this stage. Typing full commands likeadd n/Caesar c/CS2101results in an error. -
The result box tells you that
plushas now been mapped toadd.
-
Let’s test our new command by trying to add a student named John in our CS2101 class. Type in
plus n/John c/CS2101and hit Enter.
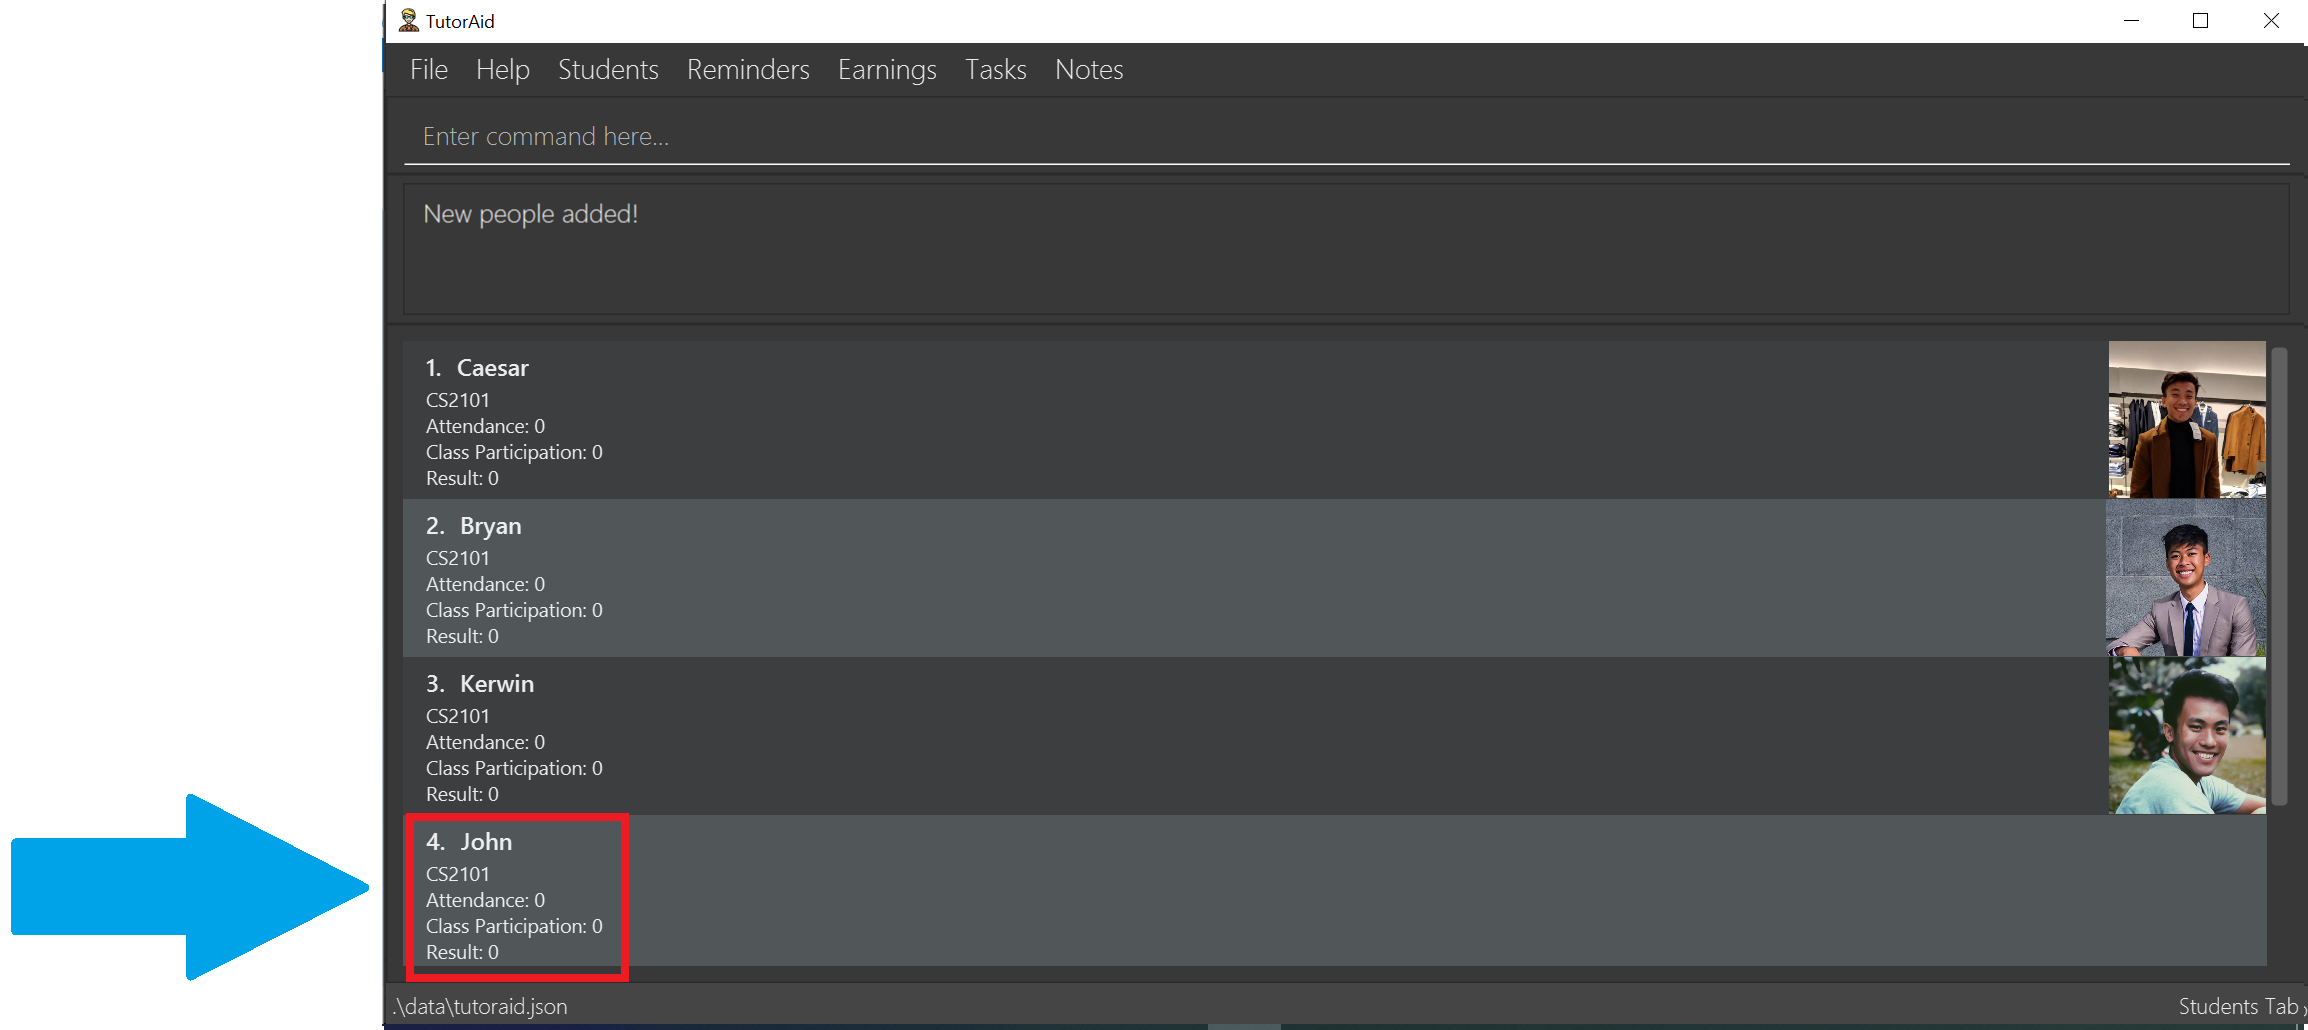
-
You should see that the command is successful and a new student called John in CS2101 has been added!
3.10.1. Delete a custom command: 'deleteCustomCommand'
To delete a custom command you previously added.
Format: deleteCustomCommand CUSTOMCOMMAND
Example:
Let’s try to delete the plus command you learned as add previously.
-
Type in
deleteCustomCommand plusand hit Enter.
-
The result box informs you that they’ve deleted the custom command
plus.
-
You should no longer be able to use
plusasadd.You can’t use deleteCustomCommandto delete basic commands likeadd,delete,listetc. You can only delete custom commands you added.
3.11. Clearing all entries : clear
Clears all entries from the address book.
Format: clear
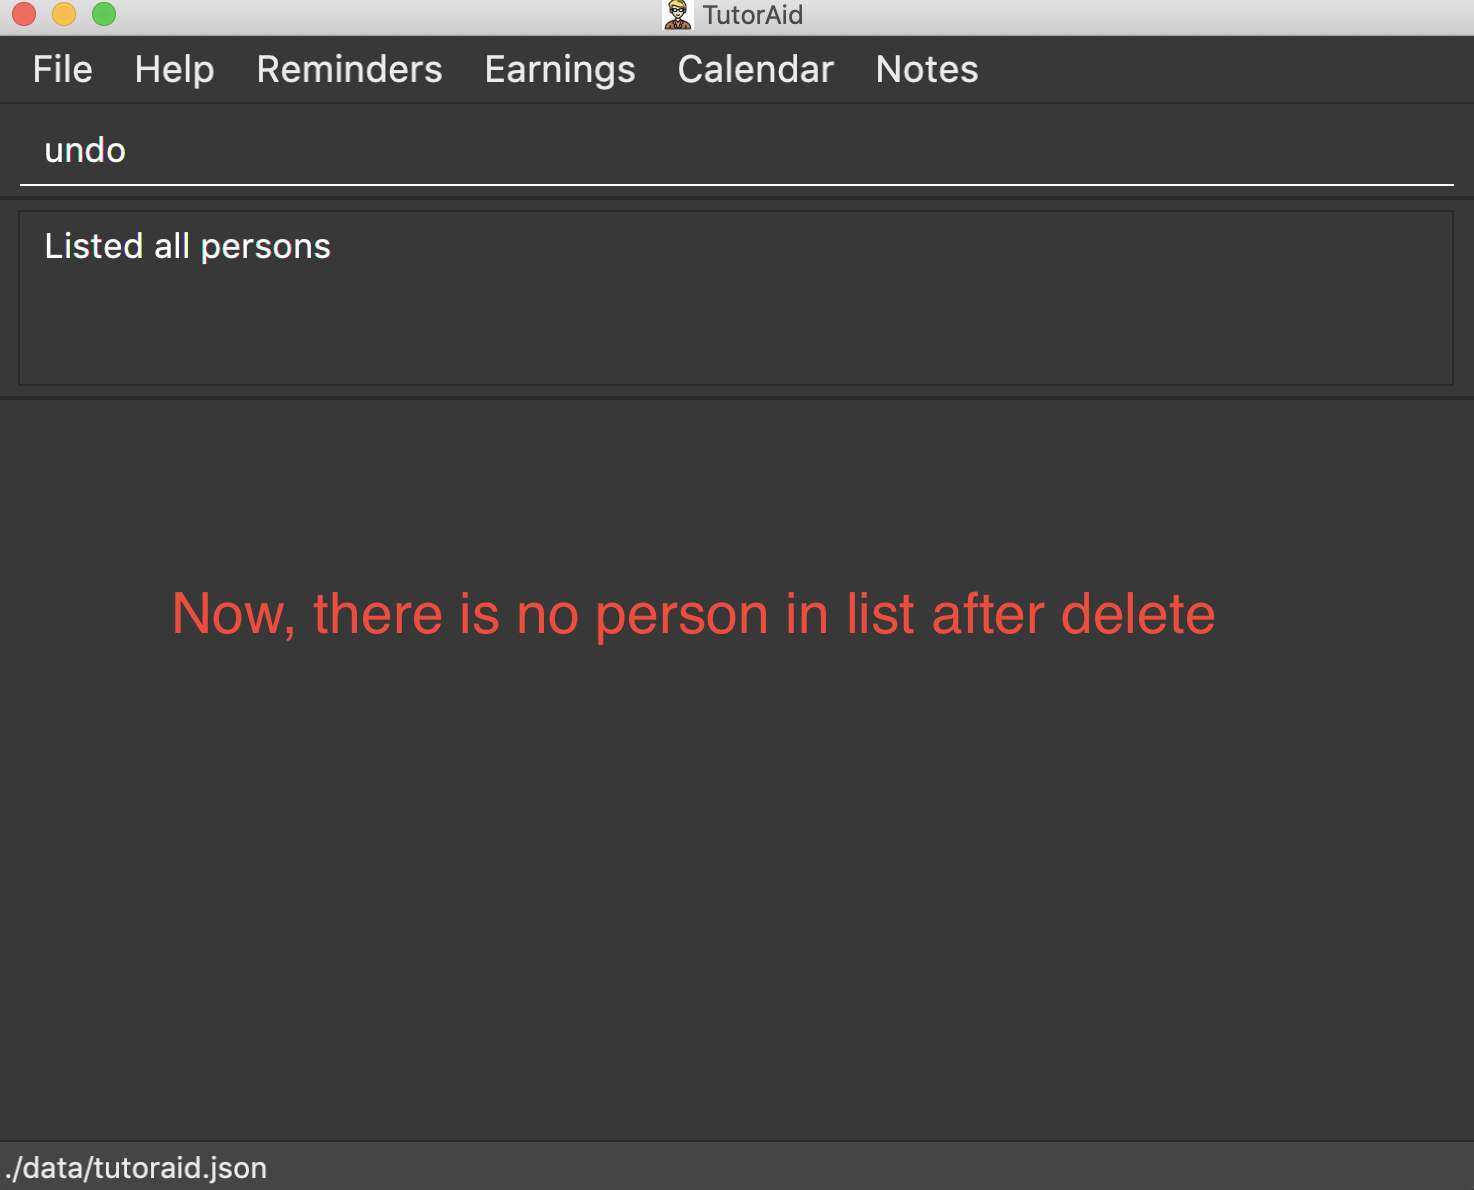
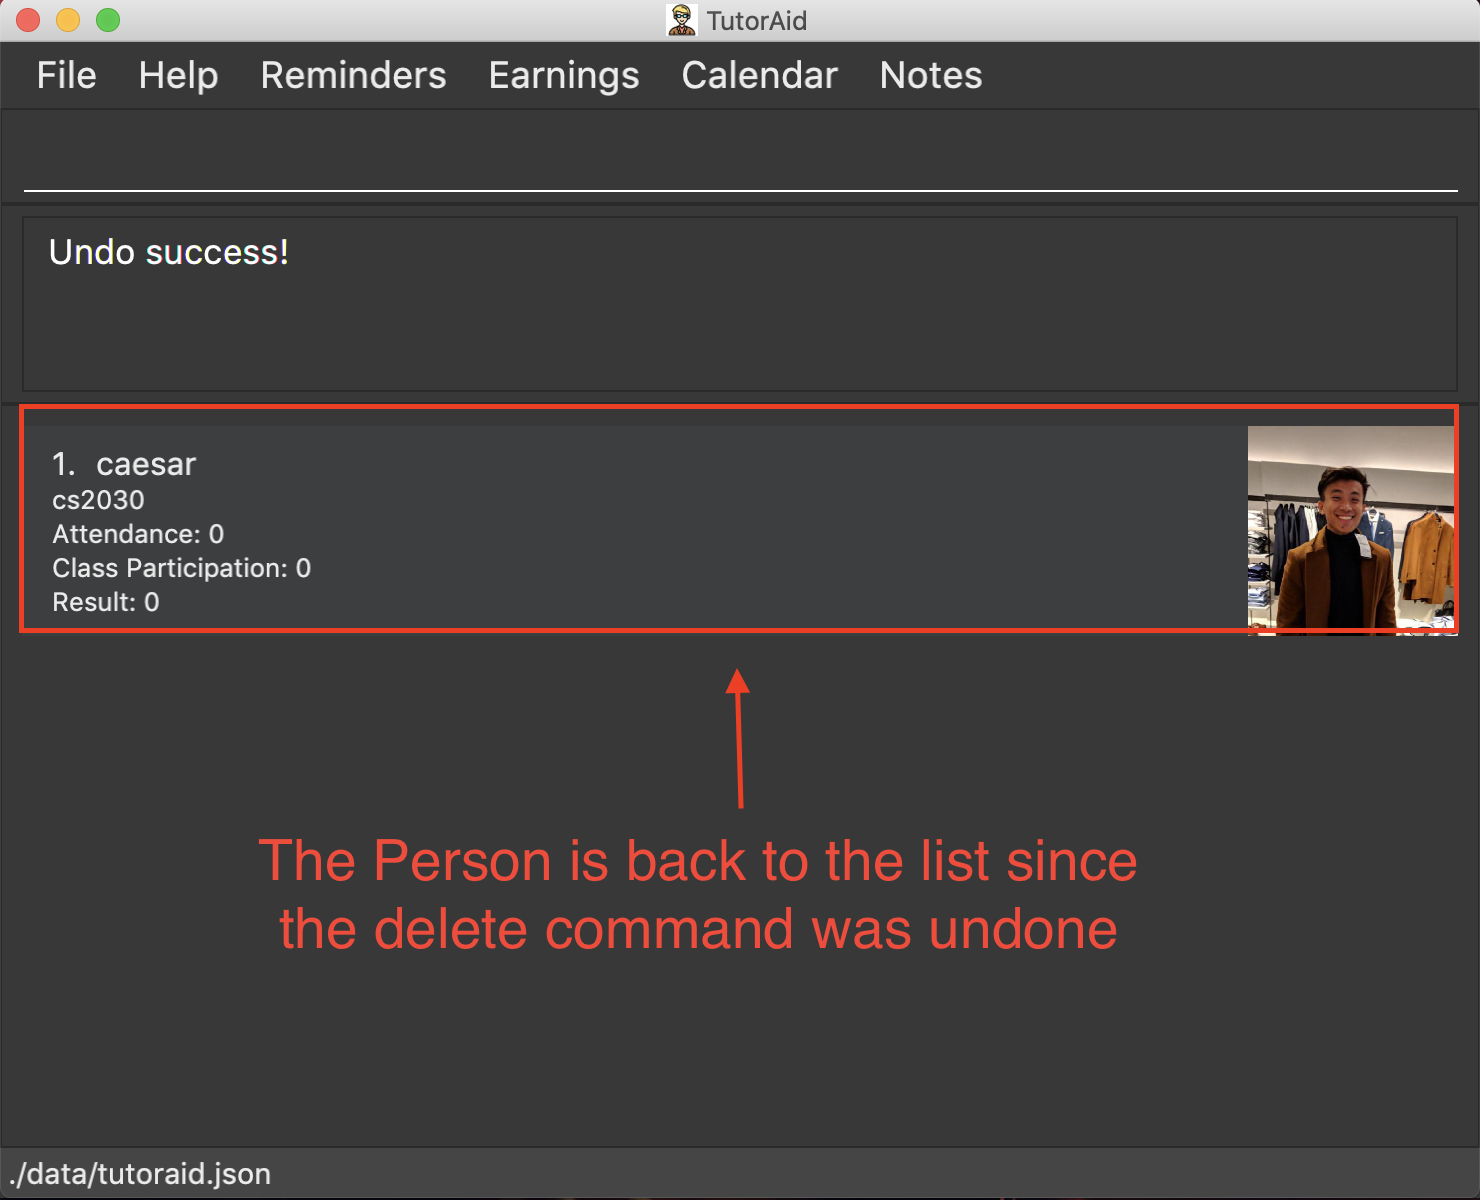
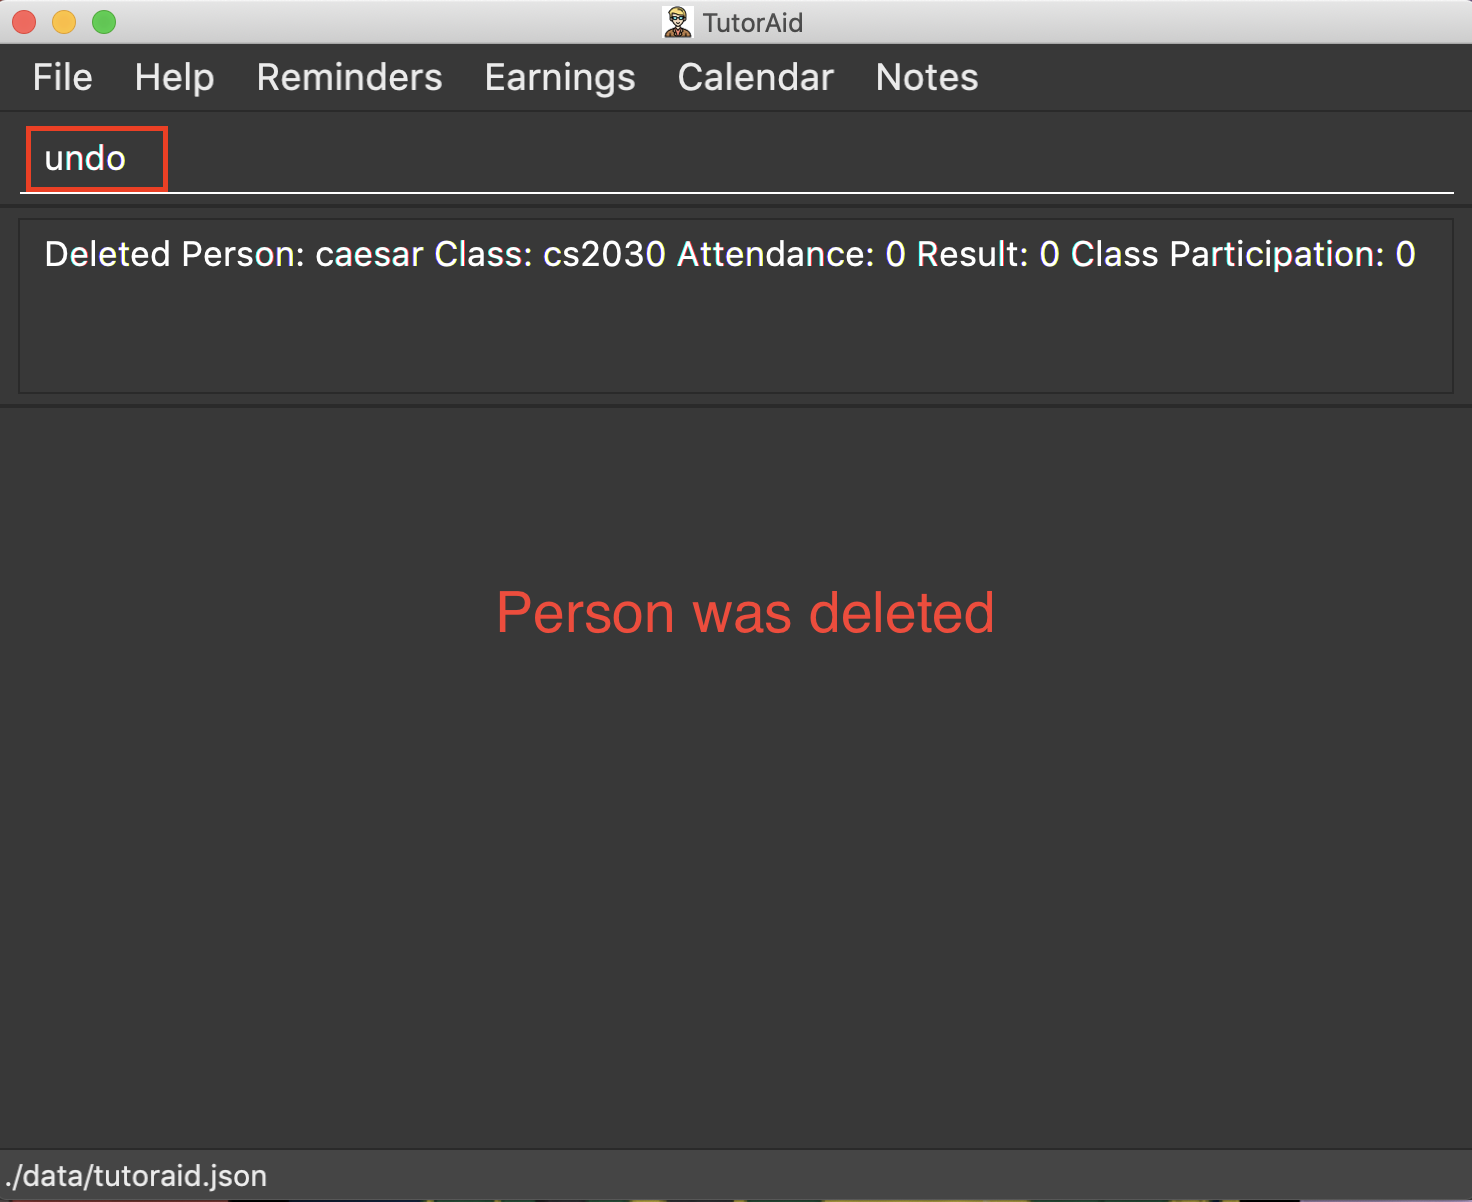
3.12. Undoing previous command : undo
Restores the Tutor Aid to the state before the previous undoable command was executed.
Format: undo
|
Undoable commands: those commands that modify the Tutor Aid’s content ( |
Examples:
-
delete 1
list
undo(reverses thedelete 1command)
-
list_task
find_earnings
undo
Theundocommand fails as there are no undoable commands executed previously. -
delete 1
edit_task 1 mark/N
undo(reverses theedit_task 1 mark/Ncommand)
undo(reverses thedelete 1command)
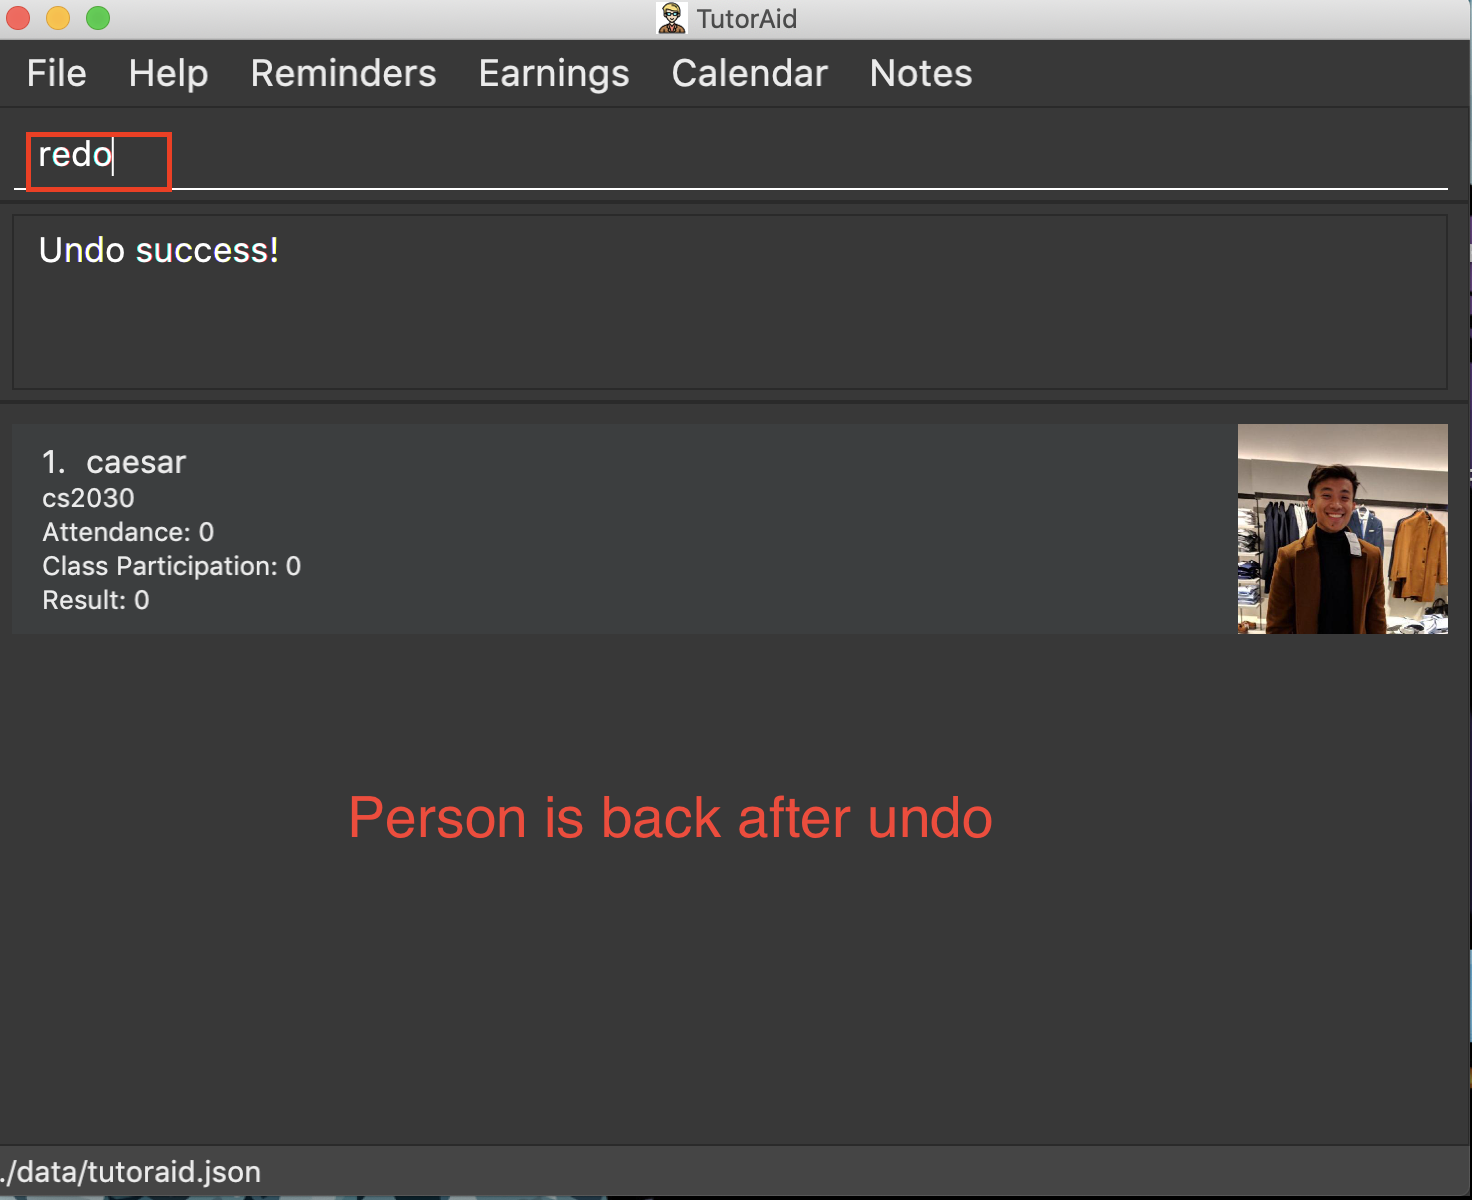
3.13. Redoing the previously undone command : redo
Reverses the most recent undo command.
Format: redo
Examples:
-
delete 1
undo(reverses thedelete 1command)
redo(reapplies thedelete 1command)

-
delete 1
redo
Theredocommand fails as there are noundocommands executed previously. -
delete 1
edit_task 1 mark/N
undo(reverses theedit_task 1 mark/Ncommand)
undo(reverses thedelete 1command)
redo(reapplies thedelete 1command)
redo(reapplies theedit_task 1 mark/Ncommand)
3.14. Exiting the program : exit
Exits the program.
Format: exit
3.15. Saving the data
Tutoraid data are saved in the hard disk automatically after any command that changes the data.
There is no need to save manually.
3.16. Logout : logout
Logs out of the account.
Format: logout
3.17. Encrypting data files [coming in v2.0]
As of the current implementation, hashing is implemented in the account password. With this encryption, malicious user will not be able to view the content despite they have the access to the computer. However, we plan to provide a better encryption with SHA256 for our password hashing and AES128 for all the data save in the TutorAid as soon as v1.5 to provide a better security protection.
4. FAQ
Q: How do I transfer my data to another Computer?
A: Install the app in the other computer and overwrite the empty data file it creates with the file that contains the data of your previous Address Book folder.
5. Command Summary
-
Help :
help -
Log :
login user/USERNAME pass/PASSWORD
register user/USERNAME pass/PASSWORD
logout -
Tab :
change_tab tab/TAB_DESTINATION -
Task:
add_task c/MODULE mark/STATUS tt/TASK_TIME…
edit_task INDEX [mark/STATUS] [tt/TASK_TIME]
delete_task 1
find_task_by_module MODULE …
find_task_by_date DATE
list_task -
Reminder :
add_reminder rd/DESCRIPTION rt/REMINDER_TIME…
delete_reminder 1
find_reminder_by_description DESCRIPTION …
find_reminder_by_date DATE …
list_reminder -
Earnings :
add_earnings d/DATE c/CLASSID amt/AMOUNT
update_earnings d/DATE c/CLASSID amt/AMOUNT type/TYPE
delete_earnings d/DATE c/CLASSID
find_earnings k/KEYWORD …
claim_earnings d/DATE c/CLASSID
filter_earnings VARIABLE -
Note :
addnote c/MODULE_CODE type/CLASS_TYPE note/NOTE_CONTENT
editnote INDEX c/MODULE_CODE type/CLASS_TYPE note/NOTE_CONTENT
deletenote INDEX
findnote KEYWORD
listnote -
Student List :
add n/NAME c/CLASSID
delete INDEX
edit INDEX n/NAME pic/PICTURE r/RESULT att/ATTENDANCE part/PARTICIPATION c/CLASS
list
find NAME
set_pic INDEX pic/FILENAME
assign_class INDEXES c/CLASSID
list_class CLASSID
mark_attendance INDEXES
mark_participation INDEXES -
Undo :
undo -
Redo :
redo -
Clear :
clear -
Exit :
exit